Stella's Tomb Raider Site ~ Lara Croft, herself, just might be able to write better walkthroughs!
  SEARCH:    

Classic Tomb Raider Tips & Strategy

The information on this page pertains only to Tomb Raiders 1 through 5. Angel of Darkness and Legend are built on different game engines and thus require different approaches. See the specific controls and walkthrough pages for them.


(NOTE: Sorry about the slightly hinky page layout here. It looks a little odd, but it should enable you to print all the info below if you begin printing with page 2.)


Using the Moves

When you first start playing the game, take some time to learn the controls and practice the moves. Once you understand the basics, the more complex combinations will come easily. If you've just started playing or need a refresher, the Controls page for each game gives all the key/button combinations for each move on every system.

Test Lara's capabilities early on in relatively safe situations. Then you won't have to do as much repeating later on when more complex series of movements are needed. The training level, Lara's Home, is a good place to start, but you can also use any relatively safe spot in the earlier levels.

WALK, DON'T RUN. Okay, maybe not always, but definitely along narrow ledges and high platforms. Lara will never walk off a ledge. Walking, sidestepping, pivoting and looking can also help you position Lara before she makes a dangerous leap. (See Set Up Before Jumping, below.)

LEARN TO JUDGE DISTANCE. You can save a lot of time if you know what Lara is capable of doing with each move. The game environment is built on polygons or blocks. All the terrain is divided into these blocks, and each of Lara's moves covers a different amount of distance. Learn how far she can go with each move and you'll rarely misjudge a jump when it counts.

MOVE (controls)

DISTANCE COVERED

Jumping In Place
(Jump)

A few inches, Lara scale. Normally jumping in place (i.e., jumping straight up and down) is used to reach handholds directly above Lara, but it can also be used to creep forward a little bit with each jump, such as when you want Lara to grab something above and she's slightly too far away, or when using the Corner Bug.

Standing Jump
(Jump + Forward)

Approx. 2 blocks

Standing Jump & Grab
(Jump + Forward + Action)

Approx. 2 blocks. (NOTE: Pressing Action can help even when there's nothing to grab. It shortens the jump fractionally and lowers Lara's arc, so she can jump under low-hanging obstacles or into doorways, or land in spots she'd normally overshoot with a regular jump.)

Running Jump
(Forward + Jump)

Approx. 3 blocks from take-off point. (See Set Up Before Jumping, below.)

Running Jump & Grab
(Forward + Jump + Action)

Approx. 3 blocks from take-off point. (NOTE: If Lara does not need to grab a ledge after making a jump, you can actually get a tiny bit more distance without grabbing. It may seem counter-intuitive, but pressing Action when there's nothing to grab actually shortens the jump fractionally. Also see the note under Standing Jump & Grab, above, and Set Up Before Jumping, below.)

Hop Back (Back or Down)
or Reverse/Roll (Forward + Back or Down together)

Just short of 1 block

Backflip
(Jump + Back or Down)

Approx. 2 blocks

Side Jump
(Jump + Left or Right)

Approx. 2 blocks

(NOTE: There are also a few variations on the basic jumps that I don't cover here. These involve special set-ups and/or the exploiting of various game bugs. These moves aren't necessary to play the game normally, but if you want to look into them further, I recommend the following sites: Tomb Runner, Tomb Raider Tourist and Speed Demos Archive.)

SET UP BEFORE JUMPING. It takes a moment, but you'll almost never miss a jump if you do. To set up for a running jump, first walk Lara up to an edge and line her up facing the spot where you want her to land. (If necessary, use walk, sidestep, pivot and look to get her into position.) Hop back once (tap Back). Then press and hold Forward and immediately press Jump, and Lara will run two steps and jump on the third. Lara always runs two steps before jumping, so if you don't set up, Lara may run off the edge before she can jump, or she may jump too soon, falling short on the other side. So unless Lara is being chased or trying to beat a timed trap, don't take a long running start before a jump.

Set up standing jumps similarly. If Lara needs to jump and grab a ledge opposite, walk up to the edge before jumping. If she needs to land on a flat spot ahead, gauge the distance and step back if necessary before jumping. And remember that pressing Action shortens the jump, so don't do it unless you need to.

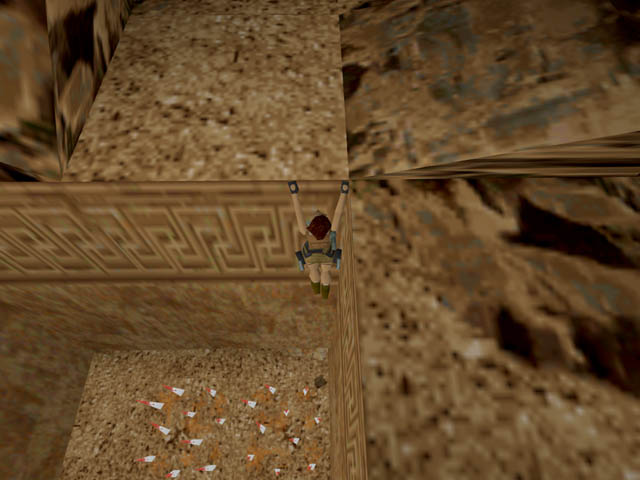
SAFETY DROP instead of jumping from great heights. Lara may still take some damage, but not as much. To safety-drop, stand at the edge of a ledge, turn around and press Back while holding Action. Lara steps off and catches the ledge so she's hanging by her hands. When you release Action, she falls but not as far. Lara can also safety-drop to hang from a ledge, then release and grab another ledge or opening below. Or, safety-drop, draw weapons, then roll to come up ready for action.

USING SLOPES. There are some angled surfaces that Lara can't climb. If she lands on these, she'll start to slide. If she slides down backwards (i.e., facing uphill), you can press Action to make her grab and hang on at the end. Once hanging, release Action and she'll let go and drop, hold Action and press Left/Right to traverse in that direction, or press Forward then Jump to pull up and quickly backflip to a ledge behind her (provided there is one). She can also slide down facing forward and leap before she reaches the end to land on or grab a ledge. When jumping from a slope, Lara will always take off parallel to the slope. (This is handy to know for places where multiple jumps from angled blocks are required.) Beginning in TR2, she can reverse in midair if necessary to change directions while sliding. (See the relevant Controls pages for details.)

CLIMBABLE SURFACES. Beginning in TR2, Lara can climb ladders and certain other vertical surfaces. Holding the Action key makes her grab and hold on. Direction keys make her climb up, down, left and right. She can jump to grab a ladder above her using Jump + Action. And sometimes she'll need to do a fancy dismount to jump from a ladder to a ledge behind her or to jump to grab another ladder. (For tips, see the relevant Controls pages.)

Beginning in TR3, she can also use certain overhead surfaces to swing hand-over-hand monkey bar-style. The controls are similar to regular ladder climbing: Jump (straight up or forward as needed), press and hold Action to grab and hang on, then use the direction keys to move about.

Beginning in TR4, Lara can climb and traverse (i.e., move sideways while hanging from a ledge by her hands) around both concave and convex corners. The controls are the same: Just continue holding Action and Left/Right, and if the surface permits, she'll climb/traverse around the corner and keep going.

Combat: Choosing & Using Weapons

Two basic rules of thumb apply: Pick the right weapon for the job and conserve ammunition.

Early on in the game, you probably won't have much choice—pistols, maybe a shotgun. Later, you'll have a variety of weapons at your disposal so you'll need to set some priorities. You may be tempted to use your high-powered weapons as soon as you find them, but remember that the enemies in the higher levels are bigger and tougher. Also, certain enemies can be taken out more easily with certain weapons. I've provided some general tips below and a few case-by-case recommendations in the walkthroughs for each level. You'll undoubtedly come up with your own methods.

SHOOTING FISH (OR WHATEVER) IN A BARREL. Most Tomb Raider enemies can't climb. So creatures on the ground can't reach you if you climb on a block or ledge. Similarly, most creatures in the water can't move on land, and vice versa. So get Lara to a spot where her enemies can't go, then use the pistols, which have unlimited ammunition, to make the kill. A few exceptions: Obviously if someone or something is shooting at Lara, pick a more powerful weapon to fight back. Also, human foes can shoot at her when she's in the water, so in this case you'll have to come out to finish them off.

USING LARA AS BAIT. If you suspect there are enemies below but they haven't come out yet, you can make Lara drop and hang to draw them out. This is the same as the safety-drop move, only you don't let go. Instead, hang until the enemies emerge, then pull up and take care of business. This works with water dwellers like crocodiles and barracudas too. Take a quick swim to get their attention. Then climb out of the water to shoot them.

HANDLING HUMAN ENEMIES. In TR1, there are times when the human adversaries won't die no matter how much you shoot at them. Pierre du Pont can't be killed until the end of Level 9 (Tomb of Tihocan), and Larson won't die until the end of Level 12 (Sanctuary of Scion). So when you meet these guys before then, save your good ammo. Shoot them with pistols until they run off or a cut scene starts. In Level 13 (Natla's Mines), however, you'll need to dispatch some human foes quickly, so go ahead and use what you've got.

In TR2, all the human foes can be beaten. I've found pistols or automatic pistols to be the weapon of choice except when fighting heavily armed or multiple attackers. In the water levels of TR2 and 3, the scuba divers can be taken out in the water with the harpoon gun, but it can be difficult to aim, and the reload time doesn't help. For divers and other underwater enemies, it's often easier to get Lara to dry land as quickly as possible then use the pistols.

Barkhang Brother

Also in TR2, you'll have a chance to make a few friends—or at least avoid making enemies. In Level 12 (Barkhang Monastery), do not...I repeat, do not...shoot at the monks. If you do, they'll dog you through the entire level, making things much more difficult than they have to be. If you treat them with respect, they'll even help you fight off the cult goons. The ice men in the Golden Mask expansion are the same: They'll help Lara if she doesn't harass them. There are also places in TR3 where holding your fire will help you advance in the game.

Mummies

WEAPONS AND TARGETING IN TR4 & 5. Lara's arsenal increases in every game, but in The Last Revelation and Chronicles, there are even more options. Some weapons can be combined with the laser sight for more accurate long-distance targeting, and some can use different types of ammunition. Details on combining items and choosing ammo appear on the TR4 and TR5 controls pages, along with information on automatic and manual targeting.

UNDEAD CREATURES IN TR4. Early in this game there are some enemies that won't die no matter what. In most cases, it's because they're already dead (e.g., mummies). So don't waste precious time and ammo blasting away at something that won't go down permanently. If you can't figure out how to get around these nasties, check the walkthrough. (If you are playing through a second time or have used the all-weapons cheat, you can destroy mummies and the like with explosive weapons.)

WEAPON

DESCRIPTION/TIPS

Pistols (all games)

Not too powerful but have unlimited ammo. Can aim while running and jumping. In TR 1-3, once you get a target lock on an enemy, holding Action will keep the lock even if the enemy moves out of Lara's sight. When they come back into range, she'll start shooting again. Remember to release Action to target another enemy. Pistols can also be used to shed a little light if flares aren't available.

Shotgun (all games)

Powerful but slow to reload and hard to aim while moving. Best for unarmed enemies at close range (e.g., 2 shots will bring down a big cat).

In TR4 & 5, the shotgun can be used with either normal or wideshot ammo. (See Inventory & Targeting on the TR4 or TR5 Controls page.)

Magnums (TR1) or
Automatic Pistols (TR2)

Similar to pistols only with a slightly faster output. Like the pistols, in TR1-3 these guns will lock on a target if you hold Action. Can aim while running and jumping.

Desert Eagle Pistol
(TR3 & 5) or
Revolver (TR4 & 5)

Powerful single gun. (Lara holds it two-handed.) Great at close range—one or two shots brings down most enemies; much easier to target than the shotgun. Replaces the Magnums or Automatics.

In TR4 & 5, the revolver is one of the weapons that can be combined with the laser sight for more accurate long-distance targeting. (Again, see Inventory & Targeting on the TR4 or TR5 Controls page.)

Uzis (all games)

These put out a lot of rounds very quickly, so they're perfect for tougher enemies. Lara can aim while running and jumping. Like the pistols, in TR1-3 these guns will lock on a target if you hold Action.

Harpoon Gun (TR2 and 3)

The only weapon that can be used underwater. Fires four harpoons before Lara must pause and reload. In a few cases, it can be used from the water to shoot targets on land.

M-16 Assault Rifle (TR2)

Powerful. Can be used in most situations but best for targeting larger/armed enemies at a distance. Will lock on target if you hold Action, but occasionally loses the lock, so be careful not to waste ammo.

MP5 Submachine Gun (TR3)

Similar to the M-16 and replaces it in TR3. Targets well at a distance; rapid fire rate. Hard to aim while moving, so best for sniping.

Grenade Launcher
(TR2 & 3) or
Grenade Gun (TR4)

Lara cannot throw grenades. She must use the grenade launcher, which hurls a grenade up to about 8-10 squares of scenery ahead. If it hits something before that, it will explode on impact. Auto-aims but not too well. Best saved for bigger, tougher enemies in the higher levels. Also useful on petrified guards in TR2 before they awaken. (See the Floating Island level walkthrough.)

In TR4, the grenade gun can be used with three different types of ammo: normal, super (big boom) and flash (blinding). (See TR4 Controls.)

Rocket Launcher (TR3)

Lara's biggest, most powerful weapon to date. Naturally best for long-distance. Rockets are few and far between, so use them wisely.

Crossbow (TR4)

For precise targeting at a distance. The crossbow can be combined with the laser sight and used with three different types of arrows: normal, poison and explosive. (Again, see Inventory & Targeting on the TR4 or TR5 Controls page.)


General Tips for Better Raiding

SAVE YOUR GAME FREQUENTLY. If you're playing the PC or Mac version of the game, there's no reason not to save often. It'll keep you from having to replay long sections of the game if something goes wrong, and can even save Lara's life—for example, during a battle with a big enemy, if you're doing well, save during the fight so if you do get killed, you won't have to start from scratch. One caveat: Be sure to save in a new slot every so often, so if you mistakenly save a game where you're doing badly or Lara is about to die, you can go back to a fairly recent saved game to start over.

BACK UP YOUR SAVES. If you're using a console, swap out your memory card every level or so. If you're playing on a PC or Mac, you can copy your current set of savegames to separate files in your TR directory then reload them later if you want to. Consider labeling the folders with the levels the games come from so you can distinguish them easily later. (My Savegame Files page has PC and Mac saves you can download if you need them. For general info and help backing up and installing, see my Savegame Help Page.)

small medipak
small medipak

large medipak
large medipak

CONSERVE HEALTH. You'll probably need more medipaks later in the game, as the enemies get tougher and the traps get more dangerous. So don't use more than you need. Small medipaks bring back half of Lara's health; large kits restore full health. Remember, too, that full health is restored before each new level. So don't bother cracking that medipak if you're almost at the end of a level. And in TR4, where you can move back and forth between certain levels, you can use this feature to restore Lara's health.

BE CREATIVE WITH MEDIPAKS. You can use them during a fight if necessary. Beginning in TR2, there are in-game medipak hot keys (see the Controls page for the game you're playing). Or, you can just press the Pause or Escape key to take a time-out for healing. The game stops when you're looking at the inventory screen. Medipaks can also work like scuba gear if Lara gets caught underwater and runs out of air, and they can keep her alive for a few moments if she catches fire. These tactics are only for emergencies though, since drowning or burning depletes Lara's health pretty fast. Do this only when you know you can make it to air (or water) pretty quickly.

CONSERVE YOUR FLARES. Beginning in TR2, Lara gets flares to light her way. There are plenty to be found, but if you're running low, try these tricks. Save your game, explore a dark area using a flare then reload if you don't find anything interesting. Or, if you're desperate, turn up the brightness on your monitor or TV, or use pistol fire to light your way. In TR4 & 5, you can also use the binoculars for light. Press the Action key while looking through the binoculars to light up Lara's view.

WALK THROUGH SPIKES, BROKEN GLASS AND BARBED WIRE. This will seem obvious to veteran players, but if you're new to the game, take note: Lara won't be injured if you walk through these dangerous areas. (In TR4 & 5 spikes are unsafe at any speed, so avoid them.)

DISABLE THE WINDOWS KEY WHEN PLAYING TOMB RAIDER 1. TR1 runs in DOS, and as a result, accidentally pressing the Windows (Start Menu) key will cause the game to crash to the desktop. This can be prevented by downloading and using the Microsoft Logo Key Control utility (formerly called "Doswinky"). You'll need to download a collection of "Kernel Toys" from the Microsoft site. Instructions for installing and using Doswinky are included. (NOTE: Microsoft moves this page around from time to time. If the link comes up dead, search the site for "Kernel Toys" and/or "Logo Key Control.")


Walkthrough text, maps, diagrams, and all other original images copyright © 1997-2008 Stellalune. All rights reserved. Title banners by Ramiel, whose artwork appears courtesy of Atlantis Studios, publisher of Tales of Lara Croft. No part of this website may be reproduced on another site without permission.

Feel free to print, quote and share the information on this site, but kindly include the copyright and contact info at the bottom of each page so people can send me their corrections, comments and suggestions. Also, if you'd like to offer my walkthroughs on your own website, please read and follow the instructions here. To give me your feedback, send email to or use my contact form.

The name and likeness of Lara Croft, Tomb Raider screen shots and the Tomb Raider name and logos are copyright © Eidos Interactive Ltd. All rights reserved. This ardent but unofficial fan site is not connected with or otherwise condoned by the creators and publishers of the Tomb Raider games, Core Design, Ltd., Crystal Dynamics and Eidos Interactive, Ltd. Other material is credited on the pages where it appears. If I've inadvertently not given credit where it's due, please let me know.

For information about the advertising on this site and our privacy policy, see here.