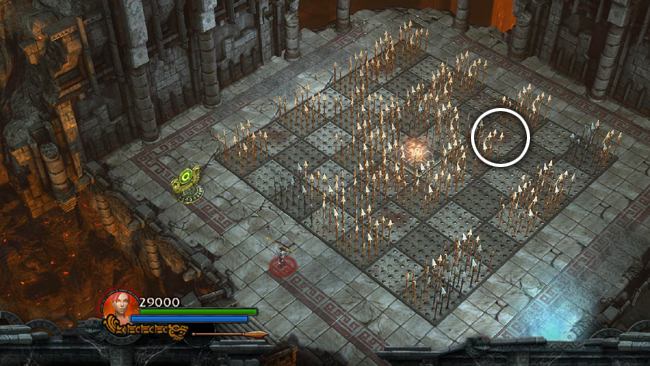
Inside is a huge field of spikes with a shiny artifact sitting the middle. These spikes don't extend when you step on them. Instead, they're controlled by the bull's-eye switch. Shooting the switch retracts certain spikes and extends others, but there's one set that remains retracted in both configurations: It's the 5th tile in the 2nd row from the top left (N) corner. It's circled above. . .
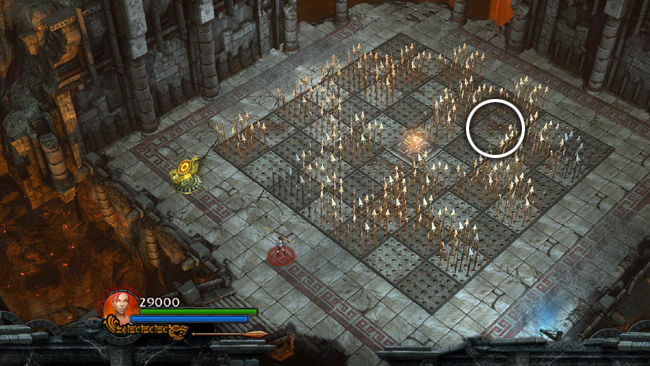
. . . and here, after shooting the target once.
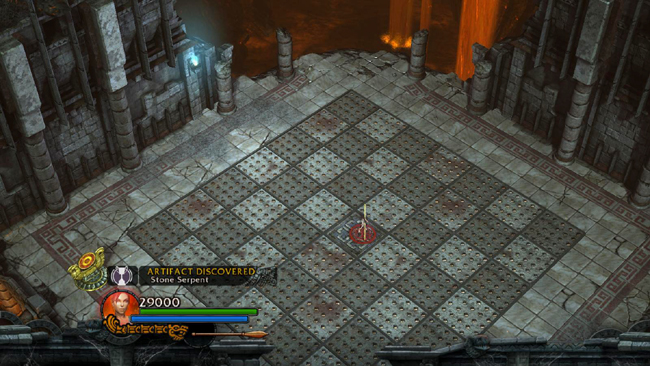
If you've already shot the target, shoot it again so the green side shows, rather than the red, and the entire sixth column of spikes is clear (as shown above). Plant a bomb next to the target and then move onto the safe tile.
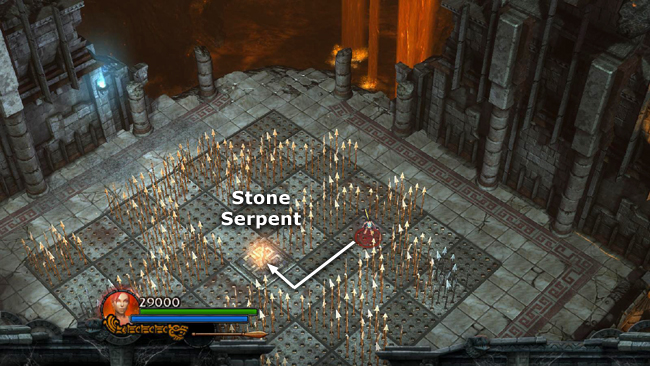
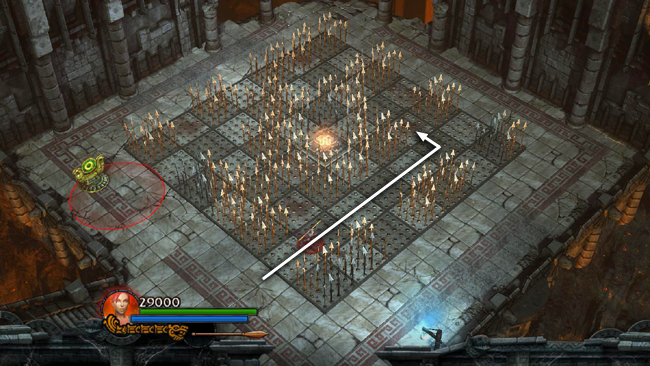
Then detonate the bomb to flip the target and rearrange the other spikes. Or shoot the target from the safe tile if you prefer. Now the path to the center is clear, enabling you to reach the Stone Serpent Artifact (+ weapon, + defense, + bomb).
When you take the artifact, all the spikes retract so you can exit safely.
[Return to the Stronghold Passage Walkthrough]
Copyright © - Stellalune (). All rights reserved. The screenshots and videos included here were made using Fraps. Feel free to copy or print this walkthrough for personal use. By all means, share it with friends, but please include this credit line so people can send me their feedback. No part of this walkthrough may be reproduced on another site without permission. As an Amazon Associate I earn from qualifying purchases. Follow this link for details about this site's advertising and privacy policy.
|