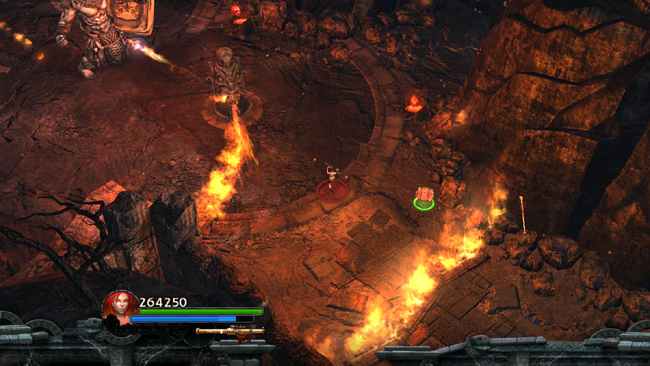
Move into the arena, which consists of 3 rings with rotating flame jets. The third gatekeeper appears, along with several fire-breathing lizards. Flame vents also flare up, blocking the exits to the SE and W, preventing you from leaving this area until the fight is over.
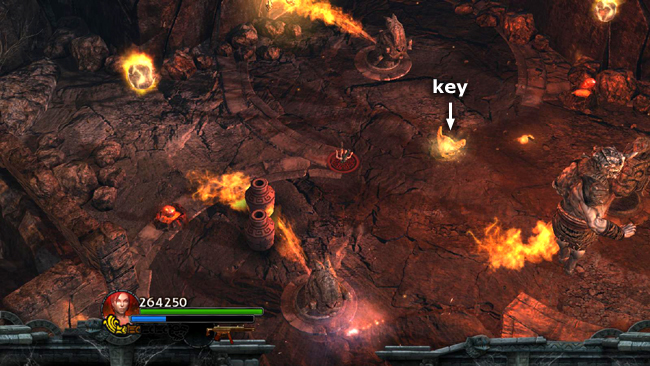
Hit the gatekeeper with a grenade or rocket to destroy its shield and make it drop the GOLDEN KEY (3/3).
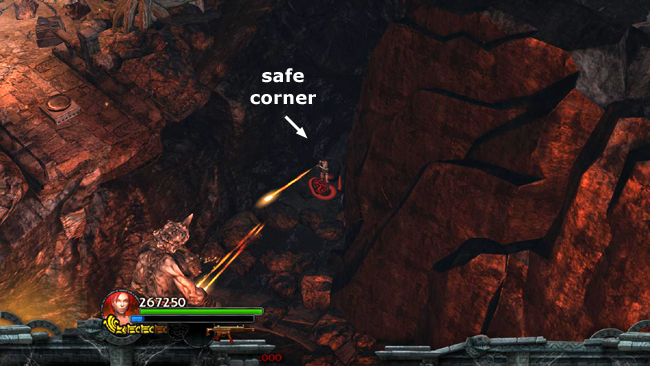
Then either fight the gatekeeper out in the open or carefully make your way past the flame jets to the narrow crevice in the northern corner. . .
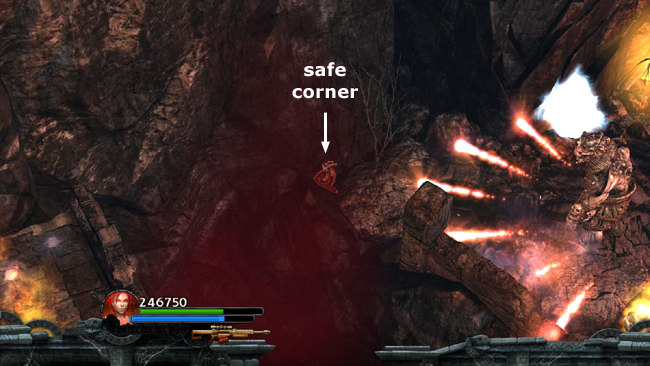
. . . or the eastern corner, where there's a boulder behind which Lara can hide. You can shoot the gatekeeper from either of these safe spots using any weapon—even use spears, as long as you've removed its shield first—and it can't reach Lara.
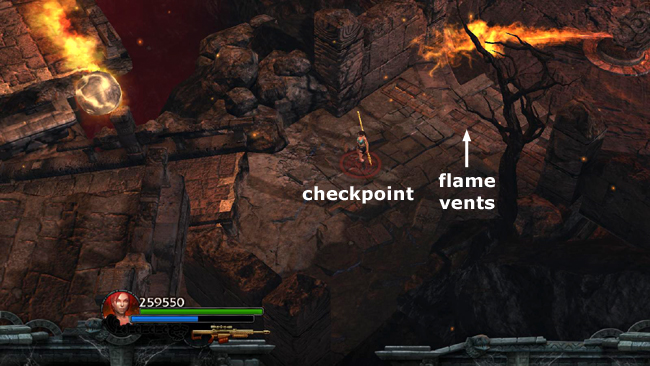
When the gatekeeper falls, the flames on the west side of the arena go out so you can exit. Pick up the GOLDEN KEY the gatekeeper dropped wherever it lost his shield. Then head to the west just until the next checkpoint registers.
If you're in a hurry to finish, continue west to the BROKEN BRIDGE. Otherwise, take a few minutes to pick up the remaining red skulls and explore the second CHALLENGE TOMB.
[Return to The Mirror's Wake Walkthrough]
Copyright © - Stellalune (). All rights reserved. The screenshots and videos included here were made using Fraps. Feel free to copy or print this walkthrough for personal use. By all means, share it with friends, but please include this credit line so people can send me their feedback. No part of this walkthrough may be reproduced on another site without permission. Follow this link for details about this site's advertising and privacy policy.
|