STELLA'S LARA CROFT GO WALKTHROUGH - Android, iOS, PS4 and Vita, Steam, and Windows Phone/PC/Tablet
THE CAVE OF FIRE - PART 5: A RESTLESS CHASE
Updated: 3/19/17(†)
Relic Fragments: 1
Gems: 2
Follow this link for my video walkthrough.

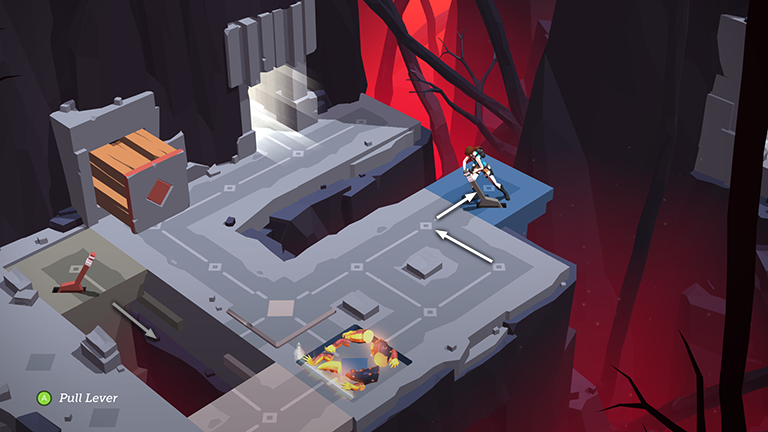
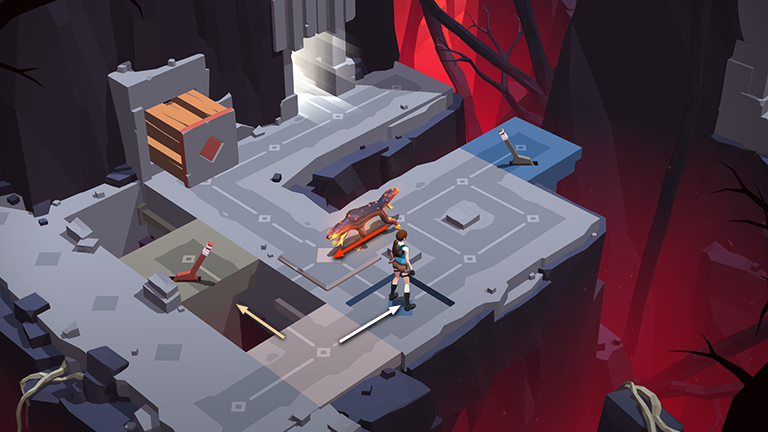
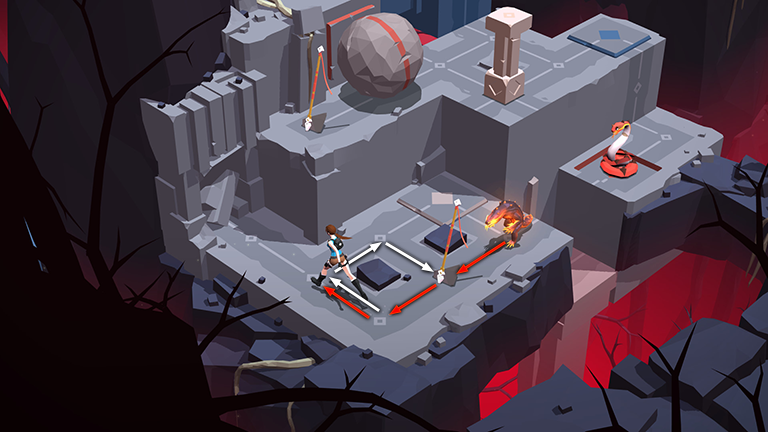
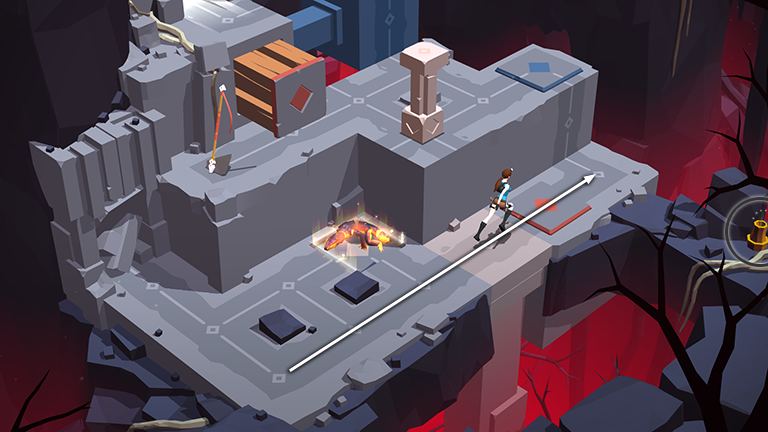
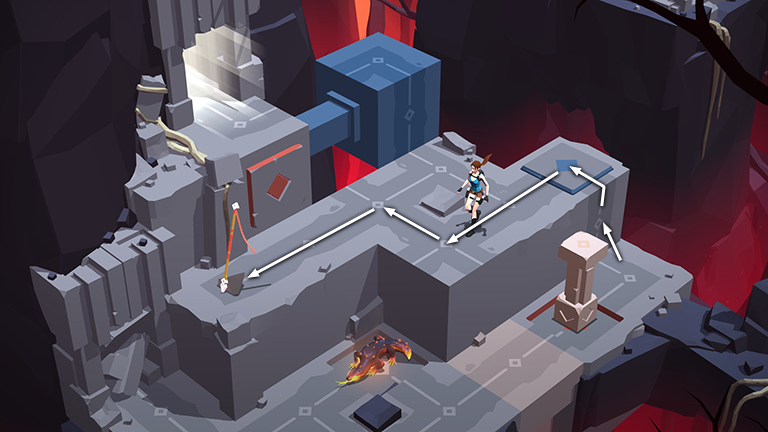
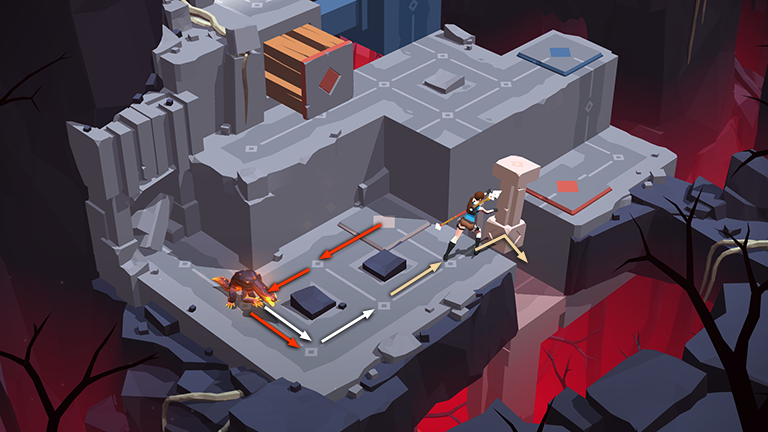
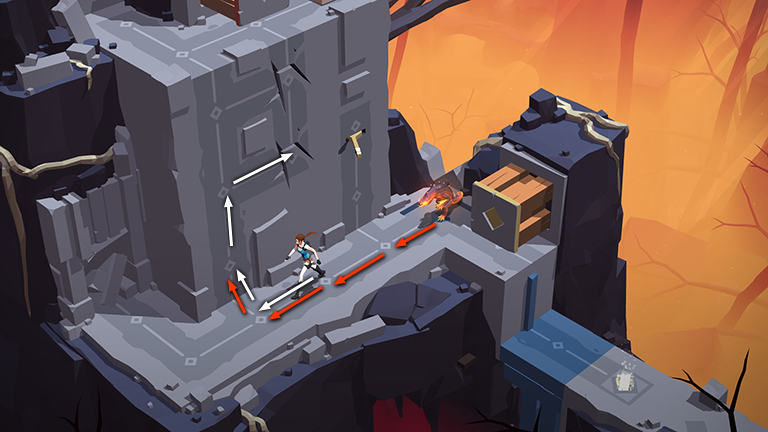
From the starting point, move straight to the right corner, passing over the blue pressure pad in the process. Smash the vase below the right corner of the walkway to obtain an OBSIDIAN (5/13).
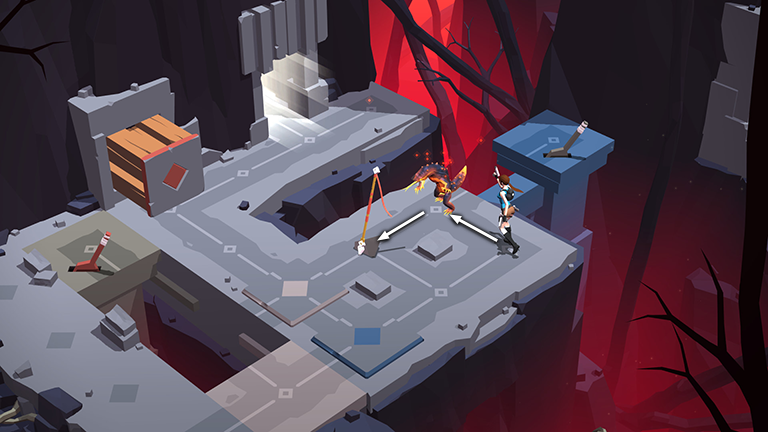
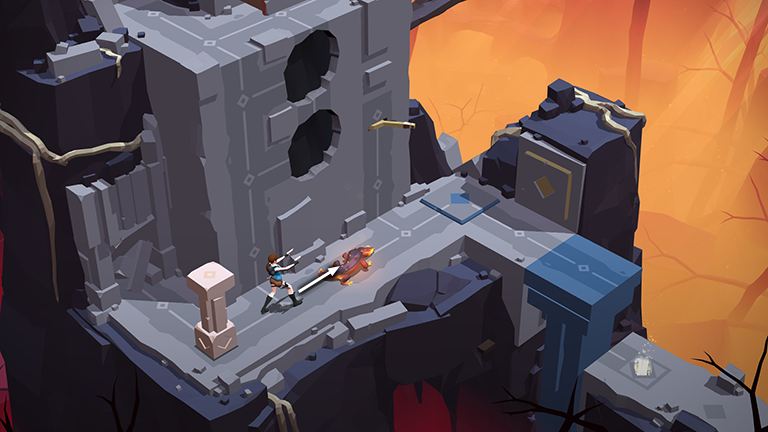
Step to the upper left to shoot the lizard, taking it out of action for the next four turns (not five turns like the spiders in the previous levels). Move to the lower left to grab the SPEAR.
Then move onto the tan pressure pad, step to the left or right and then back onto the tan pressure pad. Spending these turns gives the lizard time to pull itself together, notice Lara, and snap to attention. (Stepping on and off the pad also moves the tan block, but this is not important right now.)
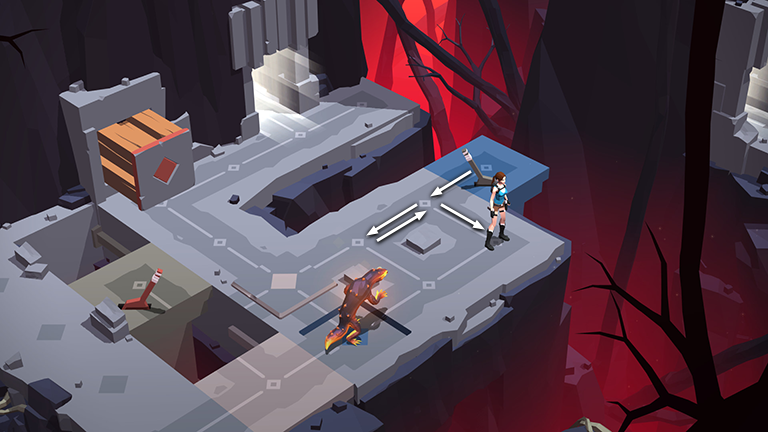
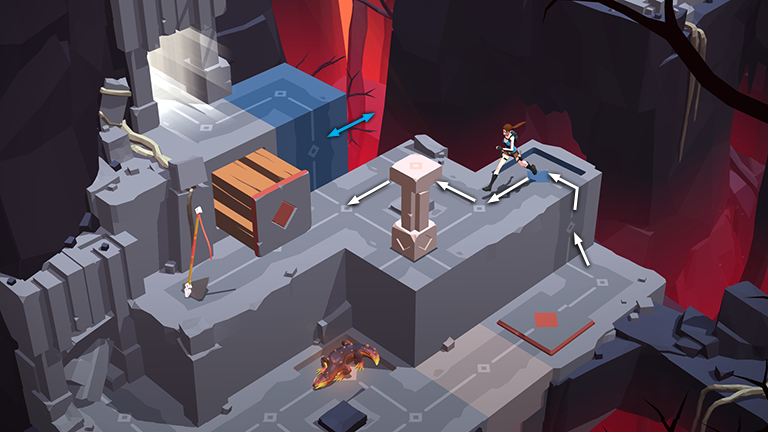
Once the lizard notices Lara, step to the lower right onto the blue pressure pad. Then move twice to the upper right. The lizard follows, ending up on the blue pressure pad. This shifts the blue block with the lever on it in toward the walkway.
Throw the spear at the lizard, immobilizing it on the blue pad for the next four turns.
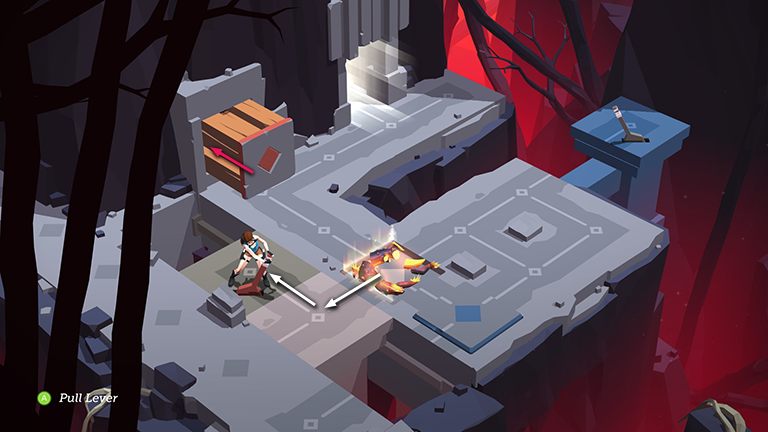
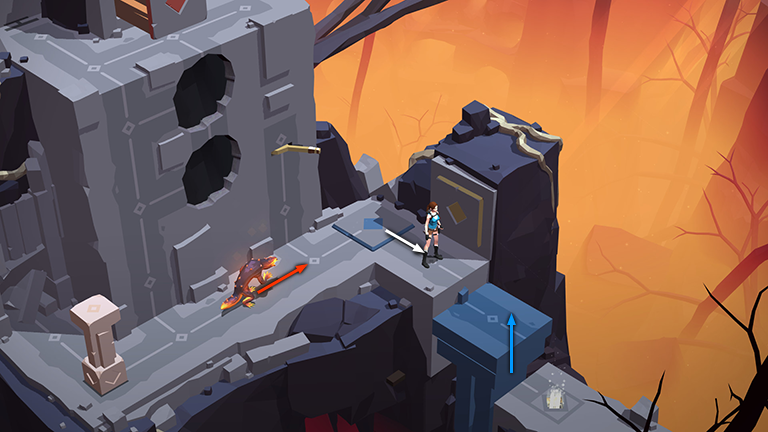
Move onto the blue block and pull the lever there to slide the gray block (with the orange lever) to the right.
Step off the blue block, step forward, then back, then right. This gives the lizard time to wake up and once again catch Lara's scent.
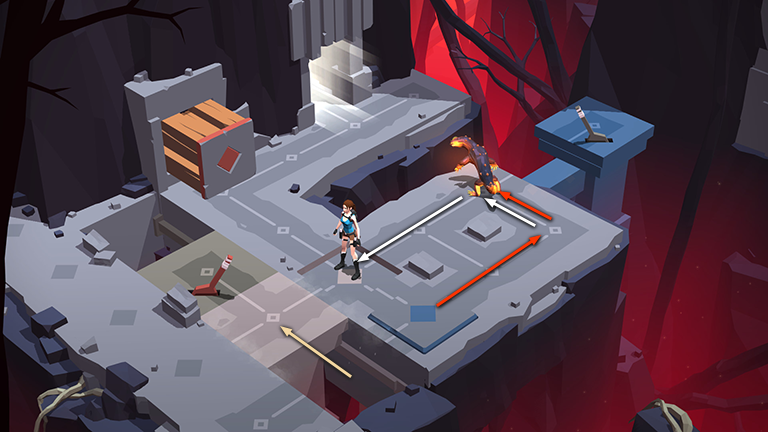
Move back to the upper left. Then twice to the lower left until Lara is standing on the tan pressure pad. This shifts the tan block to the left. The lizard follows two steps behind.
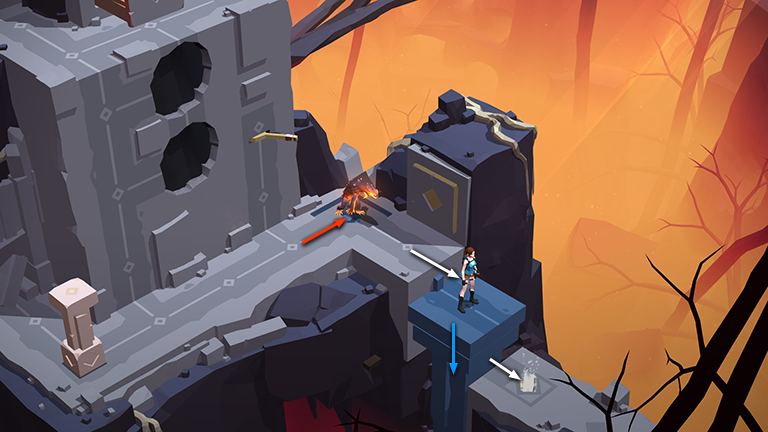
Step off the pad onto the tan block, which then slides back to the right since the pad is no longer depressed.
Step off the tan block onto the blue pressure pad. As you do this, the lizard, still following in Lara's footsteps, moves onto the tan pressure pad. This shifts the tan block back to the left. (Lara's standing on the blue pad also moves the blue block, but this is not important.)

Now that Lara is out of the lizard's line of sight, he forgets all about her and settles down for a nap. Move into the space he occupies to shoot him and once again immobilize him for the next four turns.
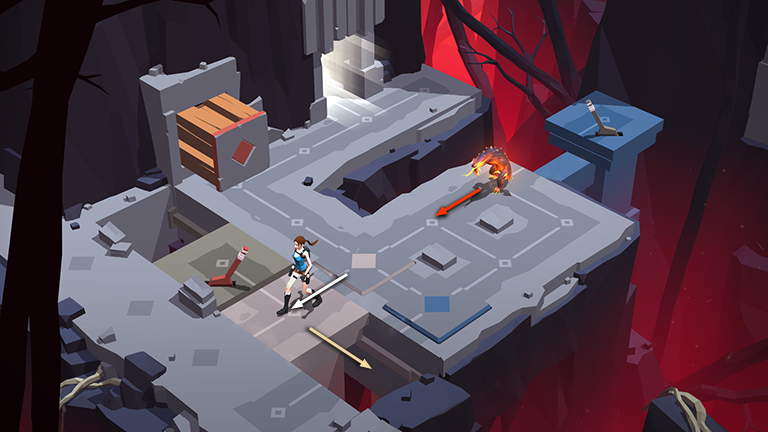
Move onto the tan block. (With the lizard bits sitting on the tan pressure pad, the block stays in place for now.) Then move to the orange lever and use it to retract the block trap between here and the exit.
Step over the lizard, which doesn't revive until after you've passed it. Then make your way to the exit.
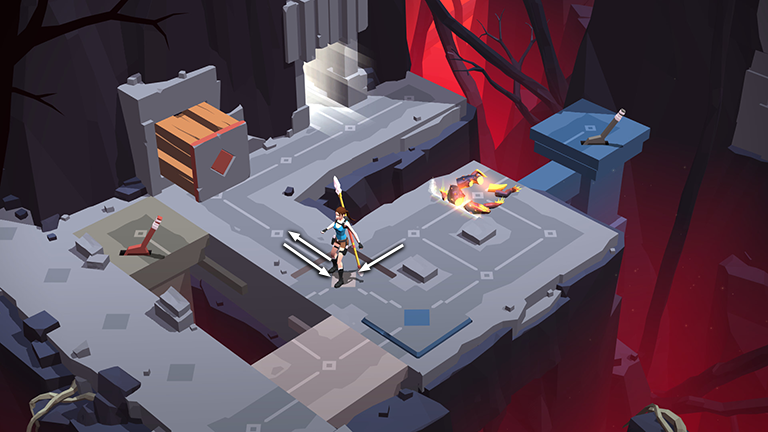
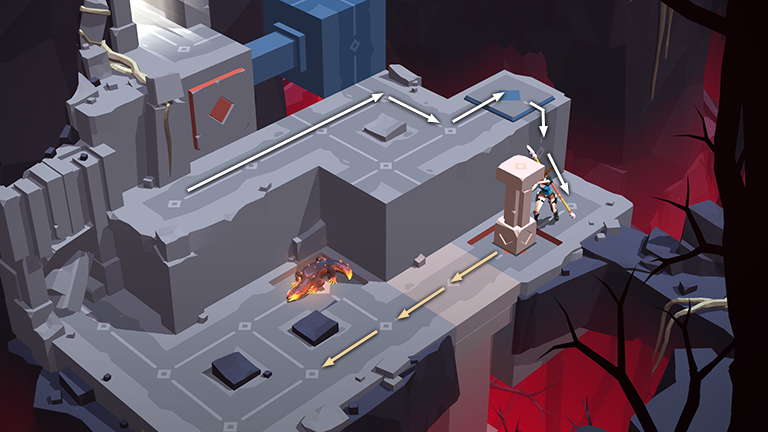
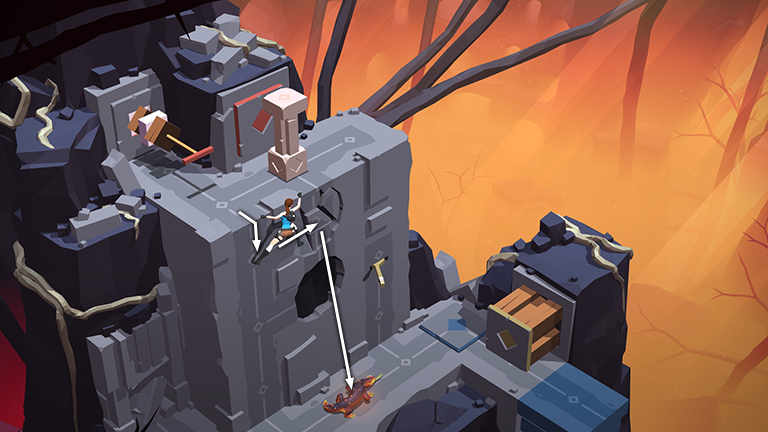
In the next area, step forward twice from the starting point to get the attention of the nearby lizard.
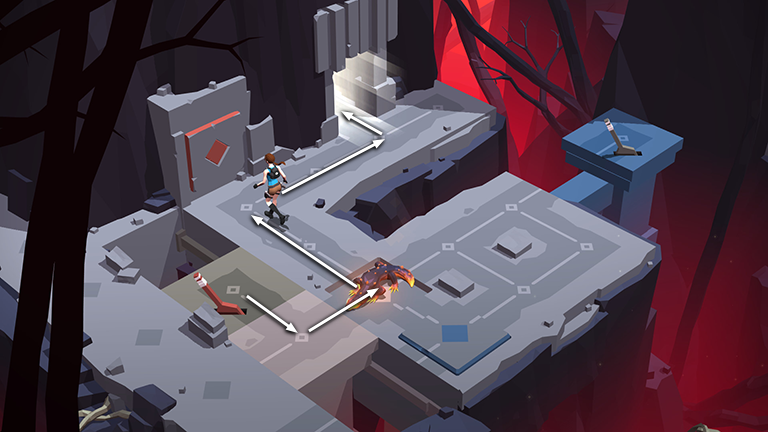
Move back to the left, then to the upper right, then to the lower right to grab the SPEAR. The lizard gives chase, remaining two spaces behind Lara.

Move to the upper right (toward the gap with the snake on the other side) then left onto the tan pressure pad, raising the tan block near the snake. Step off the pad to the lower left, then step to the lower right.
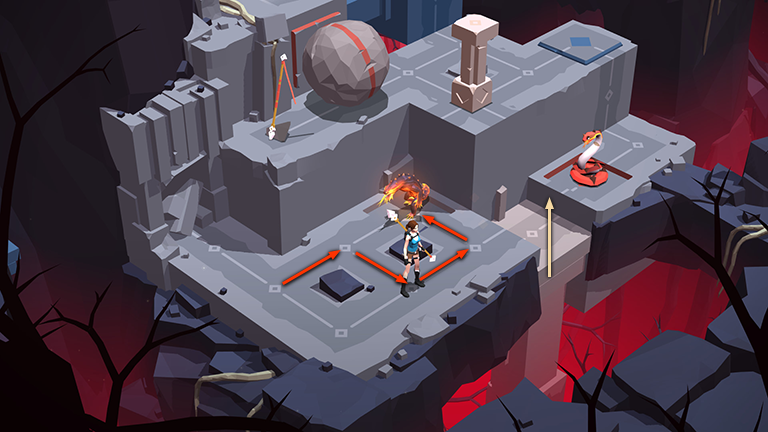
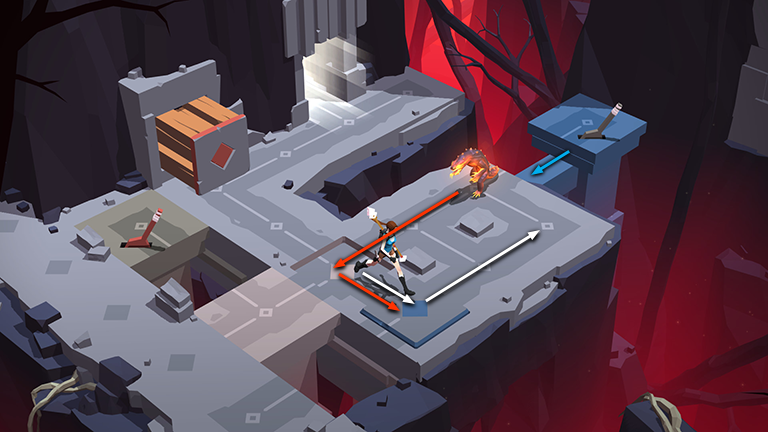
As you make this circuit, the lizard follows along the route marked in the screenshot above, ending up on the tan pressure pad. Again, this raises the tan block between Lara and the snake.
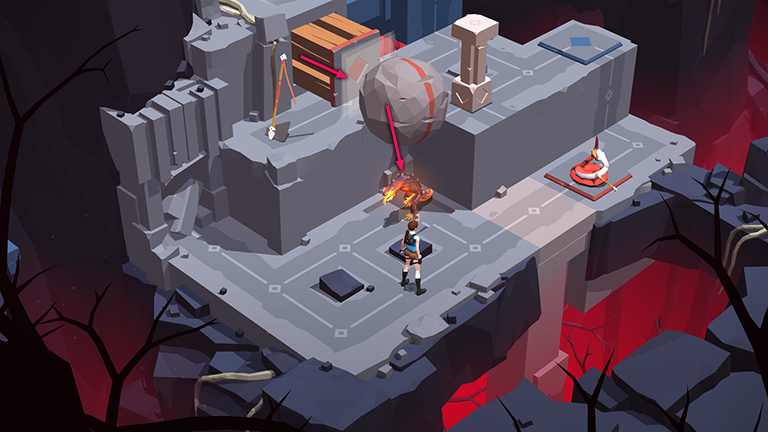
Use the spear to kill the snake. When it disappears, the orange pressure pad is no longer depressed, and the block trap on the ledge above extends, pushing the boulder off the ledge and crushing the lizard.
Step back then forward to give the boulder time to roll off the ledge.
Continue forward, over the orange pad to the right corner, breaking a vase on the way to get another OBSIDIAN (6/13). Meanwhile, the lizard reanimates, but since Lara is out of his line of sight, he doesn't move.
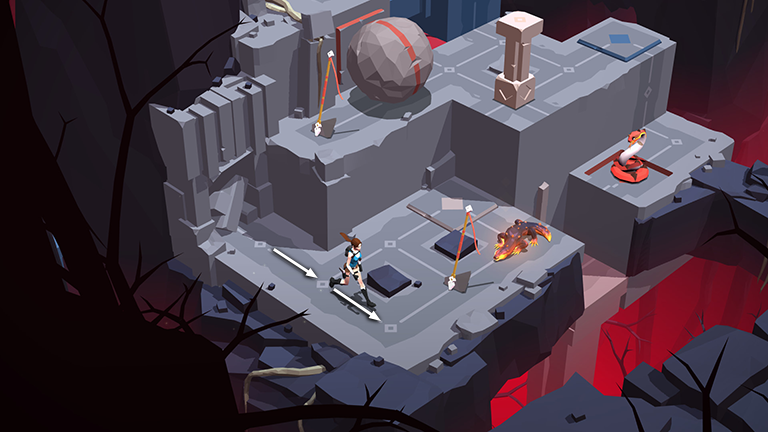
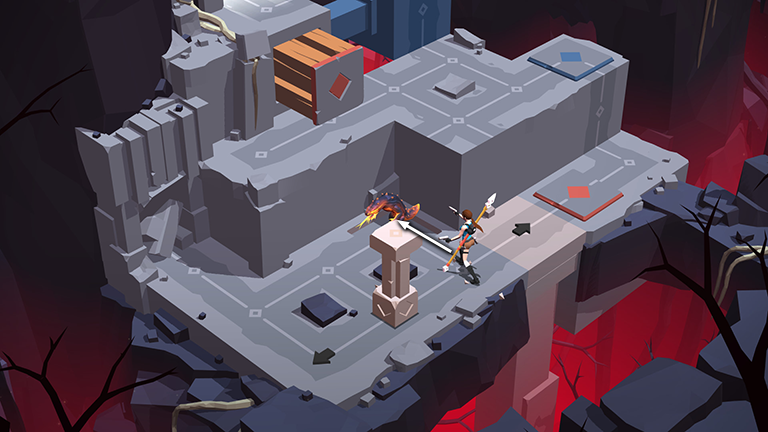
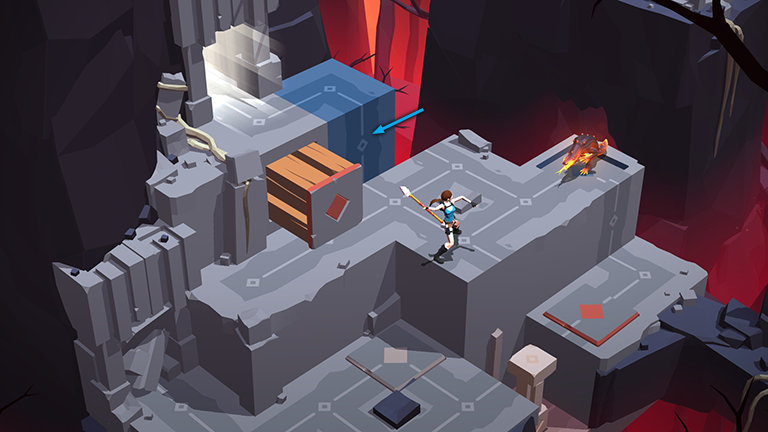
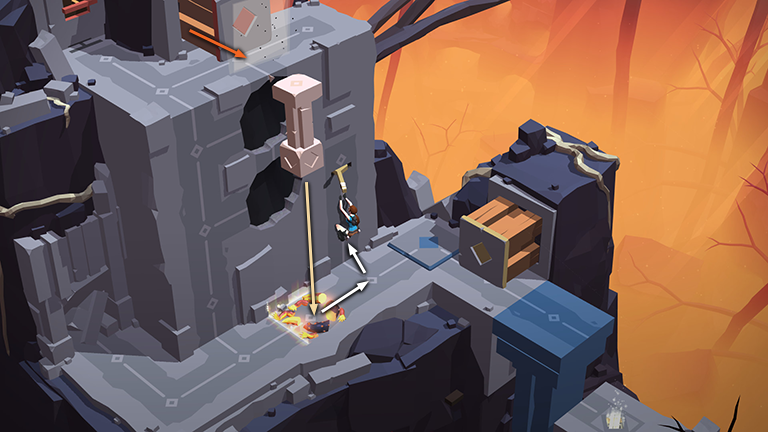
Climb onto the upper level and move around behind the movable pillar. As you go, notice how stepping on and off the blue pressure pad moves the blue block near the exit.
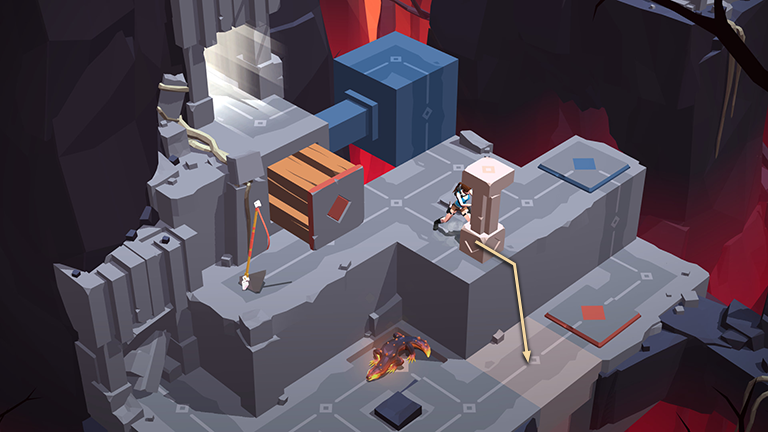
Push the pillar off the ledge so it lands on the tan block below.
Climb down and pull the movable pillar onto the orange pad. This once retracts the orange block trap on the ledge above...
...allowing you to climb back up and get the SECOND SPEAR.
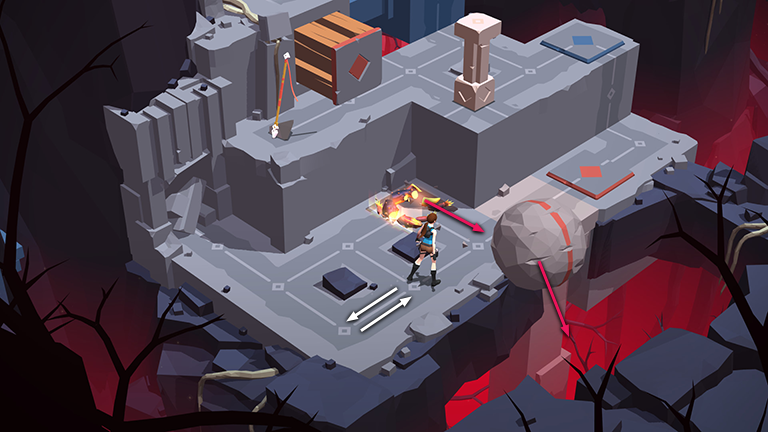
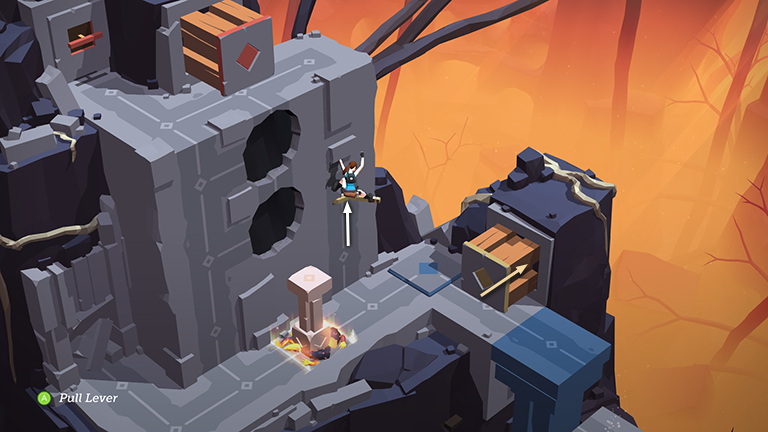
Climb back down and push the movable pillar three times.
Now shoot the lizard by approaching it from the side. This puts it out of commission for four turns.
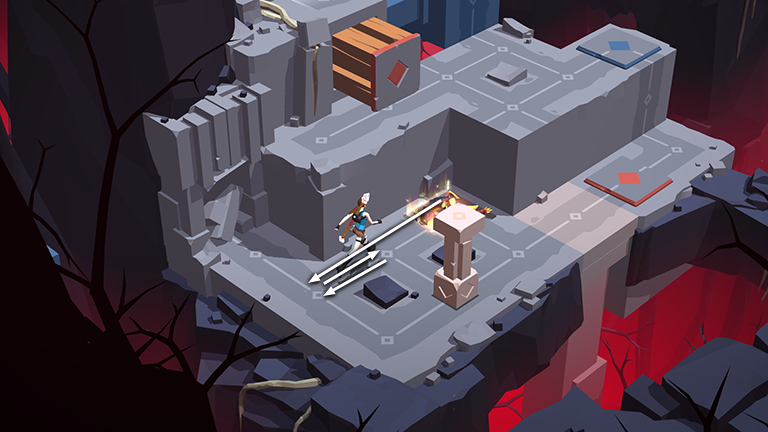
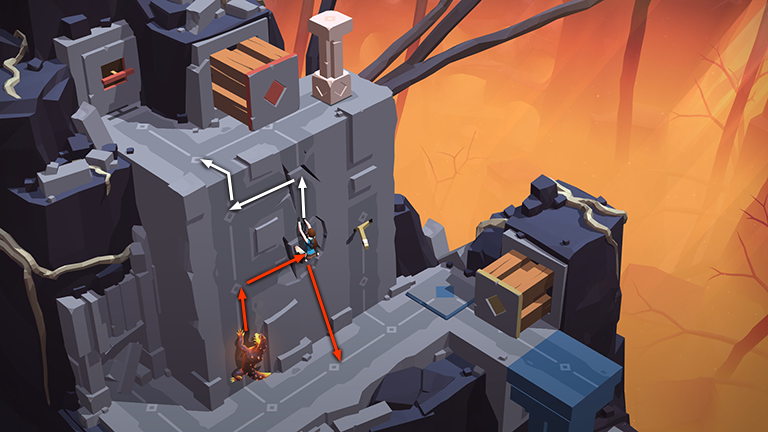
Move twice to the lower left. Move back once, then forward once again. This runs out the four turns, and the lizard revives and spots Lara again.
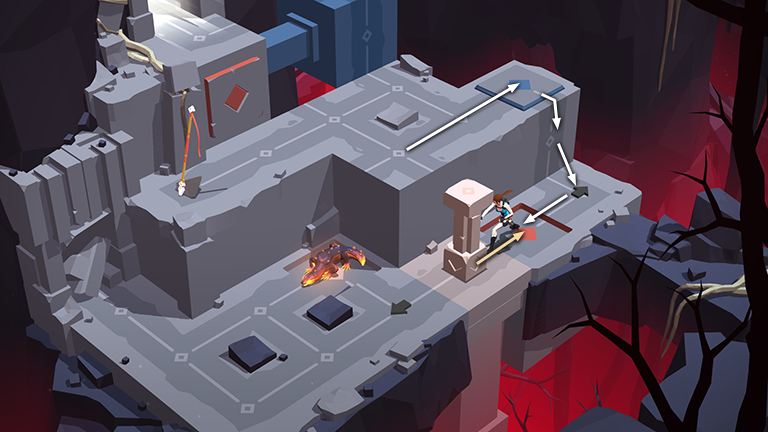
Move into to the lower corner and then push the pillar twice so it falls into the gap with the tan block. The lizard follows behind.

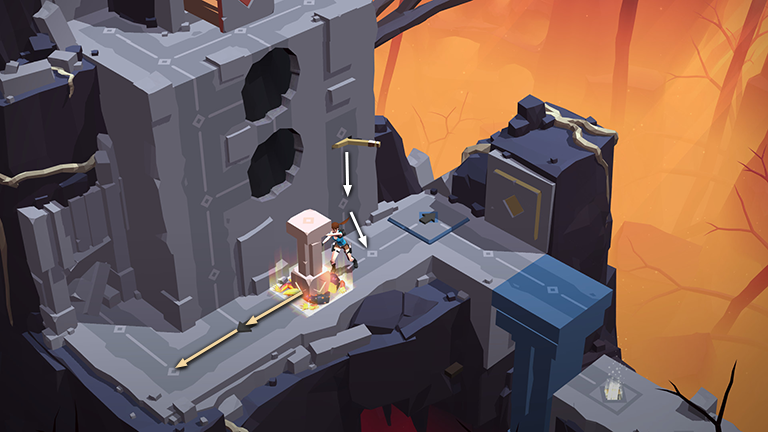
Hop onto the pillar, then the orange pad, then climb to the upper level and move two spaces to the lower left. As you go, the lizard follows two spaces behind, ending up on the blue pressure pad.
Again, depressing the blue pad moves the blue block to the left, close to the exit. Throw the spear at the lizard, immobilizing it on the pressure pad for the next four turns.
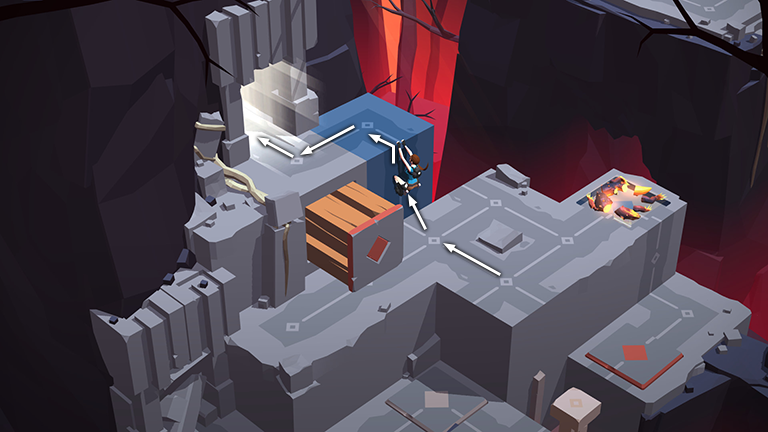
Now you can climb the blue block to reach the exit.
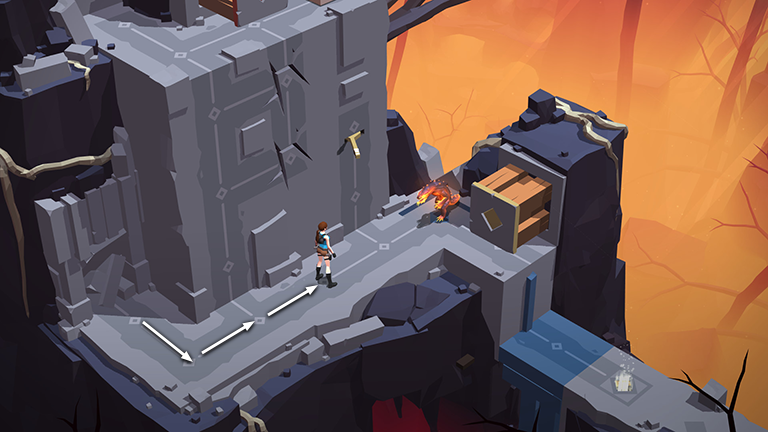
In the next area, move forward then right twice to get the lizard's attention.
Move back once and then climb the wall upward once, then right once, onto the lower of the 2 cracked sections. The lizard follows two spaces behind.
Climb upward onto the second cracked area, then left, then up onto the ledge above. The lizard pursues, but when he reaches the first cracked area, it breaks away, and he falls to the ground.
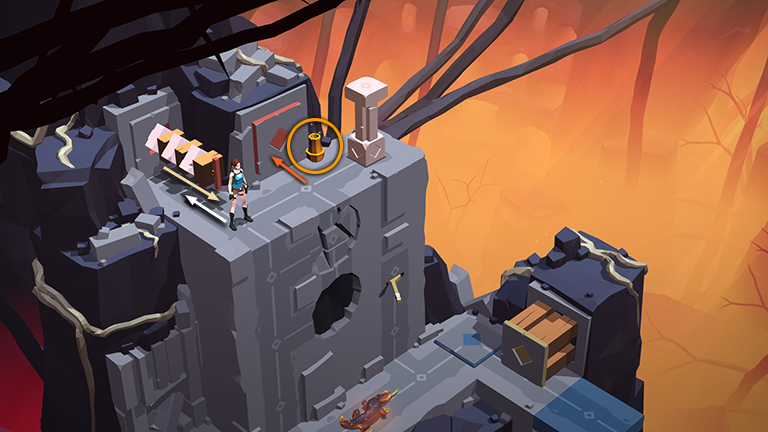
Step forward and pull the switch. This retracts the block trap, revealing a vase containing another piece of the SACRED BEETLE (5/11).
Retracting the block also enables you to reach the movable pillar. Pull it once to position it in front of the block trap.
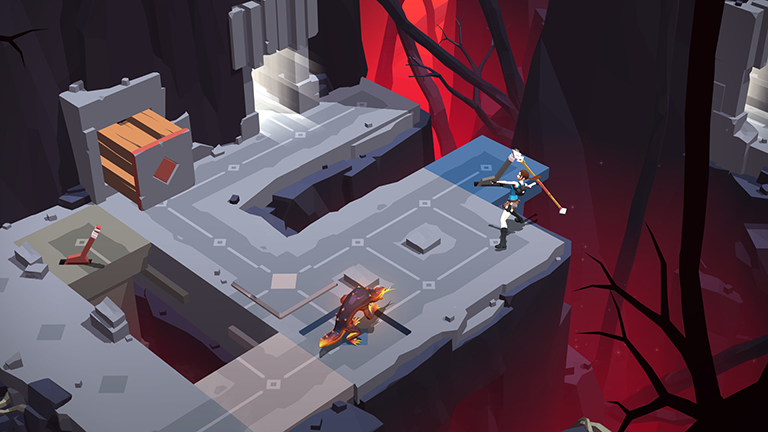
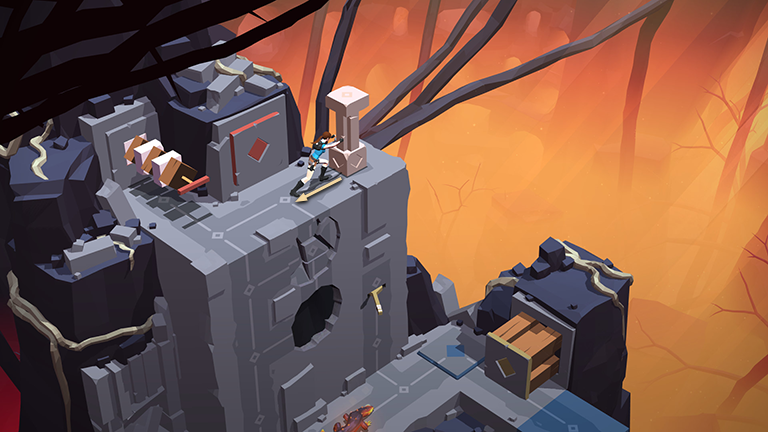
Drop and hang from the edge. Then climb to the right, onto the second cracked wall. It gives way, and Lara falls to the ground, landing on top of the lizard and shooting it in the process.
Move to the right and grab onto the wall below the lever. As you go, the switch retracts into the wall and the block trap pops back out, shoving the pillar off the ledge. It then lands on the lizard pinning it down indefinitely.
Climb up and kick the lever to retract the tan block between the blue pressure pad and the blue block.
Drop down and push the movable pillar twice to the left. As you do this, the lizard revives, but it's facing away from Lara so it doesn't notice her.
Approach the lizard from behind to shoot it, disabling it for the next four turns.

Move forward twice, onto the blue pressure pad, which lowers the blue block. Move to the right once, then back to the left onto the blue pressure pad once more. This uses up four turns. The lizard then revives and notices Lara.
Move to the right, off the pad. The blue block rises, and the lizard follows.
Step onto the blue block. The lizard then steps on the blue pressure pad, causing the block to sink. You can now step forward to the exit.
†UPDATE HISTORY: 3/19/17 - Walkthrough first posted.
WAS THIS WALKTHROUGH HELPFUL? If not, I apologize and invite you to contact me with any questions. If you need help right away, I recommend the r/TombRaider subreddit. Other fan-run forums are listed at tombraiders.net/stella/community.html. If this site was useful, please consider supporting it financially or in other ways. For details, visit tombraiders.net/stella/support.html. As always, I welcome your corrections/suggestions. Thank you!
Copyright © - Stellalune ( ). Screenshots for the Shard of Life expansion levels were made using the Steam version of Lara Croft GO. Feel free to copy or print this walkthrough for personal use. Share it with friends if you like, but please include this credit line so people can send me their feedback. No part of this walkthrough may be reproduced on another site without permission. As an Amazon Associate I earn from qualifying purchases. Follow this link for details about this site's advertising and privacy policy.
Stella's Tomb Raider Site: tombraiders.net.