STELLA'S LARA CROFT GO WALKTHROUGH - Android, iOS, PS4 and Vita, Steam, and Windows Phone/PC/Tablet
THE MIRROR OF SPIRITS - PART 10: THE ATTIC
Updated: 4/1/17(†)
Relic Fragments: 1
Gems: 1
Follow this link for my video walkthrough.
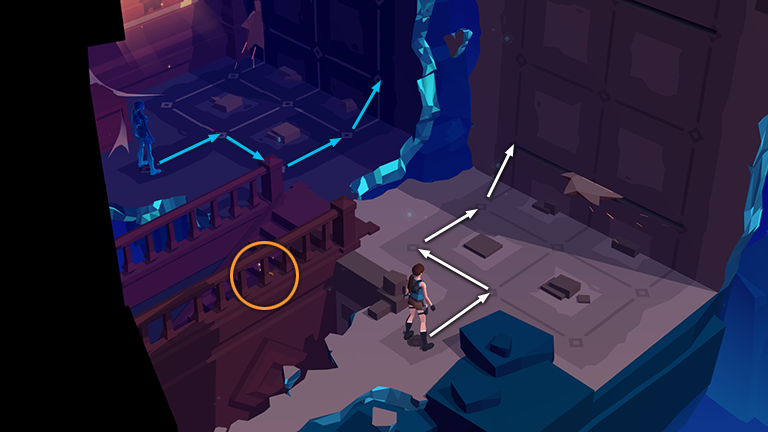
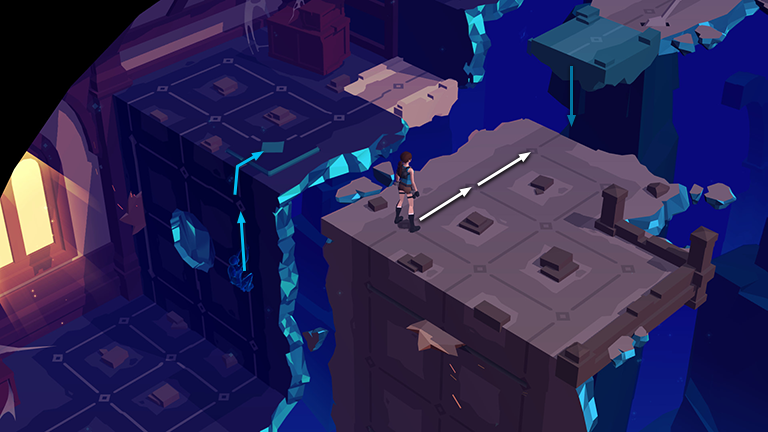
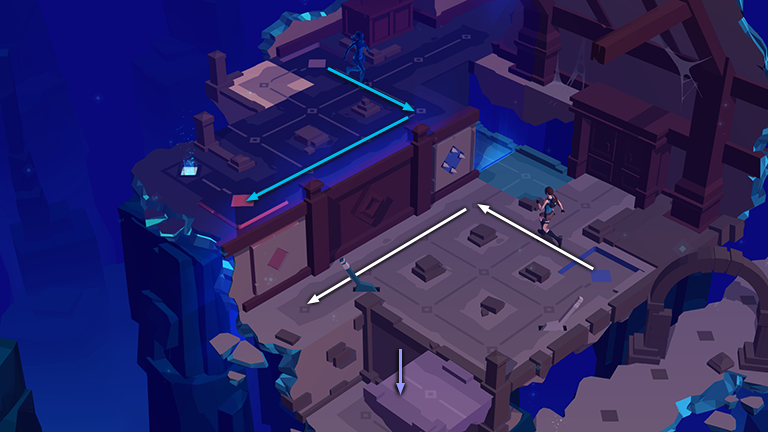
Break the vase on the stairs between the two halves of the room to get a piece of the EYE OF THE ABYSS (9/10). Then move forward, left, forward, and forward again to grab onto the wall with the spinning blades. As you go, the lower blade moves back and forth, ending up where it started, in the middle of the wall.
Meanwhile, on the other side of the room, Spirit Lara moves forward, right, then forward, and climbs onto the wall there.
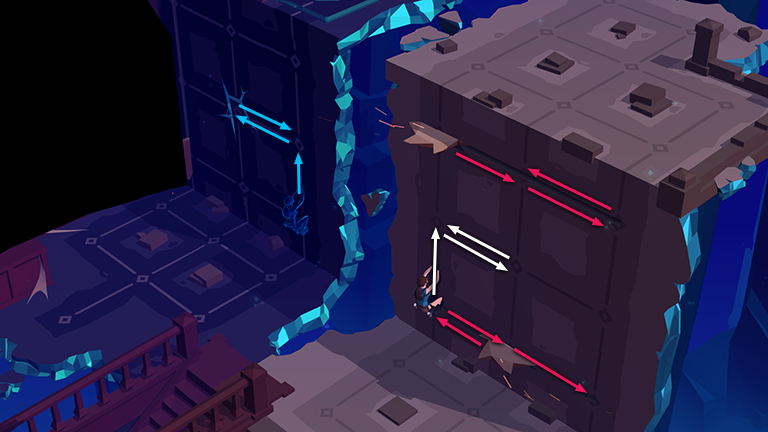
Climb up, right, then back to the left. The blade below moves left, right, then right again. The blade above moves right, right, then left. Spirit Lara, meanwhile, climbs up, left onto the cracked wall, then back to the right.
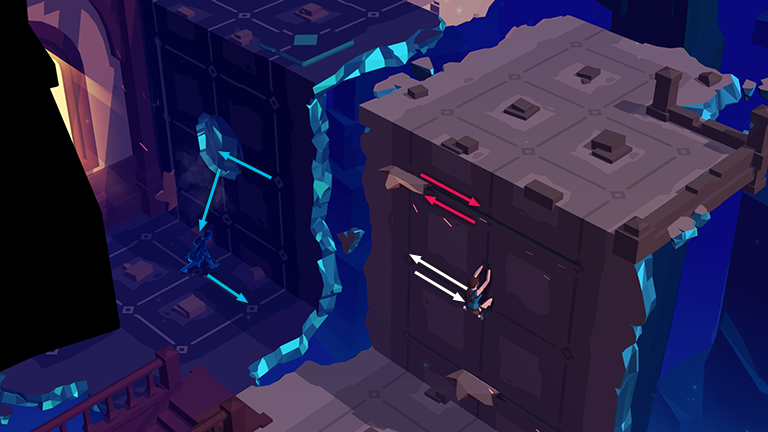
Climb to the left then back to the right. The blade above moves to the left then back to the center. Spirit Lara climbs back to the left, onto the cracked wall, which gives way dropping her to the floor. Falling doesn't take up a separate turn, so as you move left, she moves right.
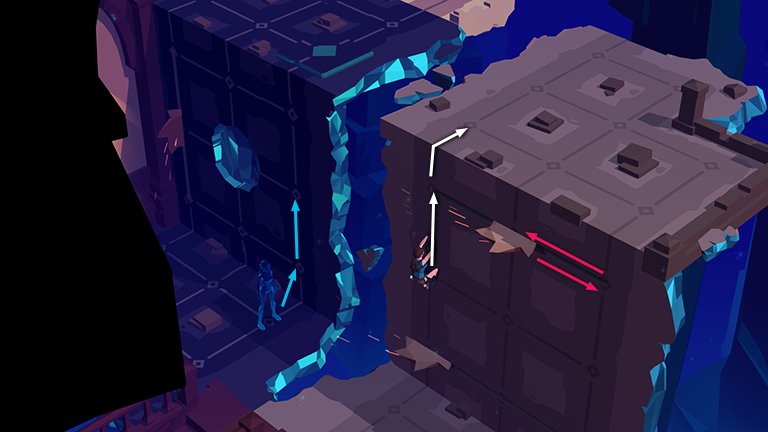
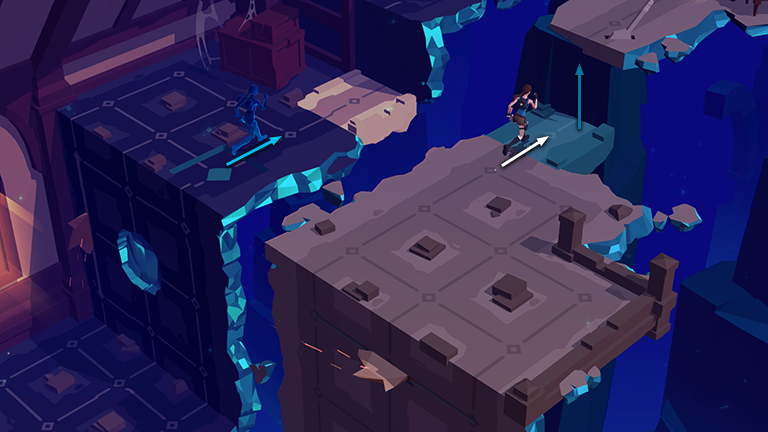
Climb up twice to the floor above. As you go, the upper blade moves right then back to the middle, so Lara should be out of the way by the time it moves to the left. Meanwhile, Spirit Lara grabs onto the wall again and climbs up once.
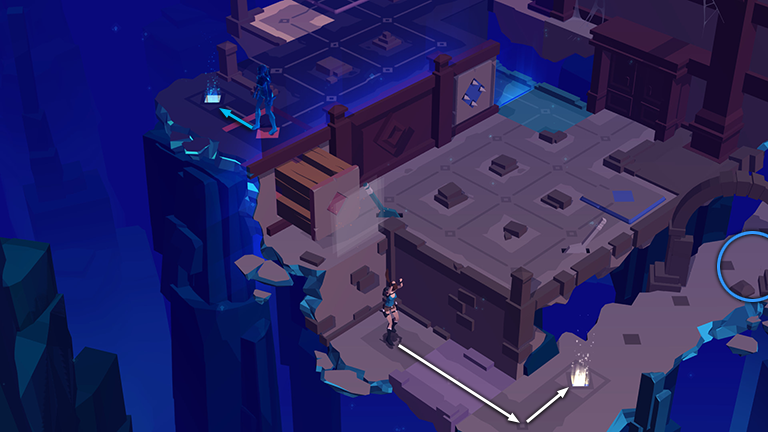
Move forward twice. As you do this, Spirit Lara climbs up and steps onto the blue pressure pad, causing the blue block to move downward, level with the floor.
Step forward onto the blue block. Spirit Lara then moves off the blue pressure pad, causing the blue block, with Lara on it, to rise to the next level.
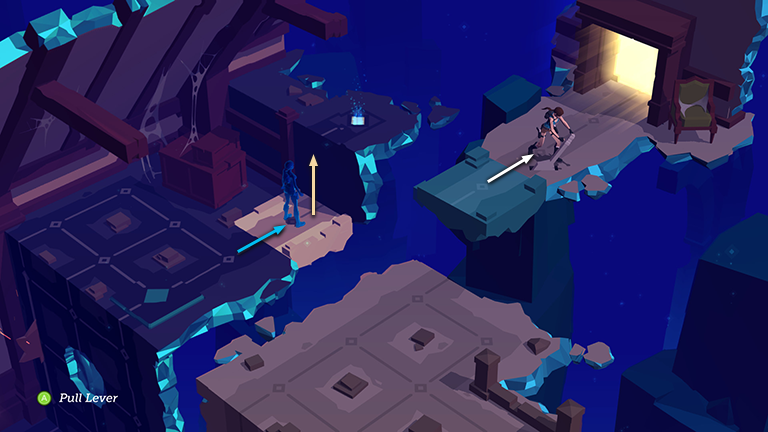
Step forward again. Spirit Lara moves forward onto the tan block. Use the lever to raise the tan block with Spirit Lara standing on it.

Now you can both proceed to your respective exits.
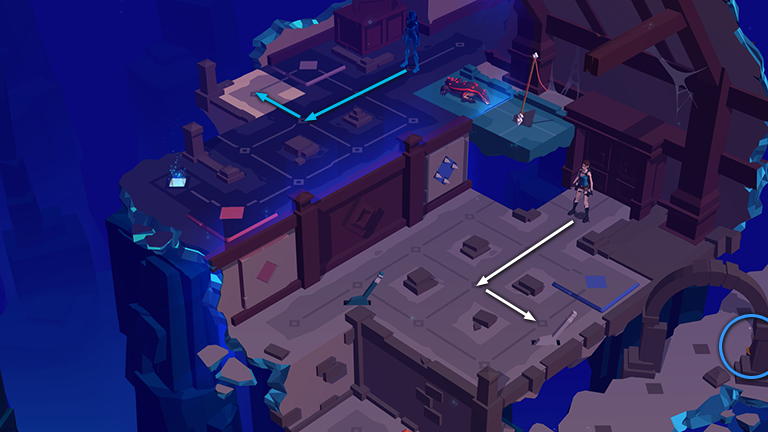
In the next area, smash the vase hidden behind the archway below on the right to get another CRYSTAL (13/14). Move forward twice then once to the lower right to reach the tan lever. On the ledge above, Spirit Lara moves forward and left onto the tan block.
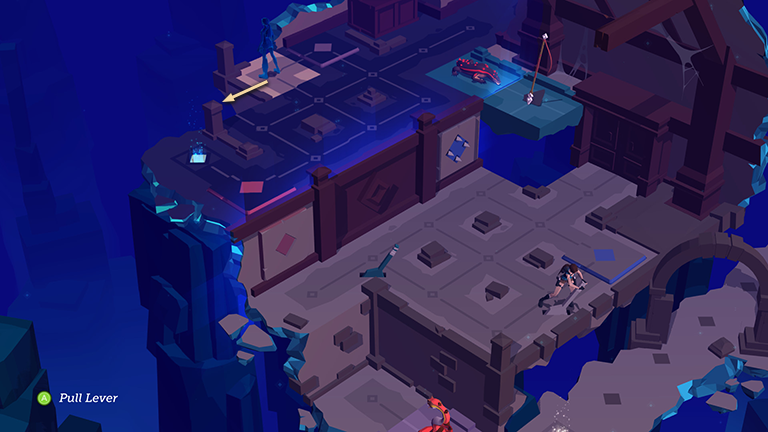
Use the tan lever to slide the tan block, with Spirit Lara standing on it, to the left.
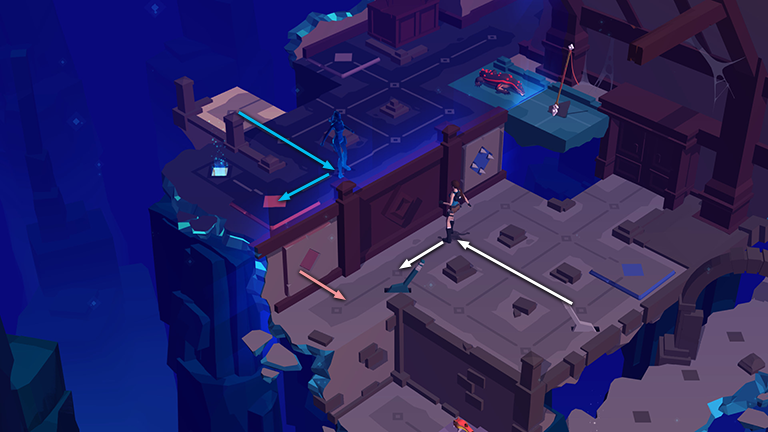
Move twice to the upper left, then once to the lower left, until Lara is standing next to the teal lever. Spirit Lara moves onto the pink pressure pad, activating the pink block trap just below the pad, which has no effect this time.

Use the teal lever to lower the teal block, with the lizard and SPEAR.
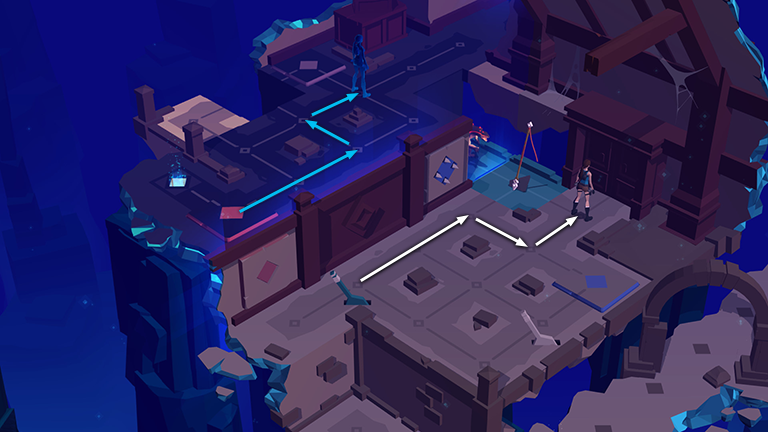
Move twice to the upper right, then around to the right side of the SPEAR. Don't try to grab the spear yet, or the lizard will attack. As soon as it spots Lara, it goes on the alert. Meanwhile, Spirit Lara mirrors Lara's movements on the upper level.
Step to the lower left, then to the upper left, then to the upper right, onto the teal block to pick up the SPEAR. The lizard moves through the translucent barrier and follows two spaces behind Lara. Spirit Lara makes the corresponding moves above.
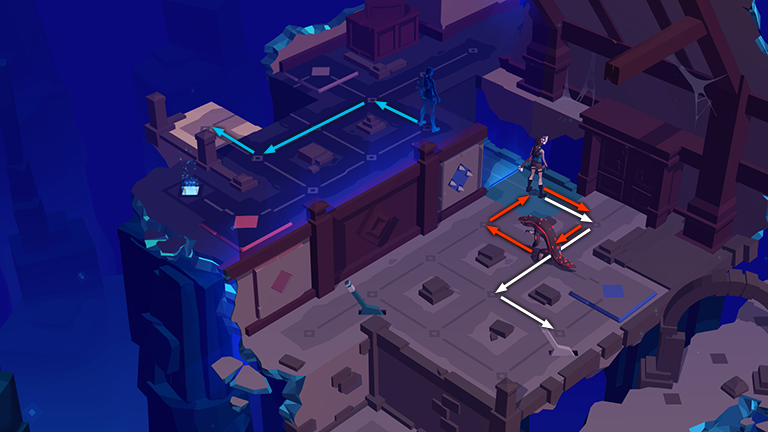
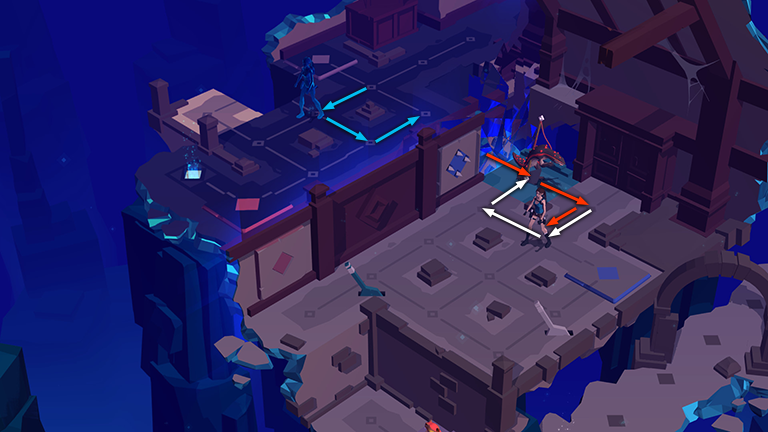
Now that you have the spear, step off the teal block to the right. Then move twice to the lower left and once more to the lower right, so Lara is standing near the tan lever. The lizard continues to follow in Lara's footsteps, circling around and ending up back where it was four moves earlier. Meanwhile, Spirit Lara moves onto the tan block.
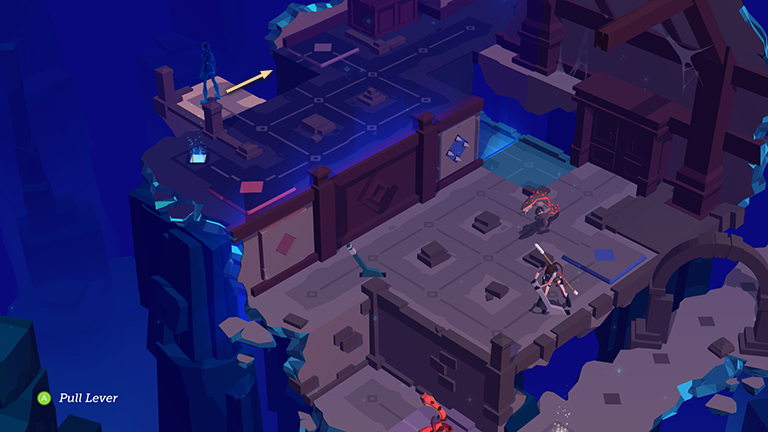
Use the tan lever to shift the tan block to the right, with Spirit Lara standing on it.
Step to the upper right onto the blue pressure pad. This activates the arrow trap, killing the lizard, which is standing between the trap and Lara. On the upper level, Spirit Lara moves off the tan block onto the purple pressure pad. This raises the purple block with the snake sitting on it.
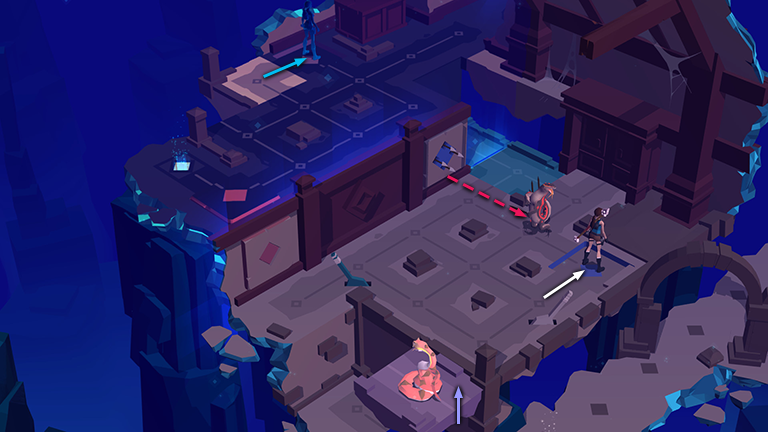
Without moving off the blue pad, which would cause Spirit Lara to move off the purple pad, use the spear to kill the snake.
Now move past the teal lever to the spot just in front of the pink block trap. On the upper level, Spirit Lara moves onto the pink pressure pad.
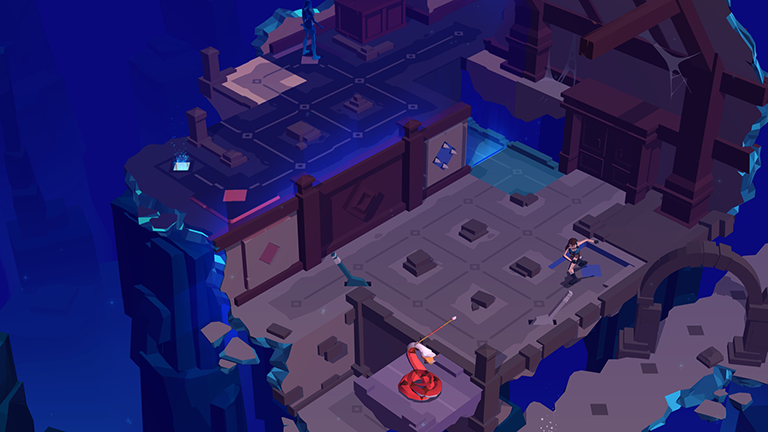
Smash the vase on the right side of the archway beyond the exit for the 13th CRYSTAL if you didn't already get it. Then proceed to the exit. Spirit Lara moves to her exit as well.
†UPDATE HISTORY: 4/1/17 - Walkthrough first posted.
WAS THIS WALKTHROUGH HELPFUL? If not, I apologize and invite you to contact me with any questions. If you need help right away, I recommend the r/TombRaider subreddit. Other fan-run forums are listed at tombraiders.net/stella/community.html. If this site was useful, please consider supporting it financially or in other ways. For details, visit tombraiders.net/stella/support.html. As always, I welcome your corrections/suggestions. Thank you!
Copyright © - Stellalune ( ). Screenshots for the Shard of Life expansion levels were made using the Steam version of Lara Croft GO. Feel free to copy or print this walkthrough for personal use. Share it with friends if you like, but please include this credit line so people can send me their feedback. No part of this walkthrough may be reproduced on another site without permission. As an Amazon Associate I earn from qualifying purchases. Follow this link for details about this site's advertising and privacy policy.
Stella's Tomb Raider Site: tombraiders.net.