SAVING, CHECKPOINTS & TECH SUPPORT: This game incorporates autosave checkpoints. If you only rely on one save slot, you may run into trouble if you get stuck, encounter a bug, or if your autosave becomes corrupted. To avoid problems, I highly recommend changing your save slot in the pause menu at least once per level. If you encounter a bug that can't be fixed by restarting the game, reloading a different save, restoring a backup save in the Xbox version, or rebuilding the game cache in the PC version, I encourage you to visit the Official Rise of the Tomb Raider Support Forum and or put in a support request with Square Enix. I also have PC save files for download.
SOVIET INSTALLATION
AREA 5F: COPPER MILL
Updated: 3/10/18(†)
Camps: Copper Mill Yard, Excavation Shaft
Weapons/Gear: Compound Bow Part (4/4), 2 Submachine Gun Components (2/4 and 3/4), Bolt Action Rifle Component (1/4)
Relics: 7 (18) Documents: 6 (26) Murals: 4 (12) Coin Caches: none (9) Survival Caches: 4 (21) Strongboxes: 4 (14)
Monoliths: 1 (3) Archivist Maps: 2 (9) Explorer Satchels: 1 (6)
Challenge Tombs/Codices: 1 (3) Crypts: none (2) Challenges: 1 (4) Missions: none (5)
Area Maps: Copper Mill Detail | Entire Soviet Installation
NOTE: The Soviet Installation is a HUGE area, so I have divided the walkthrough into several sections centered on the main base camps. This walkthrough covers the area from the Copper Mill Yard base camp to the Abandoned Mines. The first number in each of the stat lines above is for this area alone. The number in parentheses is for the entire Soviet Installation. There are a few items shown on the detail map that you won't be able to obtain until you reach the Copper Mill Bridge Base Camp later in the game. Also, while the document, relic, and strongbox locations are fixed, the exact items may vary depending on the order in which you find them.
For subsequent visits, check out the section below on Revisiting This Area Later in the Game and the separate Soviet Installation Collectibles Guides.
OBJECTIVE: Climb the Copper Mill to Reach the Mine Entrance
When you pass through the gate, you receive a new goal. Just ahead is the Copper Mill Yard Base Camp. (screenshot) If you rest here, you'll unlock a document in the Camp Journals II series called Connected.
Examining the Soviet monolith (2/3) ahead marks the locations of 3 coin caches on your map. You can go back for them now if you like or wait until later. They are covered in the last part of the Logging Camp Second Visit Walkthrough. To the left of the rope-wrapped barrier is a mural (9/12), The Warmth of Labor from the Soviet Crests series. Read it for XP and Russian. Then use a rope arrow to pull down the barrier. (screenshot)
This is a large area with many old boxcars and decrepit wooden buildings. Keep your eyes peeled for minor pickups like ammo, herbs, mushrooms, etc., since I won't mention every item here. Also, some resources respawn, and new items appear when you revisit certain areas. So each player's experience will be slightly different.
ABANDONED COPPER MILL - GROUND LEVEL: After pulling down the rope barrier, climb the stairs of the building on the left and pry open the metal door with your axe. Inside is a relic (12/18), The Game, a primitive version of Tetris from the Gulag Possessions set. There's salvage and cloth hidden under this shack. To reach it, pull down the barrier with a rope arrow. (screenshot) Climb into the back of the nearby truck to find a salvage crate. Then enter the building beyond the truck for a document (19/26), Glorious Discovery from the Soviet Power series. Examine it for XP and Russian. (screenshot)
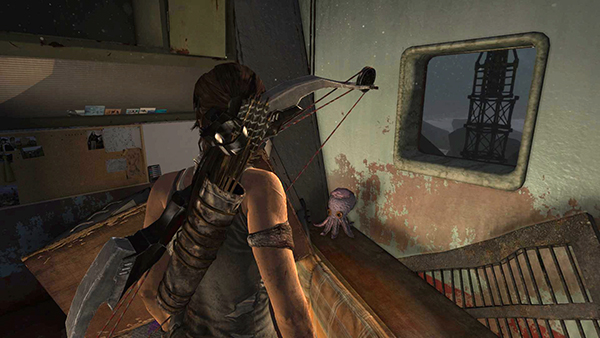
NOTE: There's a little plush Kraken hidden under the bunk here. (screenshot) This Easter egg references the giant octopus in Tomb Raider: Underworld. If you played TOMB RAIDER (2013), you may remember a similar toy in Lara and Sam's cabin on the Endurance. (screenshot)
There's a survival cache (15/21) is buried behind this building, at the far end of the row of train cars. If you found the Explorer Satchel in the cave on the east side of the Logging Camp area (C8 on the annotated map) this cache will be marked on your in-game map. (screenshot)
Climb the yellow ladder on the boxcar nearest the truck and drop down on the other side. (screenshot) There are a few minor items here on the ground level, and at the very back (northeast) is a CAVE (C11 on the map) blocked by a metal barrier. This requires explosives you don't yet have. (screenshot)
NOTES: Apparently it is not possible to break down this particular barrier using a shrapnel grenade or petrol bomb. I attempted to carry several tin cans and gas canisters from the SAWMILL to the cave, but these objects disappear from Lara's hand as you approach the Copper Mill Yard base camp. Also, you'll see a notification near the cave entrance about a nearby challenge tomb, but the entrance is actually located in the building above. If you need to return to the base camp, there's another rope-wrapped barrier on the northeastern end of the fence, near the abandoned train cars, that can only be pulled down from the back. (screenshot)
CLIMBING THE MILL BUILDINGS: For now, climb onto the roof of the large building in the middle of this area, either via the ladder on the boxcar or the slats on the southeast side of the building near the CAVE. (screenshot) Use a rope arrow to pull down a rope-wrapped barrier on the adjacent building and jump over there to find some supplies. (screenshot)
NOTE: If you've unlocked the Eye for Detail skill, which makes Challenge items glow in Survival Instinct, you may notice that the cosmonaut poster (1/7) on the wall here has something special about it. (screenshot) Later when you learn to make molotov cocktails or unlock fire arrows, you'll be able to burn this poster as part of the Challenge: Difference of Opinion.
Jump back to the previous roof and climb the next yellow ladder to the level above. (screenshot) Turn right, pull down another rope-wrapped barrier, and jump across to the ledge there. (screenshot) In the next room, crack open a salvage crate and listen to a recorded document (20/26), Second Kill from the Heart of Darkness series. Then climb another ladder to the level above. (screenshot)
FIRST COMBAT ENCOUNTER WITH MOLOTOV COCKTAILS: Lara notices enemies ahead, and a brief cutscene shows her picking up a bottle and some cloth. A tutorial tells you to hold RB/Middle Mouse/R1 to craft a MOLOTOV COCKTAIL from these items. Do this and move forward to hide behind a rusted mine cart. Hold LT/Right Mouse/L2 and use the right stick or mouse to aim the molotov toward the 3 men clustered ahead, then RT/Left Mouse/R2 to throw it. While they burn, quickly take out the fourth man on the ledge ahead on the left. (screenshots)
NOTE: If you instead decide to use poison arrows during this fight, don't craft new ones when you're done. You'll find poison arrows in various metal lockers throughout the Copper Mill and nearby challenge tomb.
Loot the bodies and scour the area for supplies. Notice the strongbox behind the bars in one corner. You'll get that from the other side momentarily. Don't forget to open the lockers and pry open the metal door at the right end of the upper ledge where the last enemy was standing. (screenshots)
Pick up more cloth if you need it, then one of the bottles lying around. Hold Alternate Fire to craft another molotov. Then throw it at the flammable barrier to clear the way, but don't leave yet. First, craft another molotov cocktail and toss it at the second flammable barrier off to the right. After the flames subside, climb up and go inside to find more cloth, salvage, a relic (13/18), Dog Tags from the Red Army Officer set, plus another cosmonaut poster (2/7). If you like, you can burn this poster with a molotov to start the challenge. Then go back later for the first one you saw. (screenshots)
Exit the room with the relic and swing over to the ledge on the left. Drop down into the room below, where there are several lockers with goodies inside, a salvage crate, and the strongbox (9/14) you saw from outside. Pry it open to obtain a SUBMACHINE GUN COMPONENT (2/4). (screenshots)
CHALLENGE TOMB ENTRANCE: At the far end of this room is a console with a green light. Use it to open the large metal door with the painted glyphs. This is the entrance to an optional challenge tomb.
Follow this link for THE RED MINE CHALLENGE TOMB WALKTHROUGH, which includes the Excavation Shaft Base Camp, an Archivist Map (7/9), an Explorer Satchel (5/6), relics (14/18 and 15/18), documents (21/26 and 22/26), a mural (10/12), and 3 survival caches (16-18/21), plus the codex that confers the skill Bright Eyes.
MORE COPPER MILL COLLECTIBLES: To get out of the room with the strongbox and CHALLENGE TOMB ENTRANCE, scramble up the painted metal wall. Move straight forward to the edge of the ledge, jump to grab the yellow ladder, and climb up to the loft to find an Archivist Map (8/9) and a box of cloth. Drop back down to the floor. (screenshots)
Go up the steps and through the doorway where you burned the first flammable barrier earlier. Inside, head up the ramp to the next level, where there are a bunch of very dead Russians, plus some salvage and other supplies. If you like, you can make a rope line from here to the water tower, slide over there, and collect some salvage, cloth, and feathers. If you do this, you'll need to climb all the way back up to this building again, so you may or may not want to take that detour now. (screenshots)
In the room in the back right (northwest) corner of this building you'll find a relic (16/18), a Hero of the Soviet Union Medal from the Red Army Officer set sitting in a fenced-in area on the left. On the wall above the doorway is another cosmonaut poster (3/7) you can burn using a molotov—or later a fire arrow—for the challenge. Inside there's a mural (11/12), a Soviet Crest titled For the Motherland which gives XP and Russian proficiency; and various minor supplies. (screenshots)
Before leaving this room, use a rope arrow to pull down the rope-wrapped barrier revealing a long chute. Slide down and jump at the very end of the chute to land on or grab the ledge on the far side of the barnlike building below. If you miss the ledge, you'll need to climb back up and try again. Once you reach this ledge, pull up and collect some salvage, plus more salvage and arrows inside a locker, pry open the strongbox (10/14) to obtain a BOLT ACTION RIFLE COMPONENT (1/4). There's also a cosmonaut poster (4/7) you can destroy for the challenge. There should be a few bottles sitting nearby that you can use to make a molotov. (screenshots)
Climb onto the ledge above the strongbox to find more salvage. Shoot a rope arrow into the rope-wrapped beam in the building above. Then climb up there to find a relic (17/18), an Order of the Red Banner Medal from the Red Army Officer set. Use a rope arrow to pull down the wooden barrier in the ceiling and climb back up to the room where you slid down the chute. You'll find some arrows and a container of cloth on the way up. (screenshots)
CLIMBING TO THE UPPER LEVELS OF THE MILL: Move forward into the open doorway overlooking the Logging Camp. Shoot a rope arrow into the dangling rope coil and swing across the gap onto the wooden ledge ahead. Crack open the salvage crate. Then use another rope arrow to pull down the pile of junk on the next ledge to clear a path. Jump across to that ledge. Then walk along the narrow beam, jump across another gap, and continue around to the right. As you go, the beam tilts forward alarmingly but doesn't break. When you reach the end, jump forward and latch onto the climbing wall. Climb up and around to the left. Then scramble onto the deck above. Gather hardwood and salvage, and then climb the ladder to the top of the rusty tank. (screenshots)
There's a lone Trinity soldier in the building ahead. If you're quick, you may be able to shoot him through the broken slats. Otherwise, wait until he moves off to the right. Then jump and grab a handhold on the wall, climb then jump to the right. Pull up onto the ledge and sneak up behind him to deliver a stealth attack. (screenshots)
Now, if you don't need cloth, you can take the quicker route to the level above. Instead of climbing the yellow ladder, go around to the left Jump from the red ledge to grab the thick, wooden beam ahead. Pull up, walk to the right and use the horizontal bar to swing over to the next beam. Move to the end of the beam, jump to grab the ledge ahead, and pull up onto a ledge with a rope-wrapped pole. (screenshots)
If you want to take a detour to pick up some cloth, instead grab the yellow ladder. Climb to the top. Then climb the wooden handholds on the side of the building, traverse around to the left, and drop down onto a ledge with a container of cloth. Climb the slats into the attic room above, and then ride the zip line down to the ledge with the rope-wrapped pole.
This ledge also has a strongbox (11/14) containing a SUBMACHINE GUN COMPONENT (3/4). You'll need the LOCKPICK to open this box. So if you have not yet completed the Communications Breakdown Mission in the Logging Camp, you'll have to do that first to get the tool. Stand near the rope-wrapped pole and fire an arrow into the beam below to make a zip line. Slide down into the adjacent building and immediately take cover behind the metal box. (screenshot)
SKIRMISH IN THE LARGE ROOM WITH ONE OPEN WALL: A group of Trinity soldiers see Lara arrive, so there's no sneaking up on them. You'll probably have worked out your own style for taking on small groups of enemies, but if you're struggling, here's what worked for me: Shoot the first man ahead on the right from behind the metal box using a poison arrow, regular arrow, or whatever. Then scramble over to the box on the left and use the bottle to craft a molotov cocktail, while the next 2 enemies move toward you. Throw the firebomb at them. If either survives, finish him off with your weapon of choice. Then advance and peer around the corner to the left. If you need ammo, you can loot the bodies as you go. (screenshots)
Hide behind the firs metal box and take potshots at the 3 soldiers on the other side of the room and the sniper on the ledge above them. They'll soon start throwing explosives. So when you see an incoming grenade or notice the red icon on the screen, run back the way you came to avoid the blast. Use a bandage (LB/V/L1) if necessary. Then advance again and keep firing. There are more bottles and cans here if you want to make more molotovs or shrapnel grenades, but that takes time. If you shoot an enemy just as he's about to throw his own explosive, you can make him fumble and set himself on fire. Or simply alternate shooting then releasing LT to duck until you're able to take out the rest of the men. You may need to move forward and take cover behind the smaller box on the right in order to get a clear shot at the sniper. There's pistol ammo here if you need it. (screenshots)
Loot all the bodies and pick up various supplies around this room. Jump across the gap in the floor, search the bodies on the other side, grab some rifle ammo and salvage, and then scramble up to where the sniper was standing. Off to the right is a basket of herbs and a table with a document (23/26), An Ally in the Darkness from the Red Arrival series (Russian). (screenshots)
Now grab a bottle and head up to the next level either via the inside staircase or by climbing up from the exterior ledge. At the top of the next yellow ladder is another document (24/26), Intercepted from the Conspiracy Theories series, sitting on some wooden boxes directly ahead. Down the stairs to the right is a flammable barrier. Use the bottle to make a molotov cocktail and burn down the barrier. Or, starting from the ledge below the ladder, jump toward the wall and scramble onto the ledge above. However you get there, you'll find a salvage crate; a cosmonaut poster (5/7) you can burn using another molotov; and a relic (18/18), a Pillbox from the Red Army Officer set that gives you both XP and Russian proficiency. (screenshots)
Burn down the barrier if you didn't do so before. Pick up another bottle and return to the level above. At the top of the stairs, turn around to spot another cosmonaut poster (6/7) high on the wall. Make another molotov and use it to destroy the poster. (screenshots)
Moving on, stand near the rusted pole with the bit of flapping cloth tied to it. Shoot a rope arrow into the rope coil and swing across to the next ledge. (screenshot) As you move around the corner and down the stairs, Jacob tries to contact Lara over the walkie talkie, warning her of danger ahead.
Enter a dark, barnlike room with several hanging corpses, a flock of crows, some rifle ammo, and a strongbox (12/14) containing a SUBMACHINE GUN COMPONENT (4/4). If you found the other parts, you'll be able to assemble the gun when you reach the next base camp. (screenshot) Lara hears voices from somewhere above, so naturally you should head that way. Scramble up the painted metal wall and move into the low-ceilinged room ahead. Pick some mushrooms. Then climb through the small opening on the left. Your goal is updated.
OBJECTIVE: Regroup with Jacob
MULTI-LEVEL BUILDING WITH FLAMMABLE GAS LEAKS: As you enter this room Lara spots, 3 Trinity soldiers attempting to crack a safe. If you're quiet and stay hidden behind the rusty mine cart, you can shoot the generator behind them to cause an explosion that should kill one or two of them. Then finish off any survivors. You could also toss a molotov into the pool of gasoline behind them to burn them and the surrounding storage crates. A single poison arrow should take out all of them, but I recommend saving at least 3 poison arrows for the final enemies in this area. (screenshots)
Once they're dead, toss another molotov at the cosmonaut poster (7/7) on the upper level to destroy it for the Difference of Opinion Challenge. If you've burned the other posters as well, you'll receive XP and 2,000 Expedition Credits for your efforts. (screenshot)
NOTE: If you return here later in the game, there are no more bottles to make molotovs. So don't bother coming back until you've unlocked FIRE ARROWS or you'll just waste your time.
Search the bodies for salvage, technical parts, etc., and gather other ammo and supplies. Then craft another molotov and use it to destroy the flammable barrier blocking the hallway to the northeast. The decaying wooden building begins to burn, making your escape a bit more challenging. As you move along the hallway, pick up more rifle ammo and get ready to meet more enemies just around the corner. (screenshots)
In the heat of combat it's easy to miss the brief tutorial about gas leaks. When you see a pipe wrapped in red tape, with vapor leaking out of it, you can add fire—by throwing a molotov or shooting the hanging lanterns—to cause an explosion, injuring nearby enemies. Lara can also be hurt if she's standing too close. But of course, you can also kill these 4 guys with regular weapons if you prefer. Move through this room, picking up ammo and magnesite and looting bodies as you go. Then go up the stairs to the next level. (screenshots)
Quickly take out the enemy throwing explosives at the top of the stairs, dodging out of the way if one of his projectiles lands nearby. Just around the corner there are two wooden boxes where you can take cover and use a can or bottle to craft an improvised explosive. The next 3 enemies come at you from the far right corner of the room. Shoot them as they approach. Or, if you want to be fancy about it, either toss a molotov at the gas leak on the far side of the room to create an explosion, throw a molotov or shrapnel grenade directly at the men, or shoot the hanging lantern as one of them passes underneath it. (screenshots)
If you throw a shrapnel grenade and it knocks an enemy down without killing him, provided there are no other enemies left nearby, you can run forward and finish him off with a melee attack. (Press Y/F/Triangle to attack. Then tap X/E/Square at the prompt to use the bow choke.) Continue around the corner and up the stairs, picking up more rifle and pistol ammo here and cloth on the next landing. (screenshots)
As you enter the next room, the doorway behind Lara collapses, trapping her here. Scramble behind the rusted mine cart, top up your rifle ammo, and then quickly take out the first 2 enemies. (screenshots)
When they die, 3 Trinity soldiers with clubs and metal shields burst into the room. The one on the lower level immediately begins to move toward you while the others throw explosives from above. You can't penetrate a metal shield with gunfire, but poison arrows work just fine, as do molotovs. If you're quick and you have at least 3 poison arrows, you can quickly take out each of the men before they get too close. After that the fight is over. (screenshots)
If you don't have enough poison arrows for all of them, or you just want to hone your combat skills, there are alternatives. The on-screen tutorial explains how to dodge. Wait for the first shielded man to lunge toward you. Then press B/C/Circle to dodge and he'll overbalance, leaving himself open to attack. Shoot him as many times as you can. If you don't manage to kill him before he raises his shield again, repeat the process until he falls. (screenshots)
NOTE: If you've unlocked the Dodge Counter skill, a successful dodge triggers a brief QTE in which you can press Melee in time with an on-screen prompt to finish off the enemy with a melee attack. This technique is detailed on the page with screenshots. It's optional at this point, but I recommend learning it as the game progresses, since it will be very useful later in the game.
When you've taken care of the first guy, a second shielded enemy jumps down to confront you while the third man continues to throw explosives. Occasionally you'll get lucky and one enemy's grenade will damage the other, but don't count on this. Either use the dodge maneuver again, craft a molotov and throw it at the shielded enemy, or lure him underneath the gas leak, run away and then throw a molotov to ignite the gas. Note that throwing molotovs also burns the wooden boxes you might otherwise use for cover, so use this tactic with caution. When the second man falls, the third jumps down and attacks. When you defeat him, the exit finally opens. (screenshots)
Alternatively, there are gas leaks above each of the elevated positions where the second and third man stand at the beginning of the fight. If you can manage to avoid the first enemy while you craft molotovs and throw them at these gas leaks, you may be able to take out the two men from below. Then finish off the first with the dodge maneuver or another molotov. (screenshot)
Quickly search the room for supplies then continue upstairs. Climb the ladder to emerge on an exterior ledge high above the northeast corner of the SOVIET INSTALLATION. (screenshot) If you look down over the edge on the left, you can see the Copper Mill Bridge Base Camp, but you can't get there yet. Stand near the rope-wrapped post and shoot a rope arrow into the beam ahead to make a zip line. Slide down to meet up with Jacob and enter the ABANDONED MINES.
REVISITING THE COPPER MILL LATER IN THE GAME
NOTE: The separate Soviet Installation Collectibles Guide includes all items, missions, and challenges, but you may want to wait to look at it until you've completed the level, since it does contain spoilers for later sections of this level.
WHEN YOU HAVE UNLOCKED EXPLOSIVES: Return to the cave on the ground level behind the train cars and large building. (screenshot) Blow up the impact barrier and enter the CAVE (C11 on the level map) to find a box of supplies and 2 stacks of gold coins (10 coins in all). This cave also counts for the Into the Dark Challenge if you have not yet beaten it.
COPPER MILL BRIDGE BASE CAMP: Later in the game you will return to this area and discover a new base camp called Copper Mill Bridge. There are several collectibles in this area: a document (25/26), a strongbox (13/14), an Archivist Map (9/9), and a survival cache (19/21), as well as the last mural (12/12). They are marked on the level map but are not counted in the totals at the top of the page. Details are included in the Copper Mill Bridge walkthrough.
The separate SOVIET INSTALLATION COLLECTIBLES GUIDES can also help locate any major items.
†UPDATE HISTORY: 12/23/15 - First draft of walkthrough posted online.
12/27/15 - Corrected the location of the 17th relic, which I had mis-remembered as being unavailable until later in the game. It can, in fact, be obtained on the first pass through the level.
1/30/16 - Added PC keyboard controls. Also reordered a few collectibles in other parts of the Soviet Installation, resulting in a few items in this area being renumbered as well.
2/7/16 - Several changes today:
· Amended the item count at the top of the page and the last paragraph of the section on "Revisiting This Level." The totals for the Soviet Installation have not changed, just the sections of the walkthrough where they are counted. Items found in the Copper Mill Bridge area are now included in the separate Copper Mill Bridge walkthrough. They are still shown on the main Copper Mill map.
· Added info on the rope barrier in the ceiling of the room with the 17th relic, thanks to Richard S. and Maxxaureate.
· Added the 15th survival cache, which was included on the map but mistakenly left out of the text. This resulted in the renumbering of the subsequent caches in this walkthrough and the Installation Vista.
4/24/15 - Added the poison arrow strategy for the shielded solders. (Doh!) Also added more screenshots for that section and renumbered most of the other screenshots in this level. Added Quick Collectibles Guides, renumbered a few items in the process, and revised the level maps accordingly.
6/25/16 - Added pickup near the rope-wrapped post in the Red Mine Challenge Tomb, thanks to a tip from the eagle-eyed Robin W.
10/11/16 - Added PS4 controls.
3/10/18 - Added a separate detail map for the areas covered in the Copper Mill Bridge walkthrough. The new map is now linked from that walkthrough. These items are no longer included in the Copper Mill detail map. Thanks to Mark P. for suggesting this clarification.
WAS THIS WALKTHROUGH HELPFUL? If not, I apologize and invite you to contact me with any questions. If you need help right away, I recommend the r/TombRaider subreddit. Other fan-run forums are listed at tombraiders.net/stella/community.html. If this site was useful, please consider supporting it financially or in other ways. For details, visit tombraiders.net/stella/support.html. As always, I welcome your corrections/suggestions. Thank you!
Copyright © 2015 - Stellalune (). All rights reserved. Feel free to copy or print this walkthrough for personal use. By all means, share it with friends, but please include this credit line so people can send me their feedback. No part of this walkthrough may be reproduced on another site without permission. As an Amazon Associate I earn from qualifying purchases. Follow this link for details about this site's advertising and privacy policy.
Stella's Tomb Raider Site: tombraiders.net.