Rise of the Tomb Raider - Path of the Deathless Collectibles
Updated: 6/19/16(†)
This guide, along with the annotated level map, should help when revisiting this level. If you are playing through for the first time, you may want to follow the main walkthrough instead. Weapons, Equipment, and Outfits are covered separately.
Relic · Documents · Archivist Map · Enemy of My Enemy Challenge
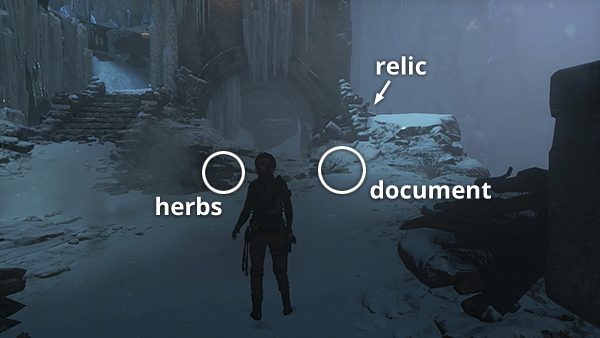
RELIC 1
The first and only relic in this level is just beyond the gate that opens after the last combat sequence. Instead of going up the stairs to the left toward the level exit, move up the slope on the right to find the relic lying on the ground near a corpse. If you missed it the first time, return to the Icy Bluff Base Camp and make your way back here as described in the final section of the main walkthrough. (Click screenshot to enlarge.)
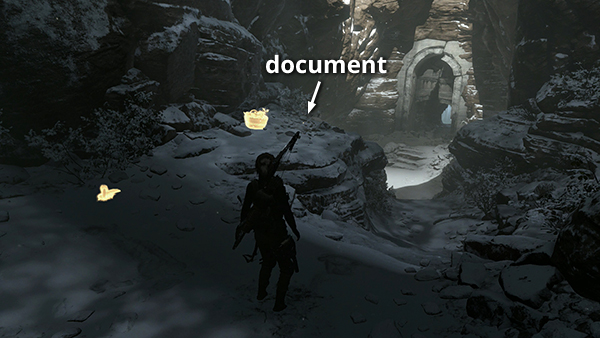
DOCUMENT 1
The first document is on a rocky ledge on the left side of the path as you enter the level. If you missed it the first time, you'll need to fast travel back to the Solemn Crevasse Base Camp in THE ORRERY and retrace your path to this point. You won't need to climb the moving machinery this time, though, since the door to the upper level of the orrery is now open. See the last section of the main PATH OF THE DEATHLESS walkthrough for details. (Click screenshot to enlarge.)
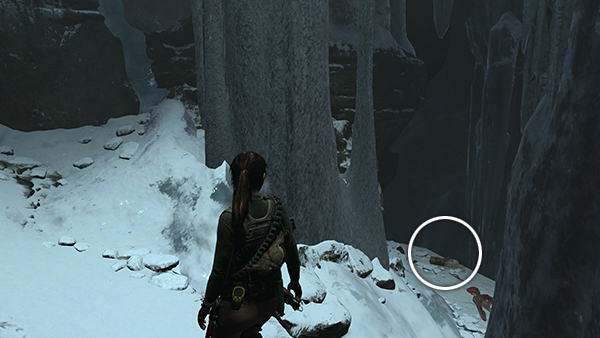
DOCUMENT 2
This document is between the two base camps. As you play through the story, just after Lara sees the Deathless army marching across the bridges, you enter a narrow canyon. The document is on the right, sitting on a ledge near a frozen corpse. To retrieve the document later, fast travel to the Icy Bluff Base Camp and follow the path up the hill to the west. Drop down off the ledge and look for the document on the left. (screenshot) (Click screenshot to enlarge.)
DOCUMENT 3
This document is is beyond the gate that opens when you complete the last combat sequence. The document is just ahead on the right, near the level's only relic. If you missed it the first time, return to the Icy Bluff Base Camp and make your way back here as described in the final section of the main walkthrough. (Click screenshot to enlarge.)
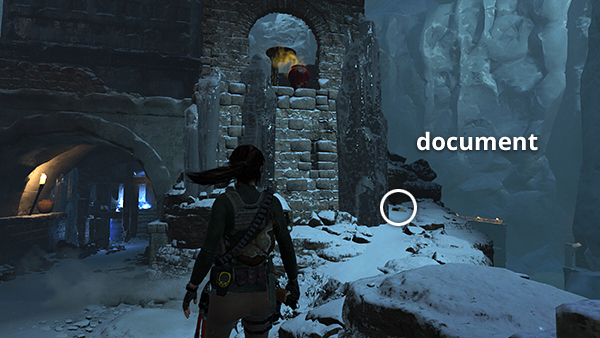
DOCUMENT 4
The last document near the third. Just before climbing the stairs to the level exit, turn around to face the gate leading back to the previous area. The document is on the right side of the building near the cliff's edge. To get it later, fast travel to the Icy Bluff Base Camp and make your way back here as described in the final section of the main walkthrough. (Click screenshot to enlarge.)
ARCHIVIST MAP
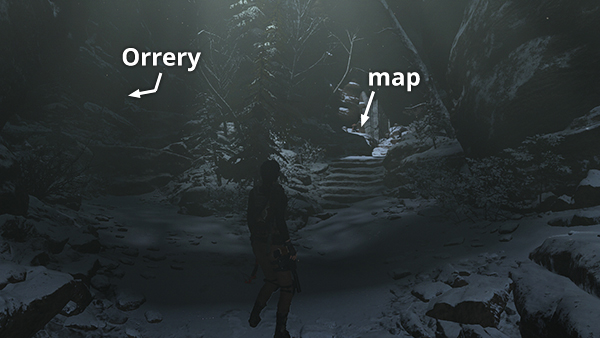
The map is at the very beginning of the level, just after you leave THE ORRERY. At the top of the stairs leading down to the huge, stone archway, turn around and you'll see a staircase leading up to the west. The map is spread out on the rocks at the top of the stairs. To retrieve it later, fast travel back to the Solemn Crevasse Base Camp in THE ORRERY and retrace your path to this point as described in the last section of the main PATH OF THE DEATHLESS walkthrough. (Click screenshot to enlarge.)
ENEMY OF MY ENEMY
This challenge requires you to light 6 signal braziers, all of which can be found in the northern part of the level where you fight the Deathless Ones. These braziers are shown below and marked with red dots on the annotated level map. To light them, shoot the nearby Greek fire urns. The main walkthrough includes more screenshots.
If you missed any of the braziers on your first playthrough, return to the Icy Bluff Base Camp and make your way back here as described in the final section of the main walkthrough.
BRAZIER 1
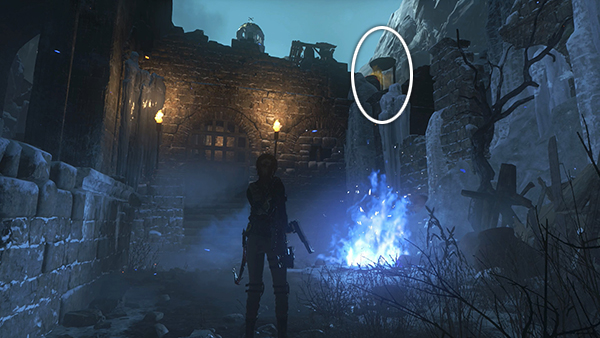
The first two braziers are in the area where you first fight the Deathless after sliding down from the Icy Bluff Base Camp. This one is on top of the wall in the northeast corner, to the right of the exit gate. (Click screenshot to enlarge.)
BRAZIER 2
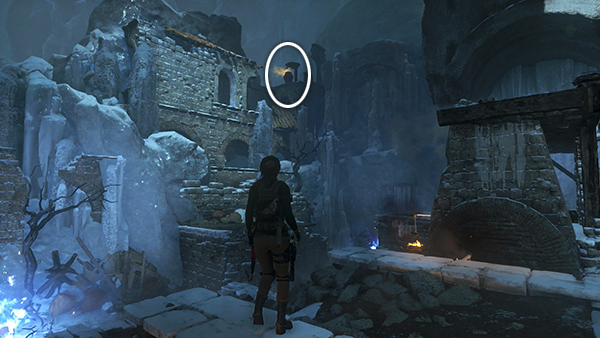
The other brazier in the same area is high in the southeast corner. (Click screenshot to enlarge.)
BRAZIER 3
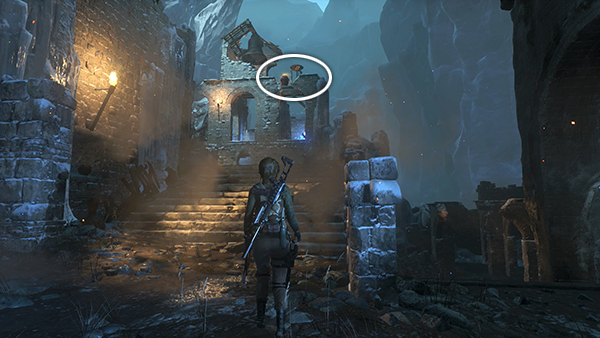
The next brazier is at the top of the stairs connecting the upper and lower areas where you fight the Deathless warriors. It's next to the huge bell above the room where a pair of archers spawns. (Click screenshot to enlarge.)
BRAZIER 4
This brazier is in the southwest corner of the final combat area, where the archers rain Greek fire down upon Lara. Climb onto one of the ledges and pull down the rope-wrapped barrier (screenshot) to reveal the brazier and Greek fire vessel behind it. (Click screenshot to enlarge.)
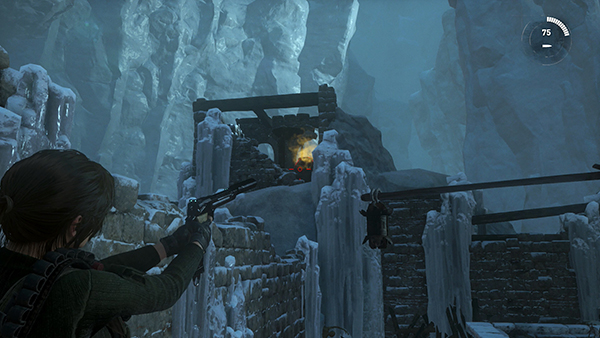
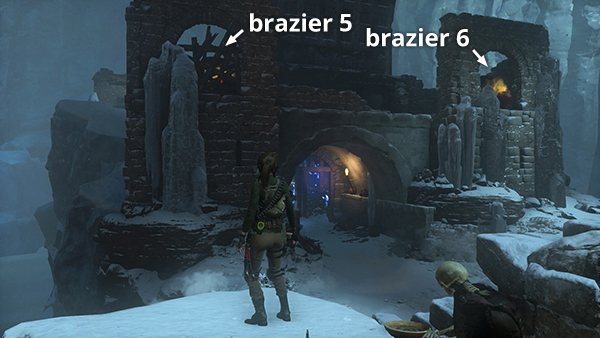
BRAZIERS 5 & 6
The last two braziers are beyond the gate connecting the combat area and the snowy area with the stairs leading up to the level exit. After passing through the gate, turn around. The braziers are above the gate on either side. In order to light #5, you'll first need to shoot out the impact barrier in front of it. (Click screenshot to enlarge.)
Top of Page | Walkthrough | Collectible Guides | Main ROTTR Page
†UPDATE HISTORY: 6/19/16 - Page first posted online.
WAS THIS WALKTHROUGH HELPFUL? If not, I apologize and invite you to contact me with any questions. If you need help right away, I recommend the r/TombRaider subreddit. Other fan-run forums are listed at tombraiders.net/stella/community.html. If this site was useful, please consider supporting it financially or in other ways. For details, visit tombraiders.net/stella/support.html. As always, I welcome your corrections/suggestions. Thank you!
Copyright © 2015 - Stellalune (). All rights reserved. Feel free to copy or print this walkthrough for personal use. By all means, share it with friends, but please include this credit line so people can send me their feedback. No part of this walkthrough may be reproduced on another site without permission. As an Amazon Associate I earn from qualifying purchases. Follow this link for details about this site's advertising and privacy policy.
Stella's Tomb Raider Site: tombraiders.net.