Rise of the Tomb Raider - Lost City Archivist Maps, Explorer Satchels & Survival Caches
Updated: 7/4/16(†)
Archivist Maps and Explorer Satchels are not required for 100% completion, but they can help you find documents, relics, and survival caches. This guide, along with the annotated level maps linked below, should help find any maps or satchels you missed, as well as all 6 survival caches. If you are playing this level for the first time, you may want to follow the main walkthrough instead.
Weapons, Equipment, and Outfits are covered elsewhere. Other collectibles are detailed on separate pages:
Relics · Documents · Murals · Monoliths · Coin Caches · Archivist Maps · Explorer Satchels · Survival Caches · Codices · Crypt Treasures · Challenges
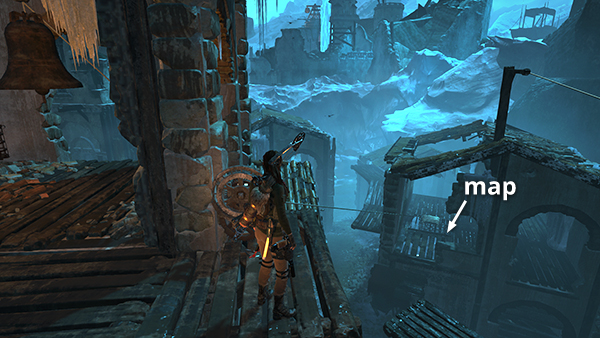
ARCHIVIST MAP 1
This map is in a secret room beneath the floor of one of the ruined buildings on the east side of the city. Climb the bell tower near the building with the second mural. Then use the crank along with a rope arrow to open the trapdoor in the next building so you can reach the map. See the walkthrough and level map for details. (Click screenshot to enlarge.)
ARCHIVIST MAP 2
This map is in the Chamber of Exorcism Challenge Tomb area. You may want to follow the walkthrough the first time, but if you've already raided the tomb, return to the Geothermal Cavern Base Camp, dive into the nearby pool, and swim down through the underwater tunnel on the right. The map is sitting on the floor in the next room. (screenshot) (Click screenshot to enlarge.)
ARCHIVIST MAP 3
This map is in the northern section of the city. Just before you use the golden bucket to break the ice and climb up to the second trebuchet, scramble up the wall on the left to find the map. If you missed it, you can get back to the trebuchet from the Citadel Plaza Base Camp. If you pulled down the rope barrier from the other side, you can take the shortcut shown here. Otherwise, follow the Part 2 walkthrough. (Click screenshot to enlarge.)
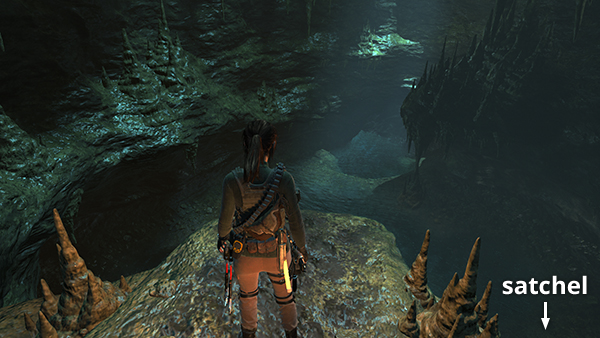
EXPLORER SATCHEL 1
The first satchel is on the way to Chamber of Exorcism Challenge Tomb. It marks the locations of caches 3-5 on your in-game map. If you're coming from the bear's den, it's below on the right as you enter the large cavern with the pool. If you're backtracking from the Geothermal Cavern Base Camp, it will be on the far side of the pool at water level. (screenshot) See the walkthrough and map for details. (Click screenshot to enlarge.)
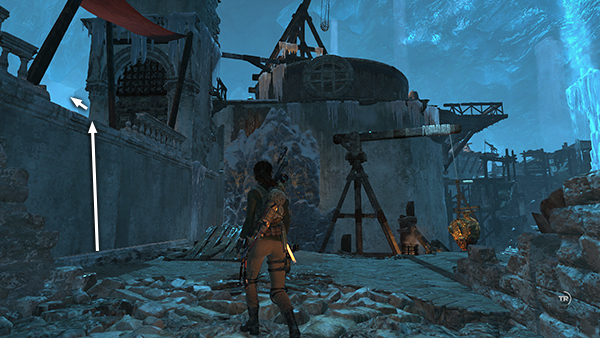
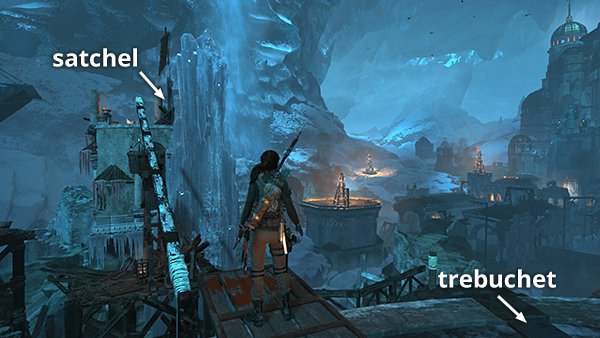
EXPLORER SATCHEL 2
The other satchel is near the third trebuchet. While you're freeing the machine from the ice, you'll climb up to a tower with a large, wooden bucket. The satchel is behind some debris near this bucket. If you missed it, return to the Citadel Plaza Base Camp and retrace the route in the Part 2 walkthrough to get back to the second trebuchet, then the third. Get the satchel and then return across the rooftops to the base camp. This satchel adds the locations of caches 1, 2, and 6 to your in-game map. (Click screenshot to enlarge.)

SURVIVAL CACHE 1
The first cache is buried on the south side of the building where you land after sliding down the zip lines from the Threshold of Kitezh Base Camp. The building is labeled A, and the cache is marked on the annotated level map. (Click screenshot to enlarge.)
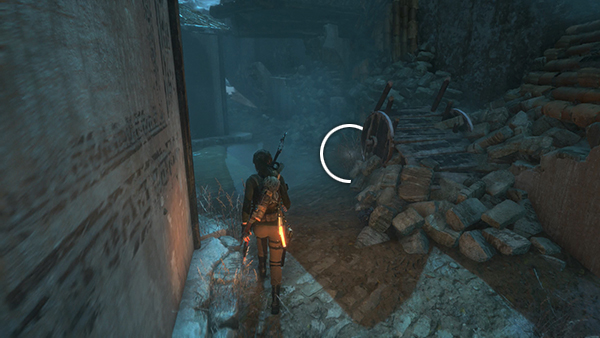
SURVIVAL CACHE 2
This cache is buried near the eastern city wall, about halfway between the building with mural #2 and the Challenge Tomb entrance. It's near a broken down wooden wagon. Here Lara is approaching from the south. (Click screenshot to enlarge.)
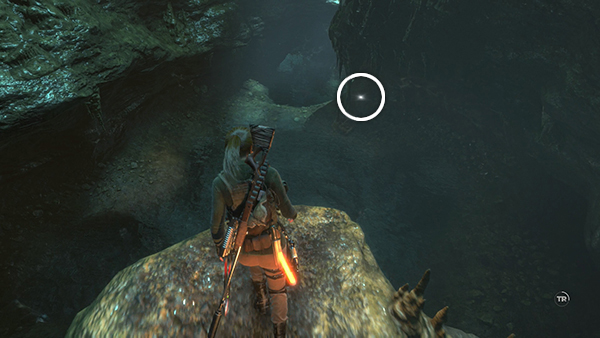
SURVIVAL CACHE 3
The next 3 caches are in the Chamber of Exorcism Challenge Tomb. This one is in the large cavern with the pool. If you're coming from the bear's den, it's on the right bank where the cavern narrows and the water becomes shallow. If you're backtracking from the Geothermal Cavern Base Camp, it will then be on your left. Follow the walkthrough for more detail. (Click screenshot to enlarge.)
SURVIVAL CACHE 4
This cache is buried in the corner right next to the Geothermal Cavern Base Camp on the way to the Chamber of Exorcism Challenge Tomb. (Click screenshot to enlarge.)
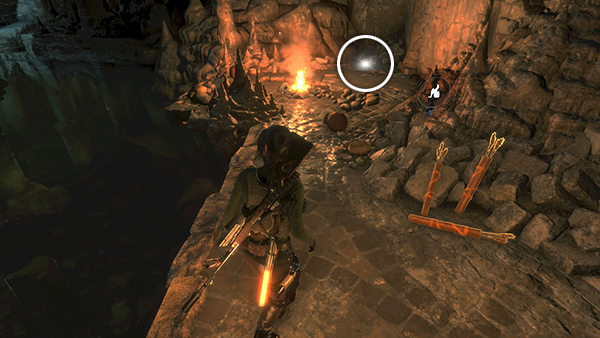
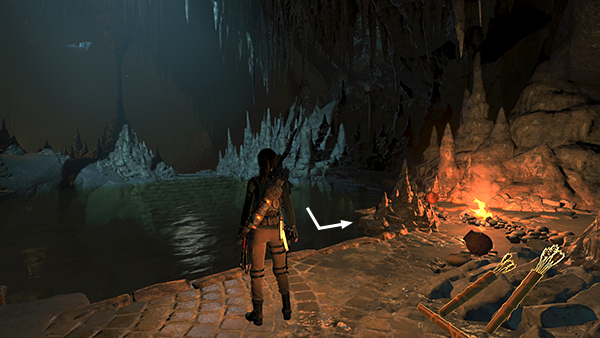
SURVIVAL CACHE 5
This cache is also in the Chamber of Exorcism Challenge Tomb. From the Geothermal Cavern Base Camp, dive into the nearby pool, and swim down through the underwater tunnel on the right. The cache is buried just ahead as you enter the little side room with the Archivist Map. (screenshot) (Click screenshot to enlarge.)
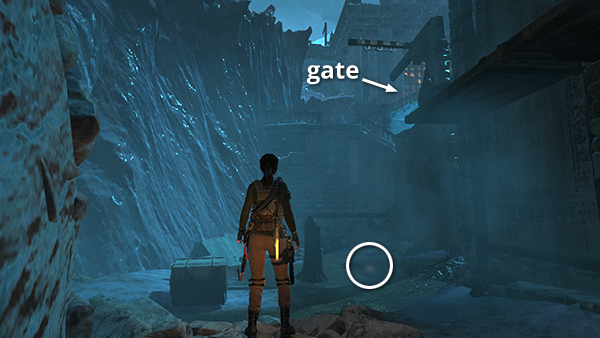
SURVIVAL CACHE 6
The last cache is buried near the western city wall just south of the first gate. There's a stump with poison mushrooms and a puddle of oil nearby. (Click screenshot to enlarge.)
Top of Page | Collectible Guides | Main ROTTR Page
†UPDATE HISTORY: 7/4/16 - Page first posted online.
WAS THIS WALKTHROUGH HELPFUL? If not, I apologize and invite you to contact me with any questions. If you need help right away, I recommend the r/TombRaider subreddit. Other fan-run forums are listed at tombraiders.net/stella/community.html. If this site was useful, please consider supporting it financially or in other ways. For details, visit tombraiders.net/stella/support.html. As always, I welcome your corrections/suggestions. Thank you!
Copyright © 2015 - Stellalune (). All rights reserved. Feel free to copy or print this walkthrough for personal use. By all means, share it with friends, but please include this credit line so people can send me their feedback. No part of this walkthrough may be reproduced on another site without permission. As an Amazon Associate I earn from qualifying purchases. Follow this link for details about this site's advertising and privacy policy.
Stella's Tomb Raider Site: tombraiders.net.