Lost City of Tinnos - Room with Switches and Hinged Ledges (part 3)
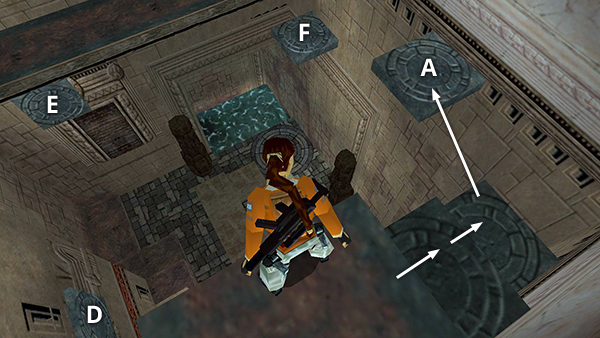
Moving switch #2 into the up position (as shown in part 2) raised ledge A (under the ledge with the two statues) and also collapsed ledges B and C (below where Lara is standing and not visible in the screenshot above). This is OK since you don't need them anymore. Go down the two steps on the right and take a standing jump to ledge A.
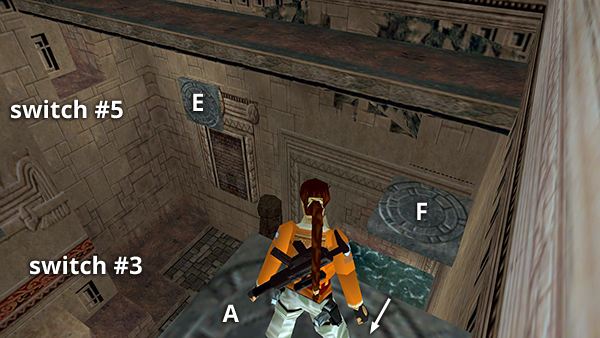
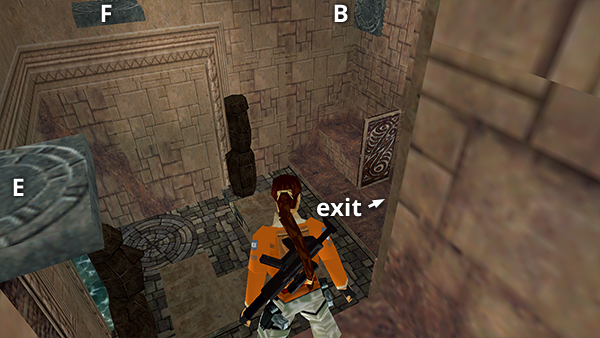
Next, you need to make your way over to switch #5. To get there from ledge A, walk to the edge nearest the long walkway spanning the room. Take one step back from the edge.
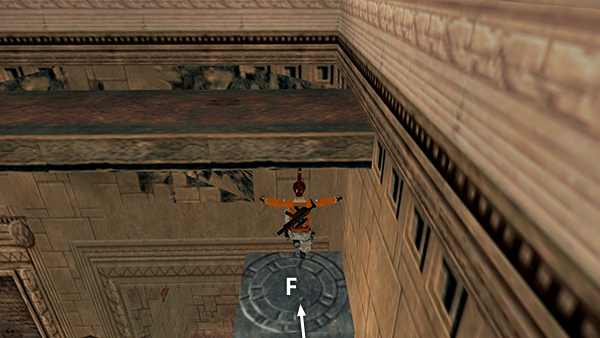
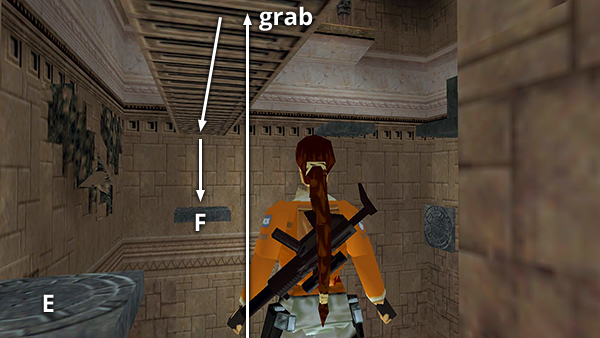
Then take a standing jump forward to land on ledge F (under the walkway).
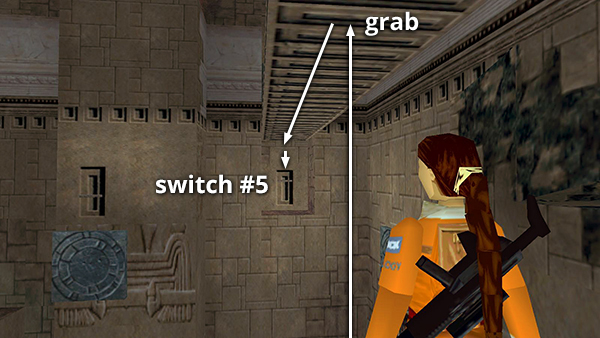
Jump up to grab the handholds on the underside of the walkway. Monkey swing across to the alcove ahead and throw switch #5 to open the big double doors and raise ledge E, just outside the alcove where you're now standing.
Jump up to grab the handholds on the underside of the walkway. Monkey swing across to the alcove ahead and throw switch #5 to open the big double doors and raise ledge E, just outside the alcove where you're now standing.
NOTE: At this point you could proceed to switch #6 (in the alcove above switch #5) and go for the final secret, but I recommend completing the next room first.
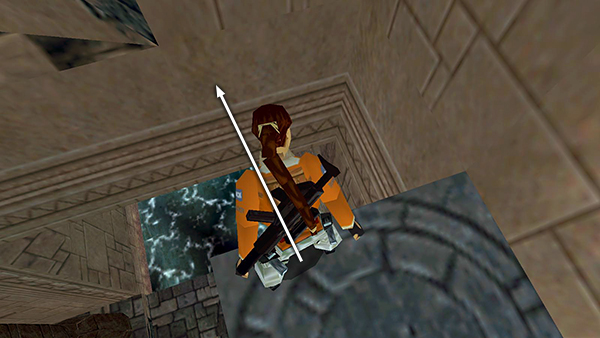
Ignore ledge E for now. Instead jump straight up to grab the handholds beneath the walkway, and monkey swing back across the room to ledge F.
Turn left to face the cracked wall containing the wasp hive. Then take a standing jump with Action...
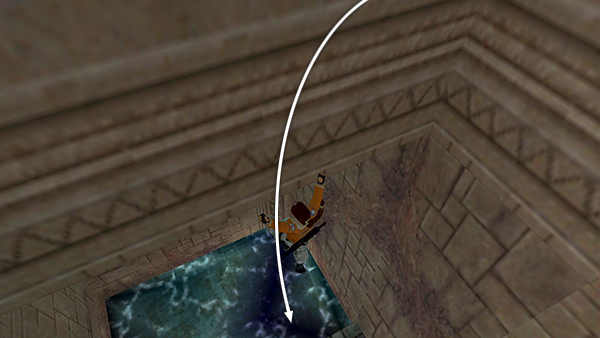
...to land safely in the small pool below.
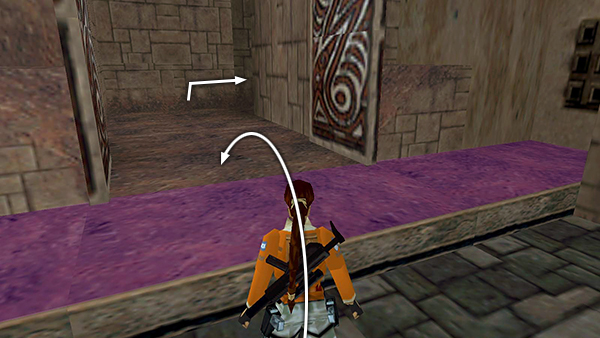
Climb out of the water and approach the open double doors. If you didn't trigger the wasp swarm earlier and don't want to, make sure you jump over the long, reddish ledge in front of the doors (shaded purple in the screenshot above) to avoid doing so. Follow the hallway to the next room.
Copyright © 1998- - Stellalune (
). All rights reserved. The screenshots and videos included here were made using Fraps and the classic Tomb Raider widescreen patch by Mr. Fourblack. Feel free to copy or print this walkthrough for personal use. By all means, share it with friends, but please include this credit line so people can send me their feedback. No part of this walkthrough may be reproduced on another site without permission. As an Amazon Associate I earn from qualifying purchases. Follow this link for details about this site's advertising and privacy policy.