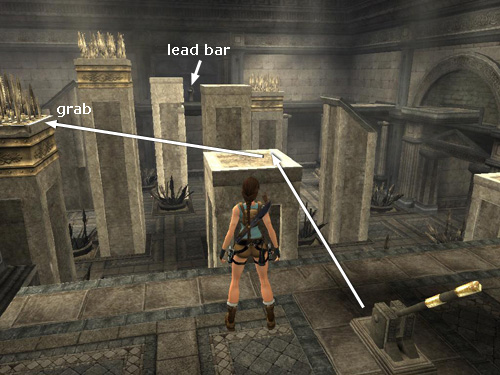
Pull the lever again to raise the pillars and trigger CHECKPOINT 6. This time you're headed all the way across the room to the alcove on the opposite wall. The first part of this sequence is identical to the path to the relic: First, take a running jump to land on the right side of the first flat-topped pillar. It starts to descend immediately, so turn left and take a running jump to grab the top edge of the spiked pillar.
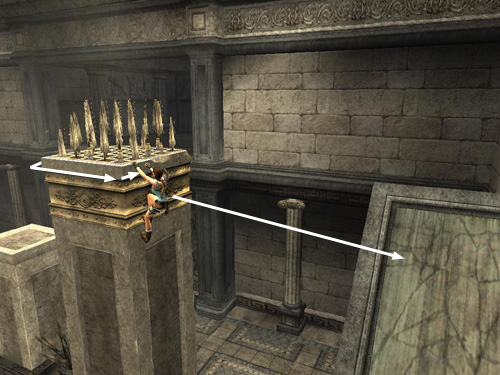
Do not try and pull up. Instead, climb around to the other side of the pillar and on to the right as far as you can. There's no need to hurry since the spiked pillar won't start sinking yet. Jump back to land on the sloping pillar near the wall.
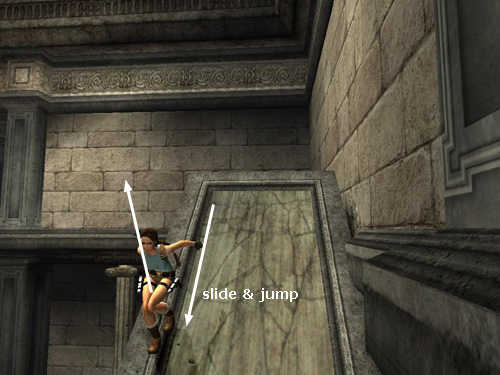
Slide just a little and jump . . .

. . . to grab the protruding ledge. It begins to retract as soon as Lara grabs it, so quickly pull up.
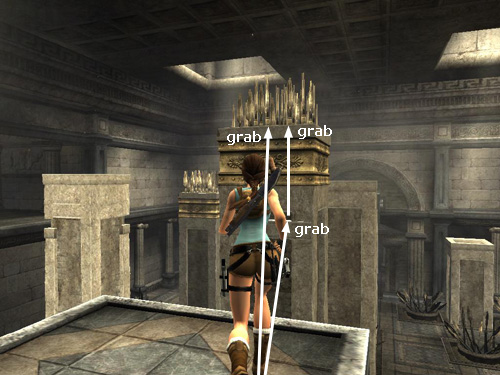
Turn right and take a running jump to grab the spiked pillar ahead. Lara may grab the top of the pillar but if she misses and grabs the horizontal crevice partway down, just jump up to grab the top.
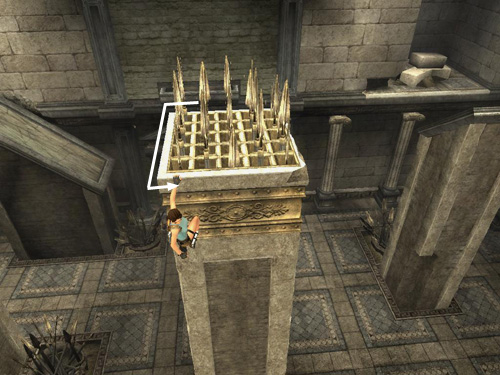
While hanging from the spiked pillar you can take your time. It won't retract yet. Climb to the right around one corner then the next. Do not go all the way to the next corner. Instead, position Lara near the left side of the pillar and jump back . . .
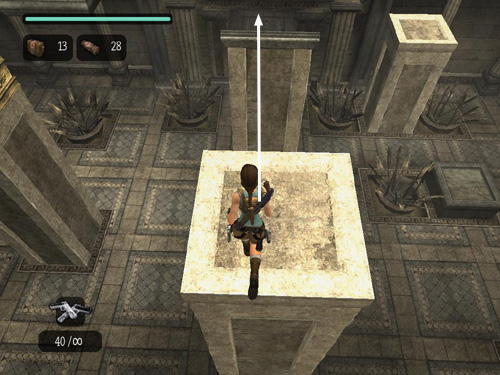
. . . to land on the flat-topped pillar behind. It starts to descend, so tap the HUD key to center the camera behind Lara. Then immediately run forward and jump at the edge to land on the sloping pillar ahead.
[Part 2 | Return to the Midas's Palace Walkthrough]
Copyright © 2007- Stellalune (). All rights reserved. The TRA screenshots included here were made using Fraps. Feel free to copy or print this walkthrough for personal use. By all means, share it with friends, but please include this credit line so people can send me their feedback. No part of this walkthrough may be reproduced on another site without permission. As an Amazon Associate I earn from qualifying purchases. Follow this link for details about this site's advertising and privacy policy.
|