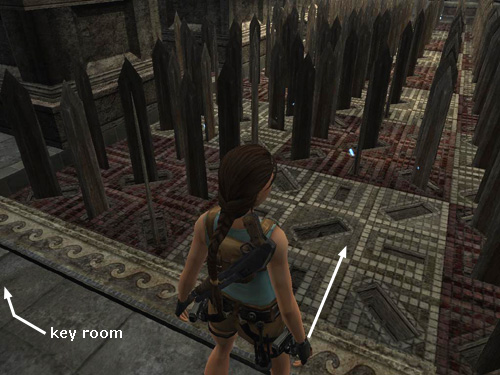
St. Francis Folly - Sword Trap
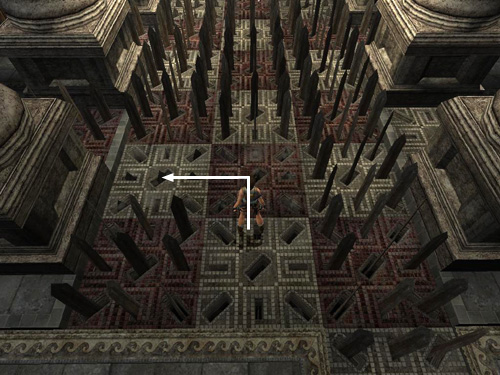
General tips: Take a few moments to observe the pattern the swords follow when extending and retracting. Stand facing the nearest white square. Then make your way carefully through the swords as they retract. Walking through the trap may help. The camera goes a little wonky here, so you need to be especially careful with Lara's movements. As you go, try stay near the middle of each square because even brushing against the swords in the next square can injure Lara, throw her off balance and prevent you from moving to the next safe square quickly enough. Now the actual moves:
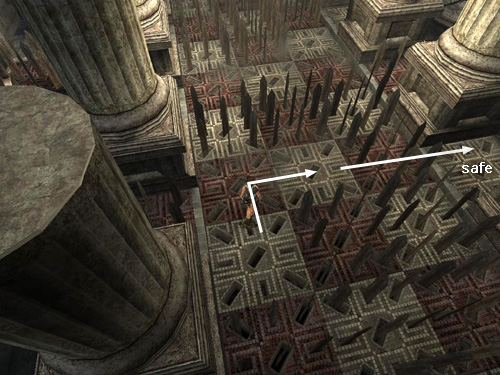
You should now be facing the next red square and one of the support columns. The red square Lara was just standing on should be behind you. As soon as the swords on the two squares ahead retract, run across the red one onto the slightly raised white square between the two columns. This square is safe. No swords pop up. Be careful not to run on into one of the falling swords in the open area near the exit. [Return to the St. Francis Folly Walkthrough] Copyright © 2007- Stellalune (). All rights reserved. The TRA screenshots included here were made using Fraps. Feel free to copy or print this walkthrough for personal use. By all means, share it with friends, but please include this credit line so people can send me their feedback. No part of this walkthrough may be reproduced on another site without permission. As an Amazon Associate I earn from qualifying purchases. Follow this link for details about this site's advertising and privacy policy. |