Temple Ruins - Path to First Ganesha Key (part 3)
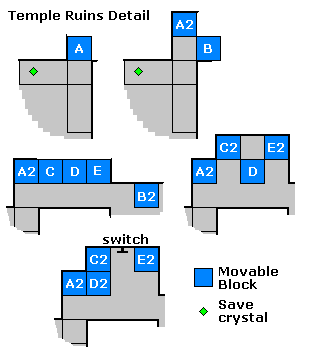
This page covers the "MOVABLE BLOCK PUZZLE" section in the main walkthrough. The sequence is shown in this series of screenshots and in the diagram above.
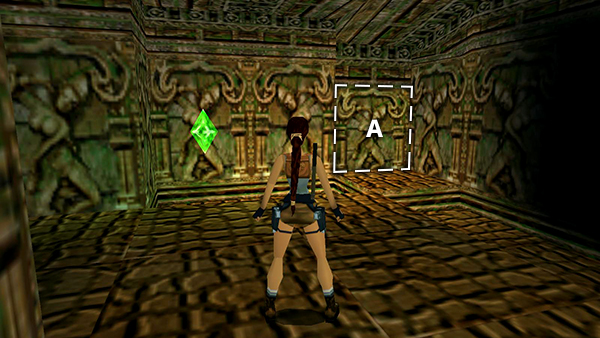
Locate the first movable block (A) in the corner to the right of the crystal.
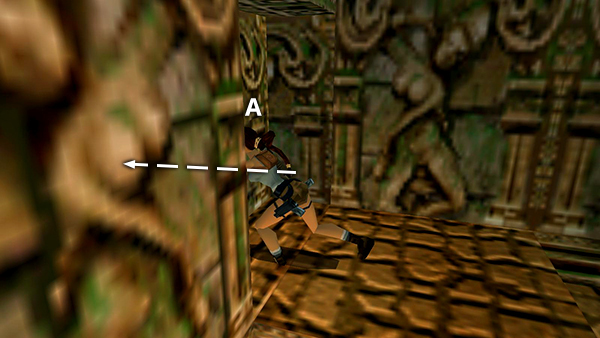
Push it once (to A2).
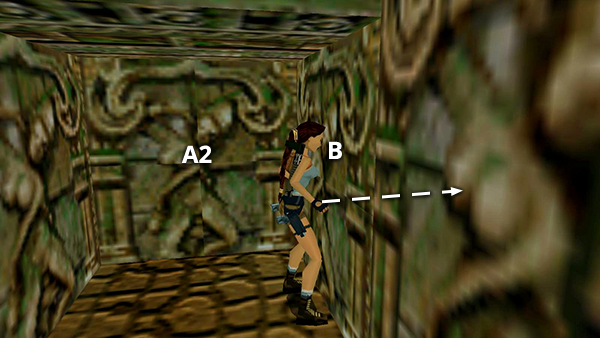
Turn right to face another movable block (B). Push this second block four times...
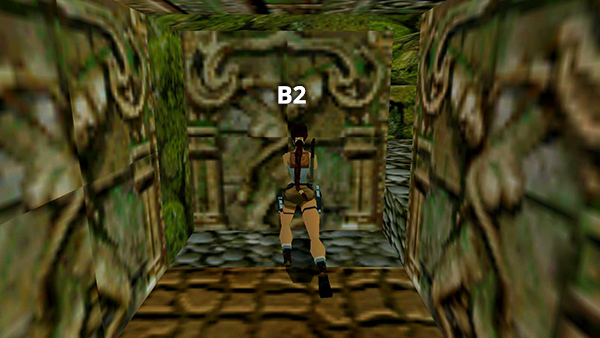
...into the next room (to B2).
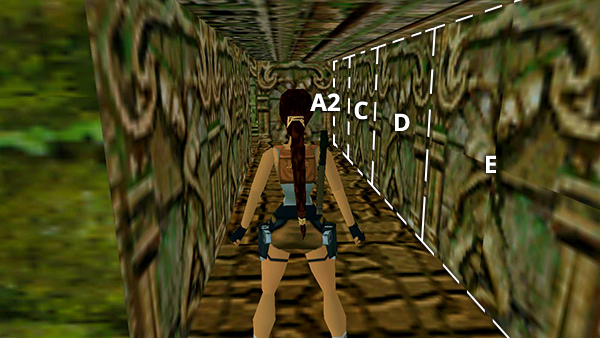
Turn around and go back into the passageway. There are three more movable blocks (C-E) next to the first block you pushed.
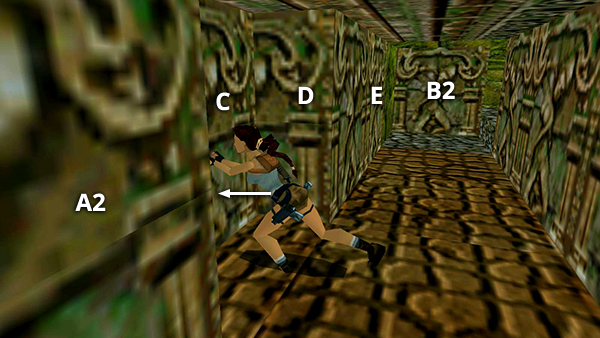
Push the second from left (C)...
...and the rightmost block (E) once each (to C2 and E2).
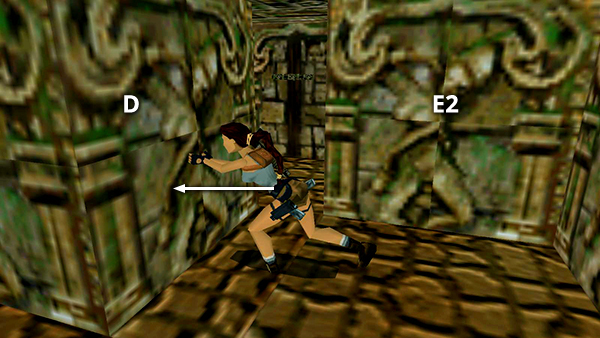
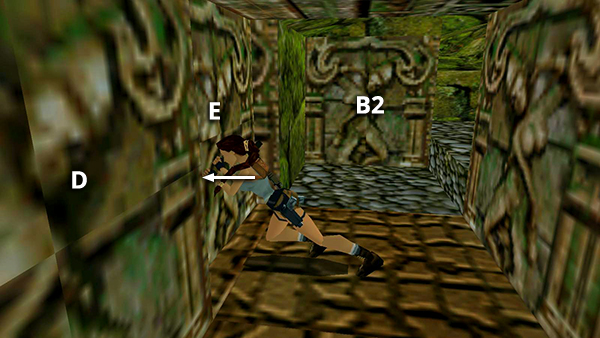
Push the middle block (D) to either side.
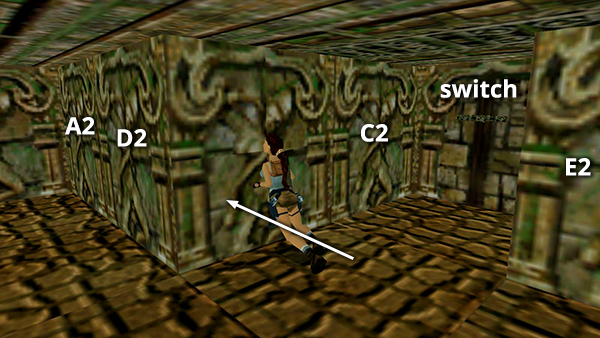
Here I've pushed it to the left so it ends up at D2, between blocks A and C. Doing so reveals a switch. Use it to fill the pool back in the ROOM WITH THE EMPTY POOL AND LEVER, where you saw the FIRST GANESHA KEY.
Copyright © 1998- - Stellalune ( ). All rights reserved. Feel free to copy or print this walkthrough for personal use. By all means, share it with friends, but please include this credit line so people can send me their feedback. No part of this walkthrough may be reproduced on another site without permission. Follow this link for details about this site's advertising and privacy policy.