The 13th Floor - More Ducts and Room with Fishbone Ladder
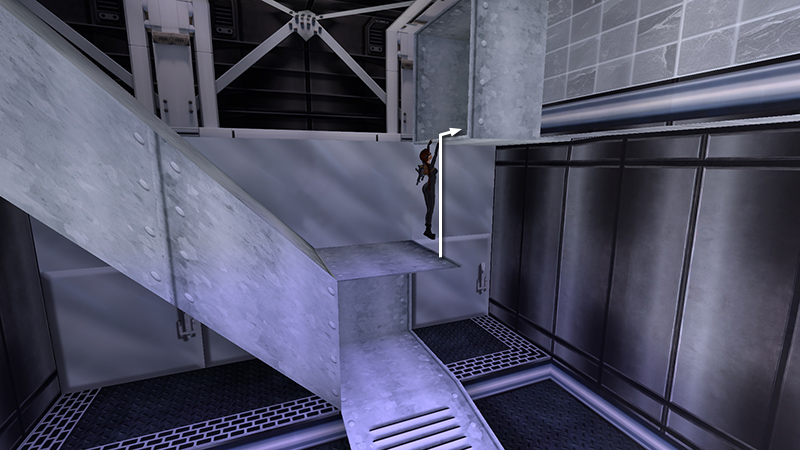
After collapsing the duct and sliding into the room with the armored soldier (and either killing him or not), as shown in the previous section, you'll need to climb out of here. Naturally, if the soldier is still alive, you'll want to do this quietly. No running or gunfire! Climb on top of the broken duct. Turn around and jump straight up to grab the edge of the opening where the duct separated. Pull up.
Just ahead is a hole in the floor leading to the next area.
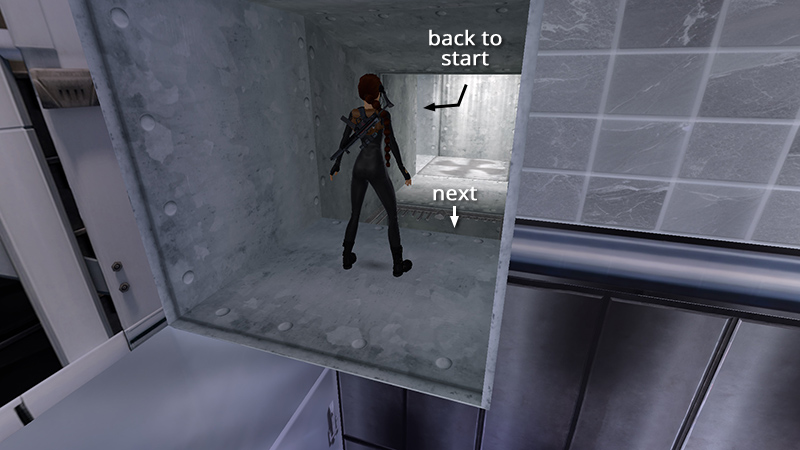
NOTE: Once you drop down here, you will not be able to return. So, if you missed secret #1, or any of the earlier pickups, you can jump over this hole, grab the opposite edge, pull up, and follow the duct back to the starting area. When you're ready to move on, return here and drop through the hole.
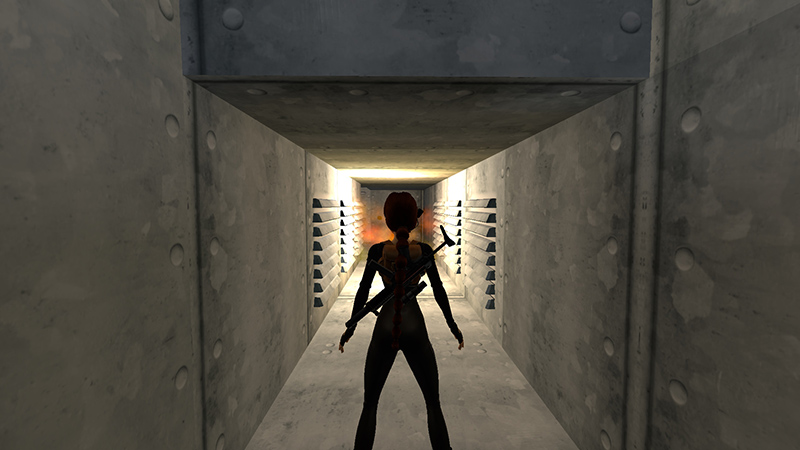
Shortly after you drop through the hole, loud explosions rock the duct with the slats just ahead. These repeat every few seconds.
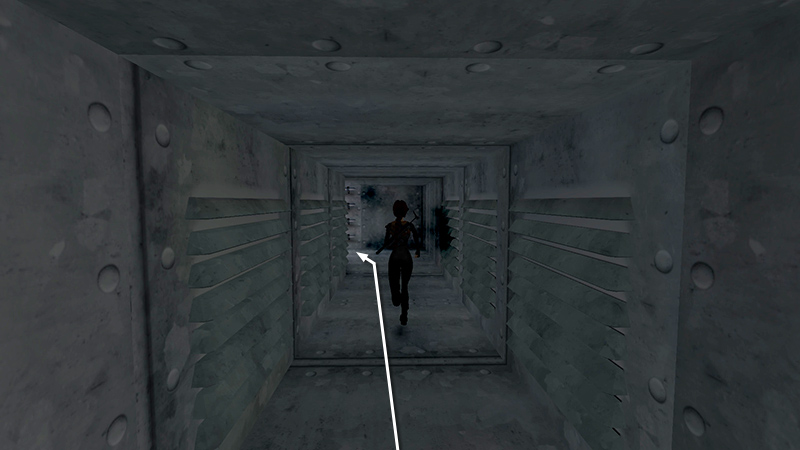
Wait for the pause between three explosions before running forward, so Lara doesn't catch fire.
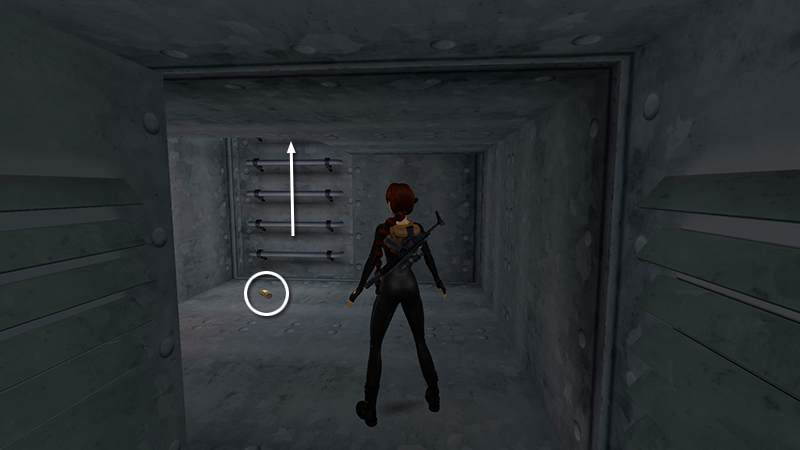
In the next small room, pick up a small medipack (8) (181/239) you glimpsed through the grate earlier. Then climb the rungs...
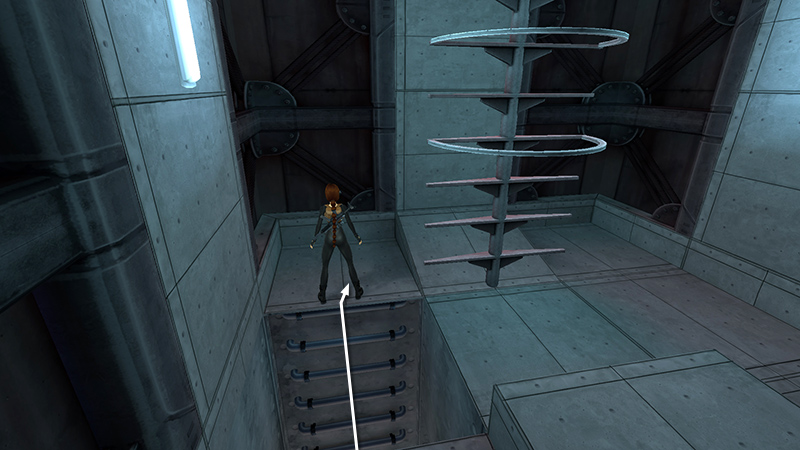
...into the ROOM WITH THE FISHBONE LADDER. The grate that was here has now disappeared.
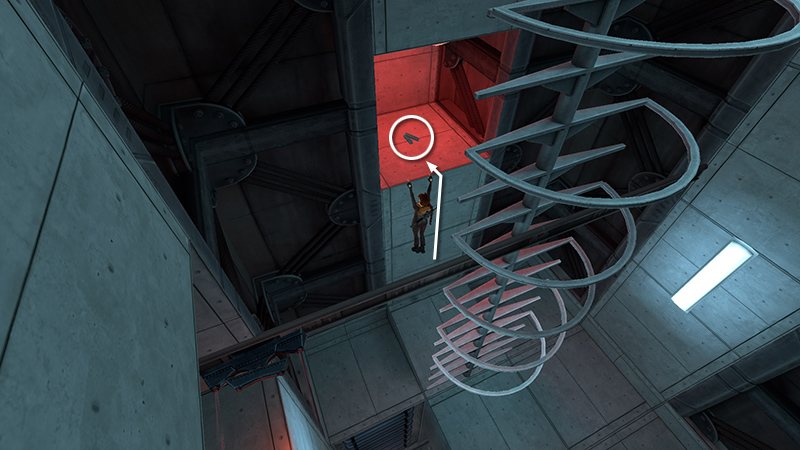
Before climbing the ladder, pull up into the red-lit alcove behind it to get some HK ammo (9) (182/239).
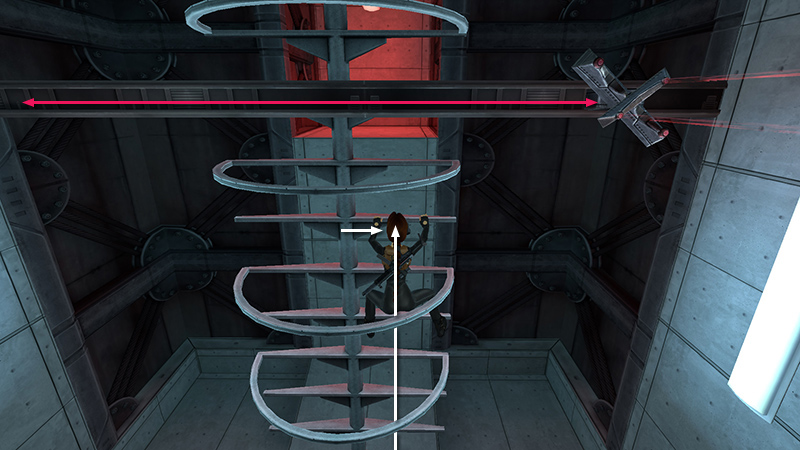
Drop down and go around to the front of the fishbone ladder. Grab onto the ladder and climb to just below the moving laser array. Position Lara's hands two rungs below the laser's metal track, and she'll be safe. Climb to the right a bit. (This will buy you a little more time to get past the lasers.)
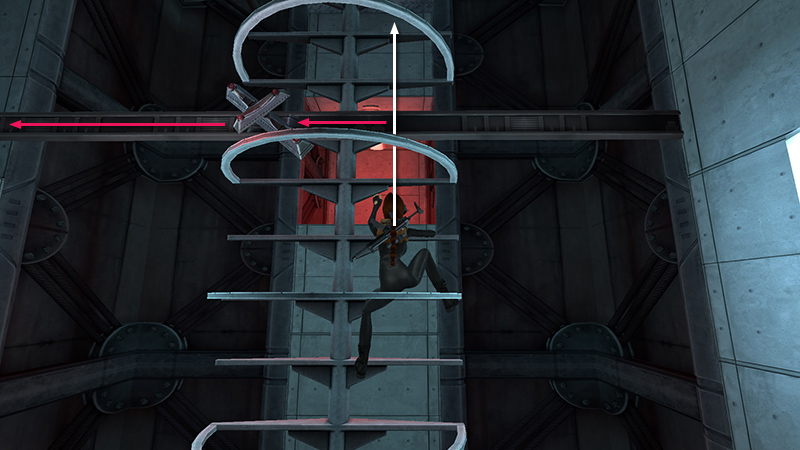
Then, when the lasers move off to the left, climb up past them.
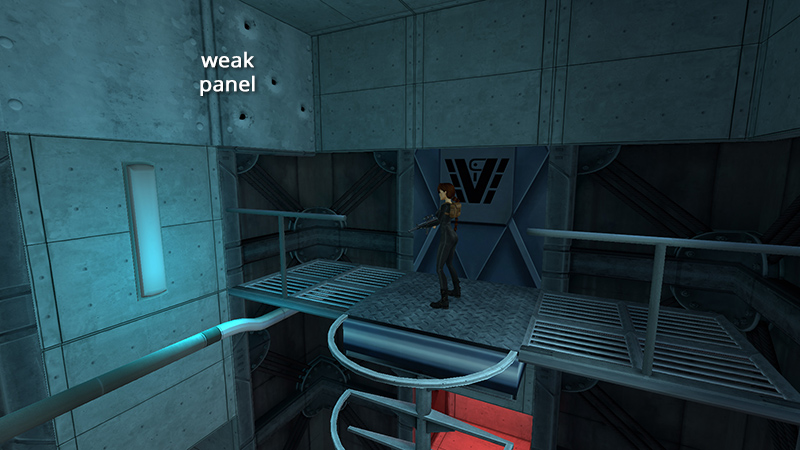
At the top, use the scope to target the hole-riddled panel on the left.
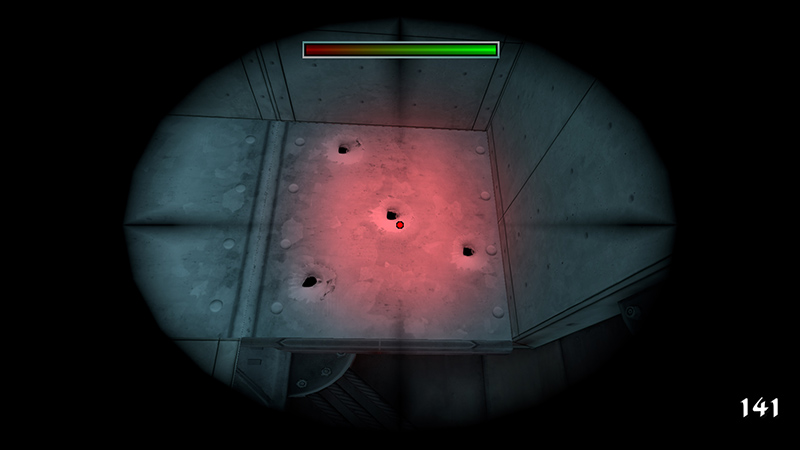
Shatter it with one bullet.
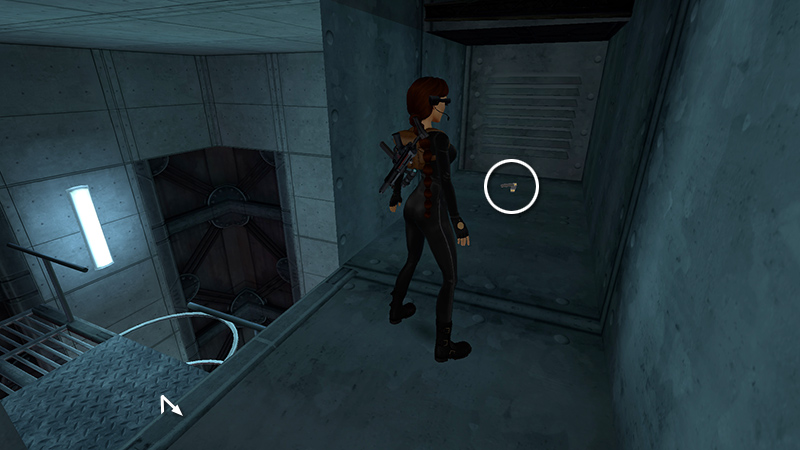
Pull up into the duct and pick up more HK ammo (10) (183/239) on the left.

As you approach to the other end of the duct, dramatic music signals enemy activity ahead. Stop here and quick-save.
DARK MODE: I plan to add optional dark mode for these pages, but my current priority is updating the walkthroughs. Meanwhile, may I suggest a reputable dark mode browser extension, such as Dark Reader? (Download only from trusted sites, like darkreader.org or your browser's official add-on/extension site.)
Walkthrough text and diagrams copyright © Stellalune (email ). Feel free to copy or print this walkthrough for personal use. By all means, share it with friends, but please include this credit line so people can send me their feedback. No part of this walkthrough may be reproduced on another site without permission.