The Strahov Fortress - Loading Bay with Movable Crates
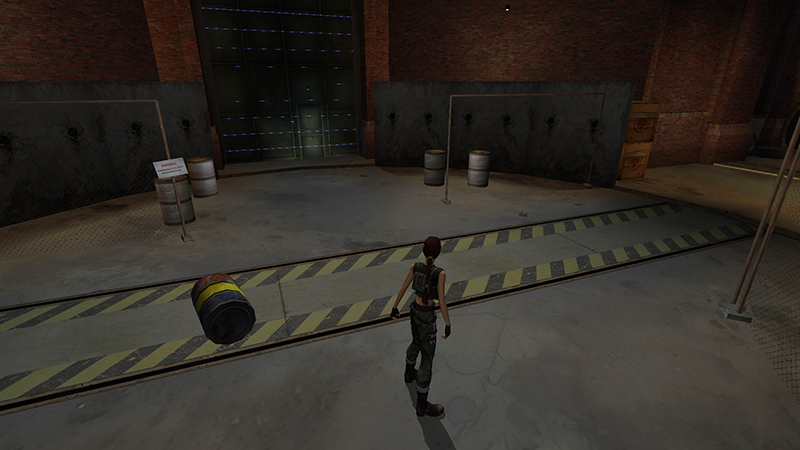
The next area, beyond the two WAREHOUSES, contains what looks like a turntable for an indoor rail system. Crates, barrels, and other debris are strewn about. Four wide passages radiate out from this hub. To the left is an electrified door.
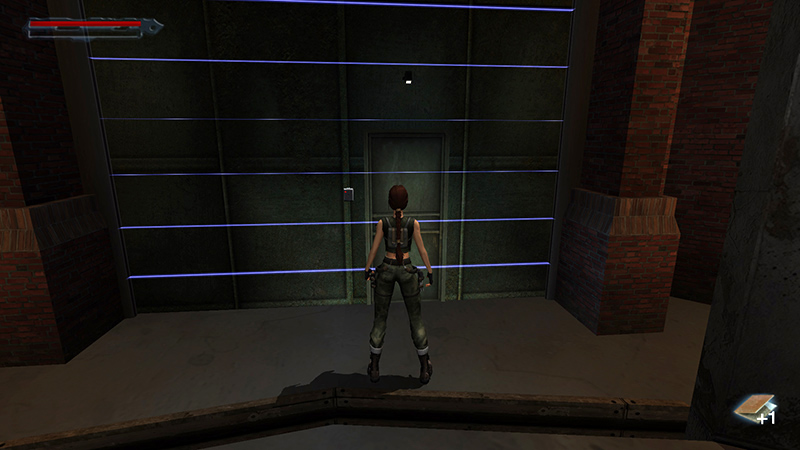
Approach it carefully to trigger a notebook update (48/62): "Gain access to the Biodome." We'll take that force field down soon.
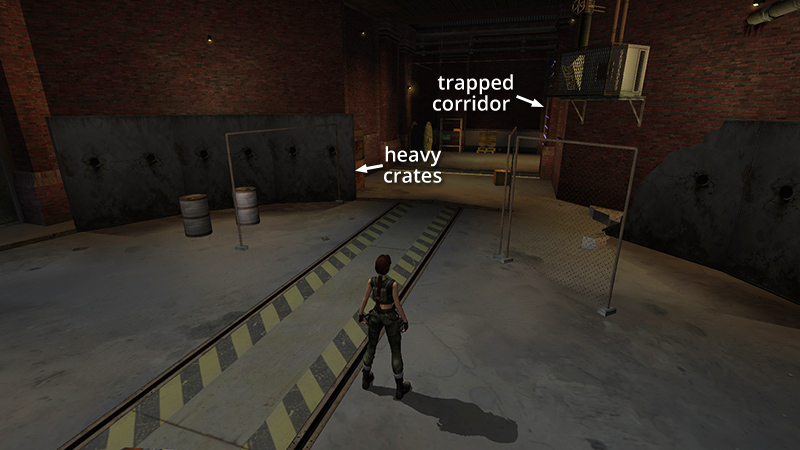
Straight ahead and around the next corner is a corridor lined with lasers, mines, and another deadly electric force field. Avoid this area for now, but make a mental note of the 2 stacked crates at the start of this passage. Lara isn't strong enough to move them yet, but she soon will be.
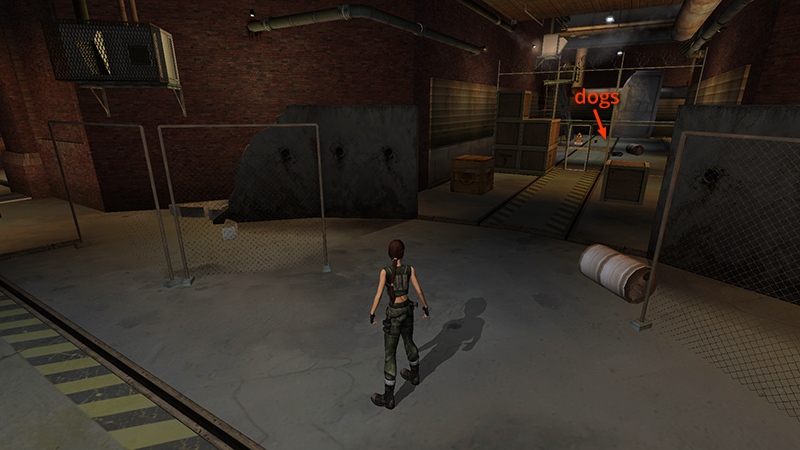
The passage to the right contains more crates, several of which are movable. Just beyond them is a chain-link fence topped with barbed wire holding back a pair of snarling rottweilers (7-8). If you're working on the "Good Boys" achievement/trophy, quick-save before approaching. If you get too close, they can bite Lara through the fence. (If you don't care about achievements or animal cruelty, just shoot the dogs through the fence.)
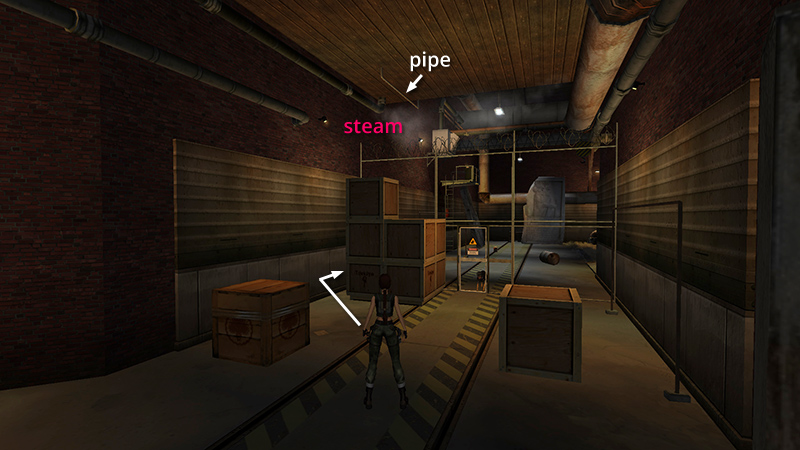
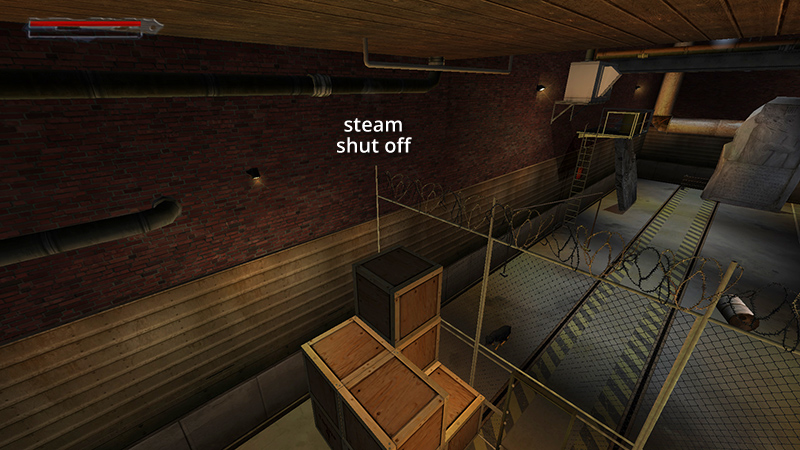
When you approach the chain-link fence, Lara spots a pipe she can use to climb over, but first she'll need to turn off the scalding steam leaking from another pipe above. To do that, you'll need a strength upgrade. Start by moving into the space between the stacked crates and the left wall.
NOTE: Lara also notices these crates originated in Turkey. More on that in the main walkthrough.
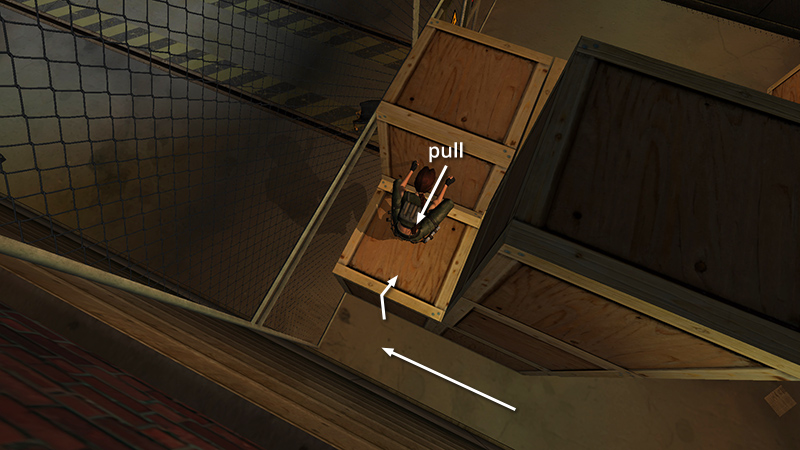
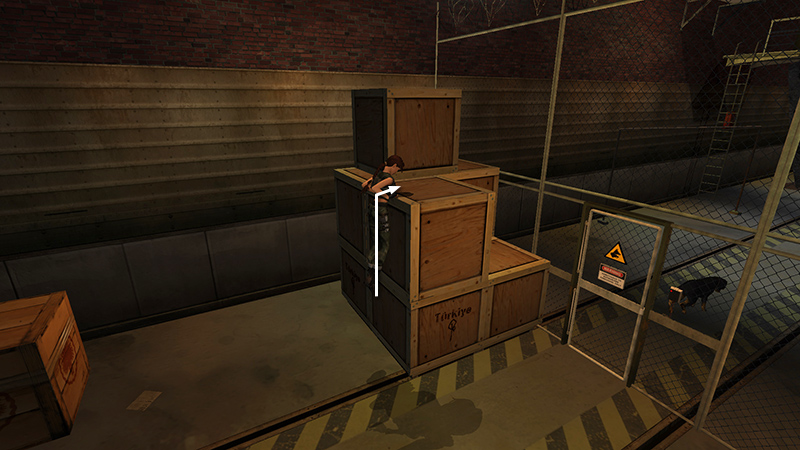
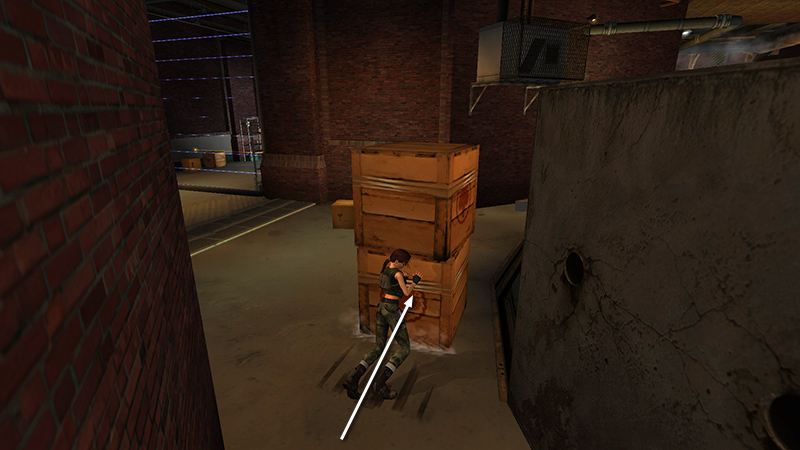
Climb onto the crate nearest the fence. (Don't get too close to the fence or the dog may bite.) With the fence on Lara's left, pull the crate in front of her toward the wall. Pull several times to move it as far as it will go. This makes a little space on the other side.
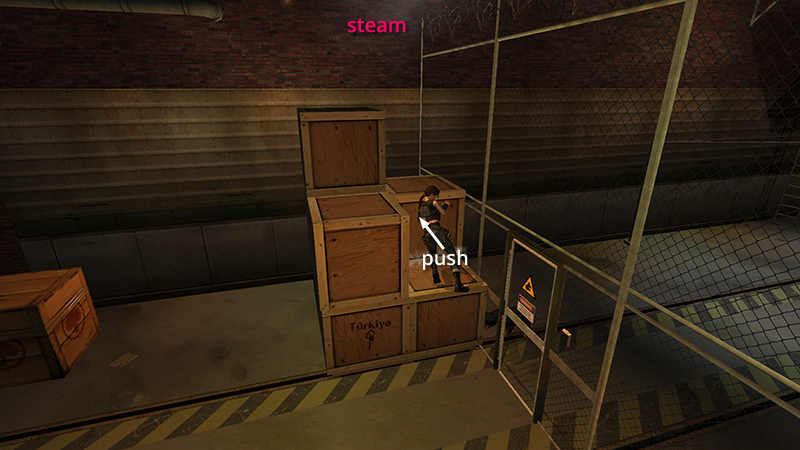
Climb over the crate you just moved. Turn around, and push it as far as it will go. (Do not climb on the topmost crate or jump straight up while standing on the stacked crates. If you do, Lara will suffer fatal steam burns.)
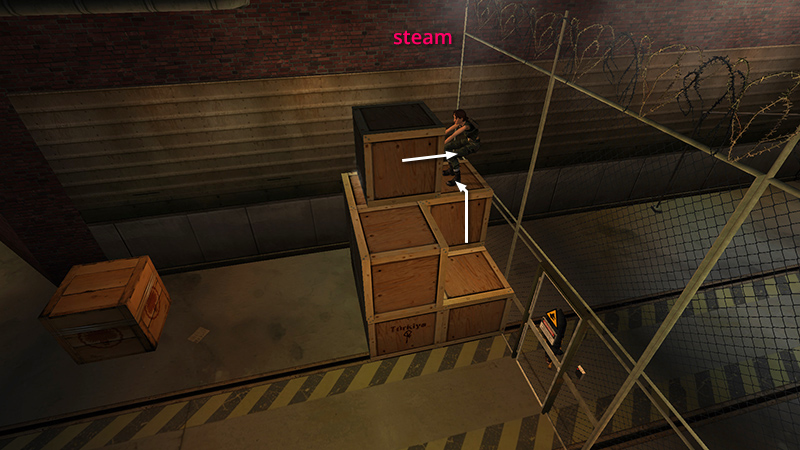
Climb onto the crate you just moved and turn to face the topmost crate in the stack. Pull it toward the fence as far as it will go. Again, you won't be able to move it all the way with Lara standing there. Just pull it several times to gradually inch it toward the fence.
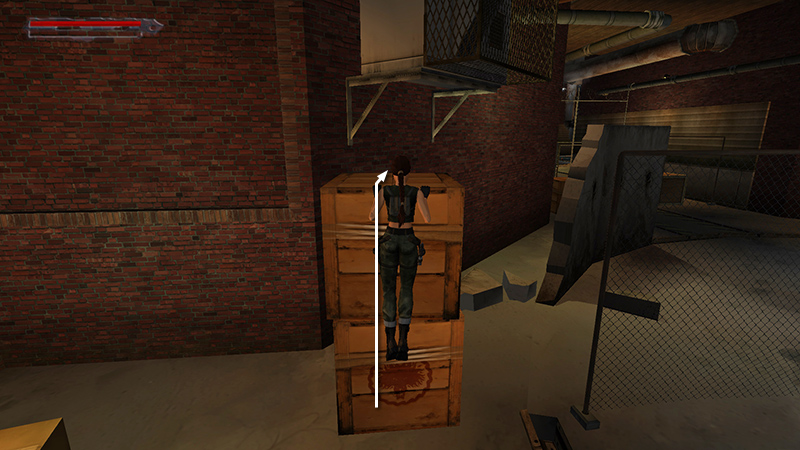
Drop down to the floor and go around to the other side of the stack. Climb onto the two stacked crates.
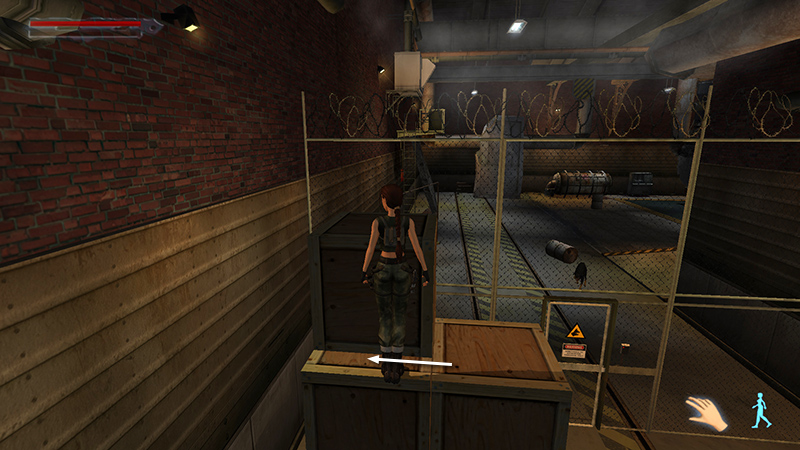
Then sidestep onto the narrow ledge you made by moving the topmost crate. If you have trouble with this, try activating Stealth mode.
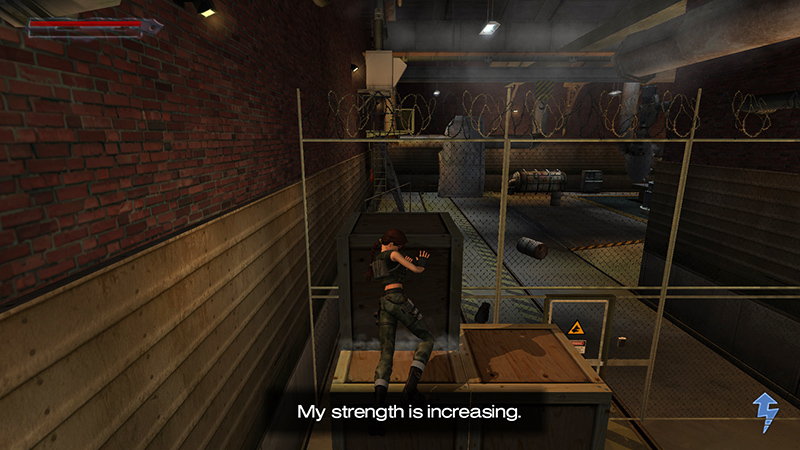
Push the topmost crate toward the fence to get an upper-body strength upgrade. Drop down to the floor.
NOTE: Earlier versions of this walkthrough included a more complicated solution to the crate puzzle. In case the method described above doesn't work for you, or you're consistently being bitten by the dogs through the fence, try the original version, described in the archived classic guide.
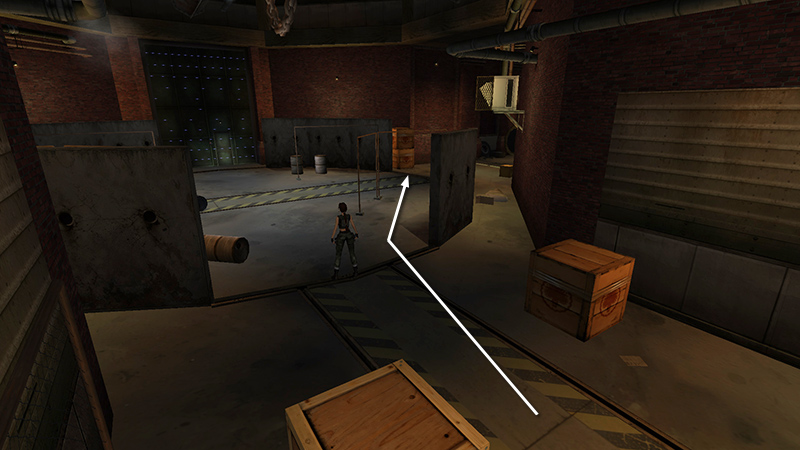
Return to the hub from which the four hallways radiate. Head for the 2 stacked crates ahead on the right.
After the upgrade, Lara is strong enough to push the stacked crates underneath the ventilation unit.
Climb onto the crates...
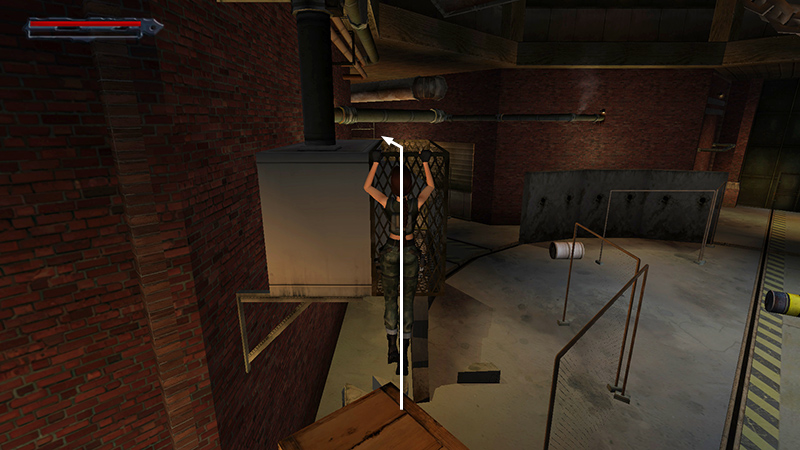
...then pull up onto the ventilation unit.
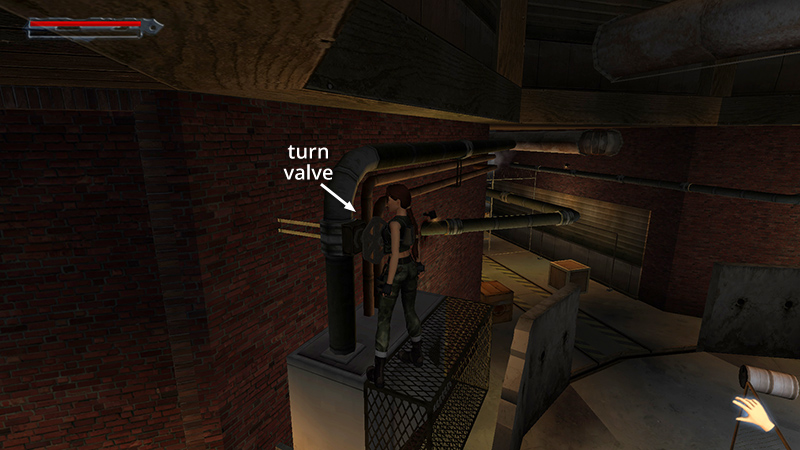
Turn the valve...
...to shut off the steam.
[Previous | Next | Strahov Fortress]
DARK MODE: I plan to add optional dark mode for these pages, but my current priority is updating the walkthroughs. Meanwhile, may I suggest a reputable dark mode browser extension, such as Dark Reader? (Download only from trusted sites, like darkreader.org or your browser's official add-on/extension site.)
Walkthrough text and diagrams copyright © Stellalune (email ). Feel free to copy or print this walkthrough for personal use. By all means, share it with friends, but please include this credit line so people can send me their feedback. No part of this walkthrough may be reproduced on another site without permission.