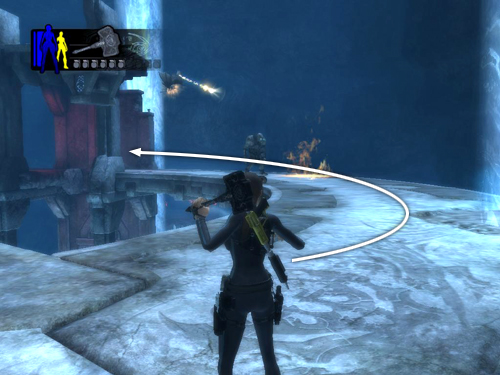
After you've taken care of the Yetis (one is still alive in the screenshot above), run or sprint forward along the walkway, moving counterclockwise around the huge circle and doing your best to avoid the fireballs and the flaming areas that remain on the floor where they've hit. You're headed for the reddish-colored wall just behind where Natla is hovering.
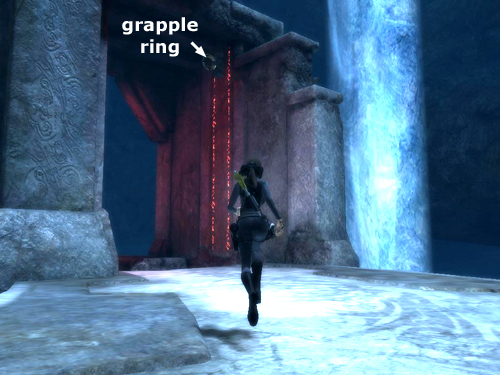
There's a metal ring high on the wall between the two lines of red glyphs.
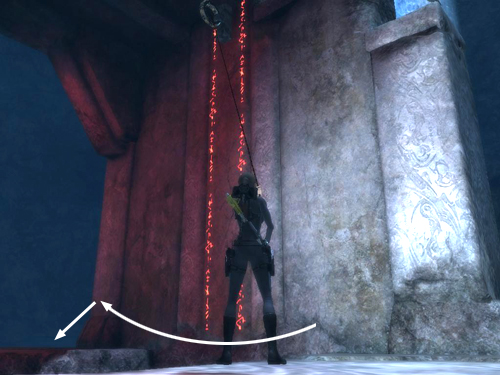
Grapple the ring and swing across the gap to the other side.
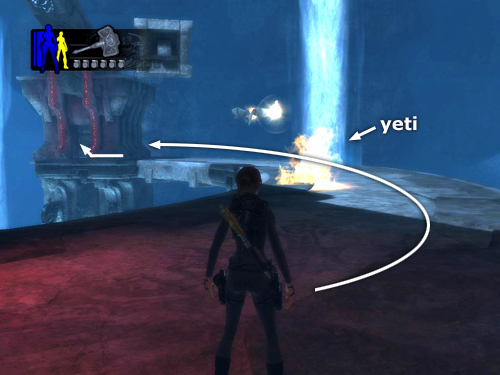
Follow the curved walkway forward toward the next buttress support (i.e., the stone structure with the two lines of red glyphs on it). Natla tries to slow you down with more fireballs, and another Yeti thrall materializes from the waterfall ahead. Work your way past those hazards. Then run into the small alcove at the front of the structure.
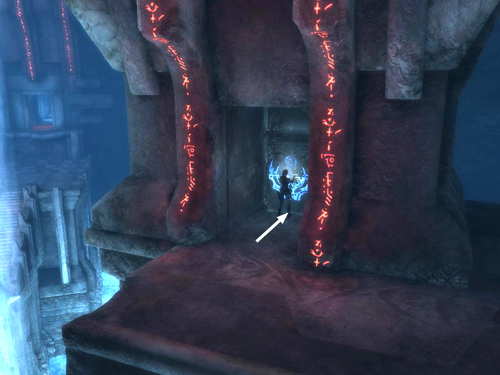
Push the carved panel with the glowing blue symbols forward as far as it will go. This exposes a power node on top of this structure. You'll need to destroy that a bit later on, but you can't reach it from here.
[Return to the Out of Time Walkthrough]
Copyright © 2008- - Stellalune (). All rights reserved. The screenshots and videos included here were made using Fraps. Feel free to copy or print this walkthrough for personal use. By all means, share it with friends, but please include this credit line so people can send me their feedback. No part of this walkthrough may be reproduced on another site without permission. Follow this link for details about this site's advertising and privacy policy.
|