OVERWORLD: SHRINE OF OSIRIS
Updated: 7/10/15(†)
FIRST VISIT - AFTER PYRAMID OF OSIRIS: After completing the first level, Pyramid of Osiris, Lara and her companions find themselves in the Overworld, a large hub area connecting the various game levels. Only a small portion of the Overworld is accessible at first. As you progress through the game, you will be able to reach new areas.
Press O/L/I on the keyboard or Back/Select on the controller to access the Objectives/Map, Inventory, and Challenges screens. On the in-game map of the Overworld, the area you're currently in is highlighted in red. The area just outside the pyramid is called the Temple of Osiris. (screenshot) Follow the elevated walkway to the left, away from the pyramid, to enter the Shrine of Osiris. (screenshot)
Move under the archway into the shrine proper to trigger a cutscene, in which Lara and her companions discover Osiris's shrine, which has been defiled. An on-screen message shows a new Objective: Retake a Piece of Osiris from the Guardian.
FIGHTING THE HUGE STATUE: You must now fight an ANIMATED STATUE, plus several skeletons and scarabs. There's plenty of room to maneuver, so just keep dodging away from the big guy, shooting it when you have a chance, and dropping and detonating bombs to damage anything that pursues you. If you're not using the Staff of Osiris and run out of ammunition, there's an AMMO CACHE off to the right of the shrine, near the gate where you entered this area. Just stand close to the glowing blue cache to replenish your ammo. The statue's health bar at the top of the screen diminishes as you do damage and soon defeat it. (screenshot)
When the guardian falls, it leaves behind OSIRIS'S DIVINE TORSO, the first of many fragments you must find in order to restore the god himself. The piece is automatically set on one of the pedestals surrounding the central dais. This restores power to the Golden Statues of Osiris found throughout the Overworld. Any time you raise the staff or approach one of these statues, it will point to your next goal and describe what you need to do, in this case Retake the Piece of Osiris from the Tomb of the Timekeeper. (screenshot)
TREASURE CHESTS AND THE COMMUNITY CHEST: Throughout the Overworld are various treasure chests. Some only appear under particular conditions, such as daylight, darkness, rainy weather, etc., so different chests will be revealed as the game progresses. Treasure chests have lights on top indicating which ones each character can use (red for Lara, yellow for Isis, etc.) (screenshot) Approach each chest to see how much it costs to unlock. (screenshot) Press Enter/B/Circle to spend the gems you've collected to open that chest. You will then receive an item, like a ring or amulet, from inside. Remember the more expensive chests yield better items. So you may want to wait until you have 500 or 1,000 gems to open chests with better rewards.
The Community Chest is special treasure chest located at the edge of the circle of pedestals. (screenshot) This is where you collect any items you've unlocked by purchasing downloadable content (DLC). For example, pre-order bonuses and Season Pass goodies are found here.
Rewards earned in Community Challenges are also distributed through the Community Chest. To view the weekly Community Challenge, select "Community" from the game's main menu. For more info about current and past Community Challenges, check out Treeble's thread on the Square Enix Forums (no longer available).
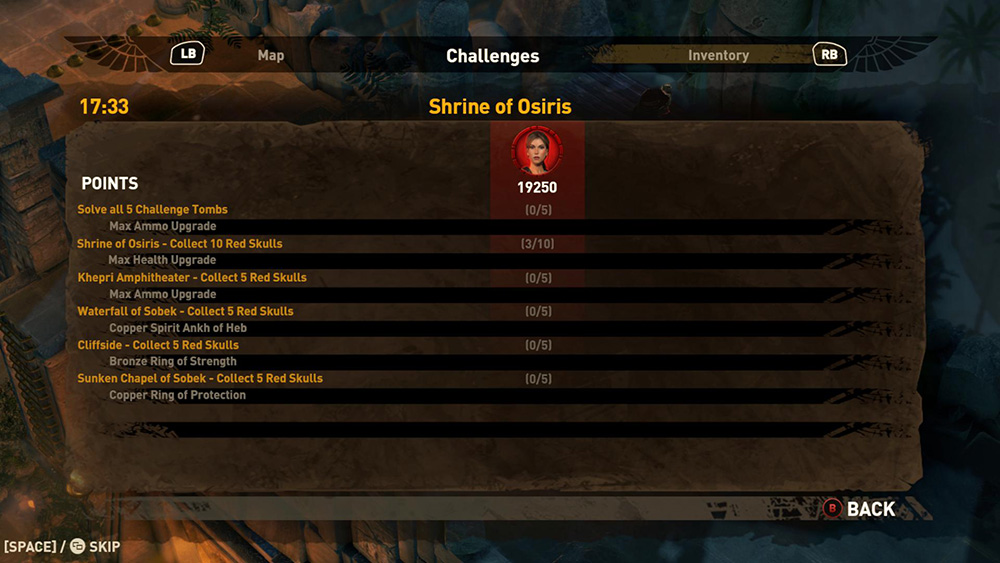
RED SKULLS: Like the tombs, each area of the Overworld contains hidden (and not-so-hidden) red skulls. Check the Challenges screen (L on the keyboard or Back/Select on the controller) to see how many are in each area. This area has 10, but since they are not all accessible now we'll just pick up a few at first.
The first red skull (1/10) is sitting on top of the archway just south of the AMMO CACHE and the shimmering gate where you came in. To reach it, stand on the square with Osiris's glyphs and use the staff to raise a pillar out of the floor. Jump from there to the skull. (screenshot)
The second red skull (2/10) is in the low area to the left of the shimmering gate and AMMO CACHE. Go down the steps and to the left and you'll see it sitting on top of a column. Climb the ladder to reach it. (screenshot)
Return to the shrine and head to the west to a ledge overlooking some spikes. (screenshot) Drop down in the safe area between the ledge and the spikes and move northward along the wall until you come to another pillar with a red skull (3/10) sitting on top. (screenshot) There's another skull sitting in the spikes off to the south (screenshot) but you can't retrieve it yet. So climb back up near the shrine.
Now face the entrance to the Tomb of the Timekeeper. (The Osiris statues will point the way if you forget where it is.) Turn around and move directly away from it. (screenshot) When you come to a ledge with some gems on it, take a running jump to land on top of the tall column ahead. Jump from there to the column on the left to get the next red skull (4/10). (screenshot) Drop down, pick up some more gems, and then return up the stairs to the shrine.
Head to the south again, past the ledge you just jumped from, to find one more red skull (5/10) on top of some scaffolding. (screenshot)
There isn't much else you can do here in the Overworld yet, so continue with the story. The entrance to the next level, the Tomb of the Timekeeper, is just southeast of the shrine. (screenshot)
[Next: Tomb of the Timekeeper]
SECOND VISIT - AFTER TOMB OF THE TIMEKEEPER: After completing this level, you return to the Overworld. Approach the shrine to add another fragment of Osiris to the collection. A cutscene shows a time bomb dropping onto the round pad northwest of the shrine, and you receive a new Objective: Retake the Piece of Osiris from the Tomb of the Silversmith. Go up the steps to that area. (screenshot)
There's another red skull (6/10) atop the pillar near the bomb. To get it, raise the Staff of Osiris to keep the time bomb from exploding as you roll it against the pillar. (screenshot) Jump on top of the bomb and then jump onto the pillar to get the skull. In co-op mode you can also use one of the Egyptian character's shield to boost another character up to the skull.
Now use a time bomb to destroy the crumbling wall just to the northwest. (screenshot) This will enable you to access a new section of the Overworld. Follow the walkway past spike fields on both sides. Just ahead on the right is the FIRST CHALLENGE TOMB. (screenshot)
Unlike Lara Croft and the Guardian of Light, which had challenge tombs inside each level, the ones in this game are accessed from the Overworld. Their locations are noted with stars on the Overworld map. (screenshot) Challenge Tombs are optional, but each one offers its own rewards in the form of weapons and other goodies. You'll also receive a MAX AMMO UPGRADE for completing all 5 Challenge Tombs.
The FIRST CHALLENGE TOMB WALKTHROUGH is included on a separate page. You can try it now or return later.
Continue along the walkway towards the northwest. Just beyond the Challenge Tomb, the walkway turns into an elevated bridge. On the left is a drop-off with some scaffolding. Climb down to get the red skull (7/10). (screenshot)
As you proceed along the bridge to the northwest, the floor collapses in spots, and you must defeat several skeleton archers before entering the next part of the Overworld: Khepri Amphitheater. (screenshot)
THIRD VISIT - AFTER TOMB OF THE SILVERSMITH: When you finish the Tomb of the Silversmith, you actually emerge in the Khepri Amphitheater part of the Overworld with the Objective: Return to the Shrine of Osiris and Banish the Night. If you have not fully explored that area, refer to the Khepri Amphitheater walkthrough.
To continue the story, return across the bridge to the south to the Shrine of Osiris. When you reach the shrine, Osiris's hand is returned to its pedestal, the floor sinks, and a previously hidden doorway is revealed. Go inside. (screenshot)
OSIRIS SHRINE INTERIOR: Grab the handle of the machine and turn it counterclockwise until daylight is restored. (screenshot) You'll receive some gems for your efforts, and when you return outside the sun will be shining brightly. Daylight means that some new treasure chests will be present. Also, the gate leading back to the Pyramid of Osiris will re-open and you'll receive a new Objective: Return to the Pyramid and Defeat Khepri. If you've forgotten the location to the Pyramid, Osiris's statues will point the way.
OUTSIDE THE PYRAMID: This is technically a separate area on the Overworld map, but since you'll only be here for a little while, I've included it here. As you approach the pyramid, fireballs rain from above smashing holes in the walkway. A red ring appears on the ground giving a little advance warning as to where each fireball will land. A swarm of regular and fire scarabs attacks, and a giant skeleton jumps down from above the pyramid entrance. (screenshot) Things get a bit chaotic, but there's extra ammo and health lying around if you need it. Try to outrun the the skeleton as you eliminate the scarabs. Then you can concentrate on destroying the skeleton with bombs and weapons.
In the co-op game there are 2 skeletons. (screenshot) You may want to have one player focus on the scarabs while the others finish off the skeletons. When you succeed, the pyramid opens and Lara and friends go inside.
OSIRIS TEMPLE CHAMBER: This anteroom has several doorways leading to different levels, but only the doorway on the left is open at first. There are various vases you can smash and sarcophagi you can blow up to release gems and skeletons. When you're ready to take on Khepri, go up the stairs and through the door on the left. (screenshot)
FOURTH VISIT - AFTER TOMB OF KHEPRI: When you finish this level, you emerge from the Pyramid in the Temple of Osiris area of the Overworld. Fire has been replaced with flood, new treasure chests have appeared, rainy weather rings and amulets now work, and several new areas are open to you. Return across the bridge to the shrine in order to set the canopic jar on its pedestal.
There are two new Objectives: Climb the Water Wheel and Raid the Tomb of the Ferryman and Retake the Piece of Osiris in the Oracle's Chamber. Both areas are now marked on the Overworld map. (screenshot) It doesn't matter which you do first, but if you consult one of the Osiris statues, it will point you to the Tomb of the Ferryman, so that's where we'll go next. (screenshot)
Head to the north, through the little sunken area where you found red skull #2 earlier and up a long flight of stairs to the WATER WHEEL. Now that it's moving you can jump onto one of the platforms and ride it up and around to retrieve the red skull (8/10). (screenshot) Ride around again and jump off on the ledge at the top right. (screenshot) Collect some gems. Then stand on the tile with Osiris's Glyphs and use the staff to raise a column so you can reach the aqueduct above. Follow it to the right into a new area, the Waterfall of Sobek. (screenshot)
FIFTH VISIT - AFTER TOMB OF THE LAMPLIGHTER: After completing this tomb, you re-enter the Shrine of Osiris from the Waterfall of Sobek area, via the aqueduct. This is described in the walkthrough for the Waterfall of Sobek - third visit. Just before the aqueduct ends at the WATER WHEEL, drop down onto the ledge with the Osiris statue and the pillar with the green glyphs. (screenshot) Then climb down onto the ledge below. Step on the pressure pad to open the gate. Then continue southeast to the shrine.
COMBAT CHALLENGE: There is now a glowing obelisk in the sunken area between the shrine and the stairs leading up to the WATER WHEEL. (screenshot) Approach it and press the button indicated to take on an optional Combat Challenge. Defeat the enemies that spawn to earn a reward. For more about this feature, see the Community and Combat Challenges page.
When you approach the shrine, Lara, Carter, and the gods return Osiris's feet to their proper pedestals and again you are reminded of your next Objective: Retake the Piece of Osiris in the Oracle's Chamber.
Before doing that, you can make a few more pickups now that this area is flooded. Go up the steps to the west of the shrine. (screenshot) Kill the crocodiles in the water below the ledge. Then hop in and swim to the lower right (southeast) to get the red skull (9/10) you couldn't reach earlier when this area was covered in spikes. (screenshot) Climb back out of the water on that same ledge.
NOTE: The final red skull (10/10) is sitting on a pillar in this pool, but you can't get it until the weather changes again.
Climb the ladder near the crumbling wall and turn left (or return up the stairs at the other end of the pool). Go past the shrine and up the stairs to the northwest to get a time bomb. Remember to hold the staff up as you move the bomb to prevent it from exploding too soon. Roll it down the stairs, past the shrine, and then down the next flight of stairs into the pool. Use remote bombs to move the time bomb across the surface of the water to the far right corner. Use another remote bomb to launch the time bomb onto the ledge near the crumbling wall. Climb out of the water and guide the bomb into position near the wall. Then let it explode to uncover a MAX AMMO UPGRADE and a MAX HEALTH UPGRADE. Finally, climb the ladder and return to the shrine. (screenshots)
To reach the Oracle's Chamber, go up the stairs to the northwest, past the round pad with the time bomb, and beneath the archway with the glowing scarab symbol. This walkway was previously surrounded by spikes, now the spike pits are flooded. Kill some crocodiles on both sides. (screenshot) Then jump into the pool on the left and swim to the left corner to find the tomb entrance. (screenshot) It is also marked on the Overworld map.
SIXTH VISIT - AFTER THE ORACLE'S CHAMBER: After defeating Set's bizarre champion in the Oracle's Chamber, you emerge back in the Overworld with the Objective: Return to Osiris's Shrine and Banish the Rain. Take care of any crocodiles swimming in the pool before swimming across to the walkway to the east or southeast. Climb out of the water and return to the shrine in order to place his leg on its pedestal. Then enter the room beneath the shrine. (screenshot)
OSIRIS SHRINE INTERIOR: Grab the outer handle of the machine and push it clockwise to stop the rain. (screenshot) You'll receive some gems for your efforts, and when you return outside the rain will no longer be falling. If you like, you can manipulate the inner handle of the machine to switch between day and night. This isn't necessary, but it may help if you have gear that is only effective in daylight or at night. It also changes which treasure chests are present in the Overworld, since some only appear by day or night. When you stop the rain, you'll receive a new Objective: Return to the Pyramid and Defeat Sobek.
Go back outside and proceed across the bridge to the east to get back to the pyramid. If you've forgotten the way, Osiris's statues will direct you. (screenshot) As you cross the bridge, white circles on the floor indicate where Set's lightning bolts will strike. Try to stay ahead of them. (screenshot)
PYRAMID EXTERIOR: This is technically a separate area of the Overworld, the Temple of Osiris, but since we're only here for a little while, I've included it in the walkthrough for the Shrine. As you approach the pyramid entrance, a giant flaming Sobek warrior jumps down from above. (screenshot) Use weapons and remote bombs to defeat him just like his smaller cousins, but also watch out for lightning bolts. Again, the white circles on the floor give you a little warning so you can get out of the way before each bolt strikes. (screenshot)
When you kill the giant, the door opens. Gather the gems the enemy leaves behind and replenish your health and ammo if necessary. Then enter the pyramid.
OSIRIS TEMPLE CHAMBER: The entrance to Sobek's tomb is up the stairs to the right.
SEVENTH VISIT - AFTER THE TOMB OF SOBEK: When you emerge from the pyramid having defeated Sobek, the Overworld is blanketed in snow and ice. You receive two new Objectives: Explore the Tomb of the Torturer in the Eastern Cliffs and Retake the Piece of Osiris in the Tomb of the Architect. Both locations are now marked on your map. (screenshot)
Return across the bridge to the Shrine of Osiris to set the canopic jar in its proper place. Before leaving this area, go after the final red skull. Follow the walkway away from the shrine to the southeast. Climb down the ladder to the alcove where you got the health and ammo upgrades earlier. (screenshot) Now that the pool is partially frozen, you can hop across and retrieve the red skull (10/10) from the pillar. (screenshot) You will also receive a MAX HEALTH UPGRADE as a bonus for finding all 10 skulls.
Return to the shrine. Then head to the west, across a newly formed ice bridge, into the new area. (screenshot) Before entering the Cliffside area proper, step on the square pressure pad to open the gate. This is not necessary, but there are a few gems and a treasure chest down there, and opening the gate makes it easier to get to and from the pool near the Oracle's Chamber. (screenshot)
EIGHTH VISIT - AFTER THE TOMB OF THE ARCHITECT: When you finish this level and exit the tomb, you receive a new Objective: Return to Osiris's Shrine and Banish the Cold. In case you forgot, the shrine is northeast of the Cliffside area, on the other side of the ice bridge that appeared when the canal froze. (screenshot)
Re-entering the shrine area triggers a cutscene in which Lara and friends place Osiris's head on its proper pedestal and Set once again goes all hostile and sepia toned. When you regain control, enter the chamber beneath the shrine and push the outer handle counterclockwise in order to melt the snow and ice in the Overworld. (screenshot) You receive a shower of gems for your efforts. Gather them and return outside.
A message on screen gives you a new Objective: Return to the Pyramid and Defeat Set! The statue of Osiris points the way. (screenshot)
The final boss fight against Set is not extremely difficult, in my opinion, but if you want to put it off until you've completed more of the challenges and unlocked better equipment that is certainly an option. At this point, you can replay any level except the first one by re-entering it from the Overworld. Refer to the in-game map and individual level walkthroughs for guidance.
REPLAYING LEVELS: The first level, Pyramid of Osiris, can only be replayed after defeating Set. At that point, the entrance will be unlocked. It is located in the antechamber inside the pyramid, between the Tomb of Khepri and Tomb of Sobek. (screenshot) All the other areas remain accessible after beating the game.
Unfortunately there is no way to tell which levels have unfinished challenges except by going inside and checking the level statistics screen that pops up as you enter. You can, however, check your inventory against the list of weapons and collectibles in order to go after the ones you want.
You can also re-enter the room beneath the shrine and turn the two cranks to alter the weather and time of day. The outer crank controls the weather: clear, rainy, cold. The inner handle swaps day and night. This will enable you to access certain treasure chests and areas of the Overworld that are only accessible under specific conditions.
WHEN YOU'RE READY TO FIGHT SET: Head to the northeast across the long bridge to the pyramid. (screenshot) As you go, Set pelts you with lightning and meteors. As usual, you'll want to jump across the gaps and try to avoid the white circles on the ground, which indicate where the hazards will strike. (screenshot) Run up the stairs into the pyramid. (screenshot)
OSIRIS TEMPLE CHAMBER: The entrance to the Tomb of Set is in the middle of the upper level. There are a few sarcophagi here that you can blow up to release enemies and possibly a few gems. (screenshot)
POST-GAME EXPLORATION: When you have defeated Set, you emerge outside the pyramid. Although the story is complete, there is still more to do.
†UPDATE HISTORY: 12/28-30/14 - First draft of walkthrough posted.
12/30/14 - 1/11/15 - New sections gradually added as later levels were linked in.
2/16/15 - Updated the Combat Challenge part of the fifth visit section.
6/26/15 - Finally back to work on this after a much-needed hiatus. Added the eighth visit section leading up to the final boss fight.
7/10/15 - Added post-game section.
WAS THIS WALKTHROUGH HELPFUL? If not, I apologize and invite you to contact me with any questions. If you need help right away, I recommend the r/TombRaider subreddit. Other fan-run forums are listed at tombraiders.net/stella/community.html. If this site was useful, please consider supporting it financially or in other ways. For details, visit tombraiders.net/stella/support.html. As always, I welcome your corrections/suggestions. Thank you!
Copyright © 2014- - Stellalune (). Feel free to copy or print this walkthrough for personal use. By all means, share it with friends, but please include this credit line so people can send me their feedback. No part of this walkthrough may be reproduced on another site without permission. Follow this link for details about this site's advertising and privacy policy.
Stella's Tomb Raider Site: tombraiders.net.