Shadow of the Tomb Raider - Mission of San Juan Explorer Backpacks and Archivist Maps
Updated: 10/31/21(†)
This guide focuses on revisiting the level after completing it. If you are playing through for the first time, you may want to follow the main walkthrough instead to avoid possible spoilers. Collectibles are numbered in the order they appear in the main walkthrough and on the annotated level map.
Follow this link for a List of All Artifacts by Story/Dialect.
Treasure Chest · Relics · Documents · Murals · Monolith · Survival Caches · Explorer Backpacks · Archivist Maps · Artifacts & Photos · Challenge
EXPLORER BACKPACK 1
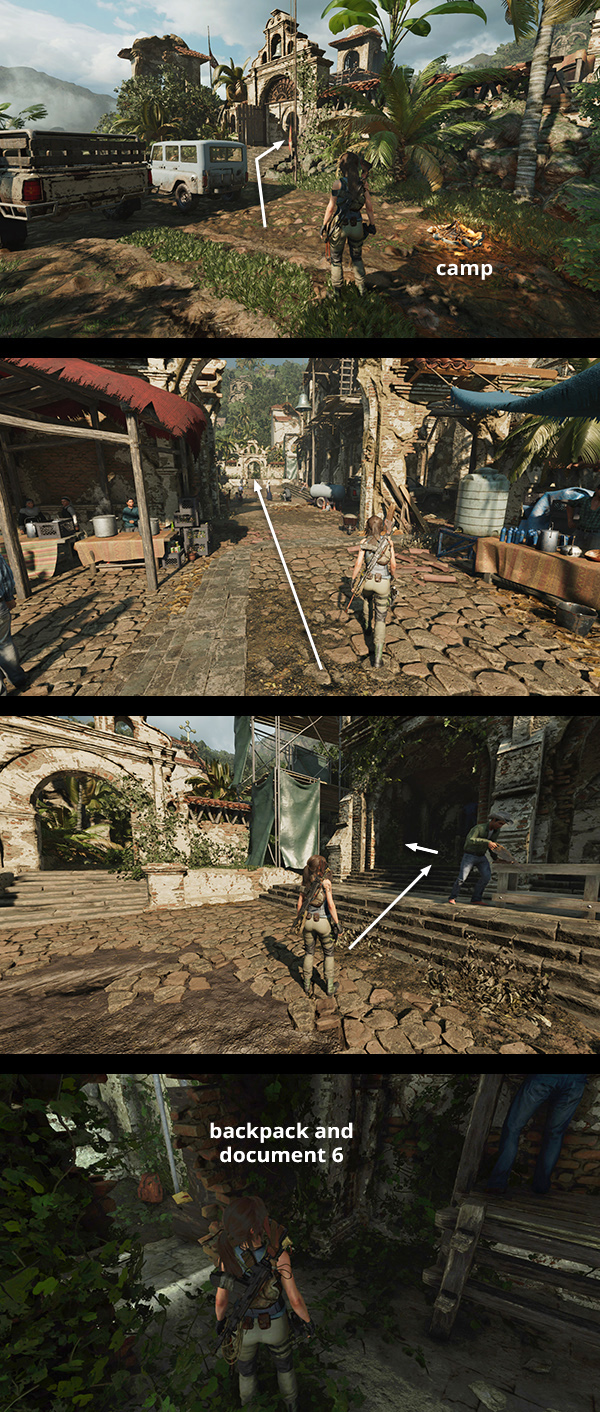
Backpacks are not required for 100% completion, but finding them reveals the locations of other collectibles, so they can be useful. This particular pack is in the northeast corner of the main courtyard. Start from the Mission Gate Base Camp. Go up the steps into the courtyard and continue straight on past the fountain and merchant stalls. Just before the white archway leading to the church and graveyard, there's some scaffolding draped with green tarps. Climb the steps to the right of the scaffolding. Then turn left and move through a narrow opening in the brick wall to find the backpack and document #6. Examining the backpack reveals the treasure chest and survival cache #2 on your in-game map. (Click image for more and larger screenshots.)
EXPLORER BACKPACK 2
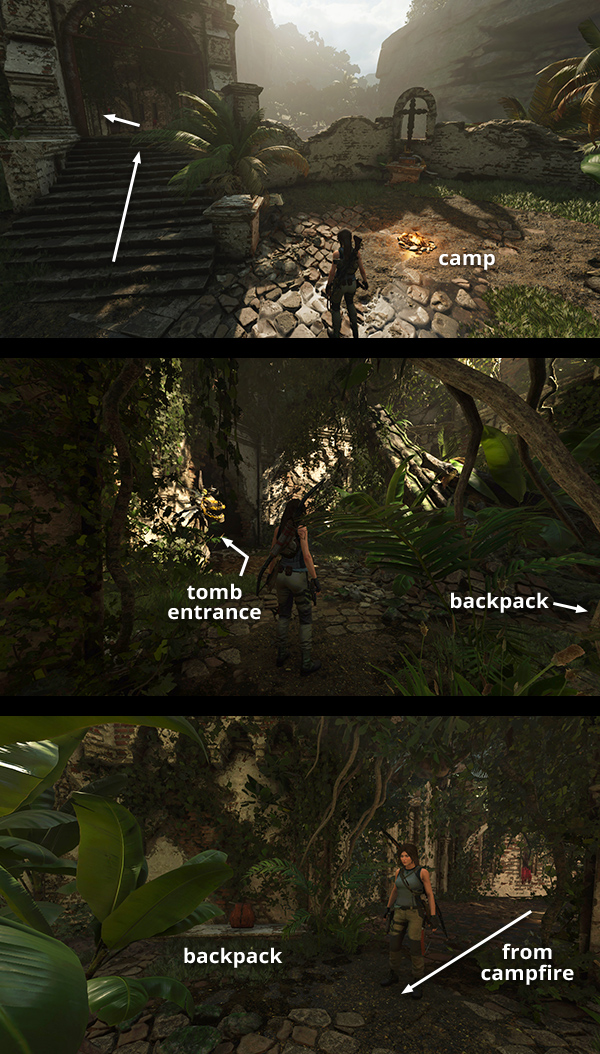
The second backpack is near the entrance to the Tree of Life Challenge Tomb. If you haven't explored the tomb yet, fast travel to the Deserted Cloister or Ruined Tower Base Camp. Then follow the main walkthrough.
If you explored this area but missed the backpack, fast travel to the Deserted Cloister Base Camp. Climb the stairs, enter the building, and follow the corridor to the opening leading into the caverns. The backpack is sitting on the floor just opposite the opening. Examining it reveals survival caches #1, #6, #7, and #8 on your in-game map. (Click image for more and larger screenshots.)
EXPLORER BACKPACK 3
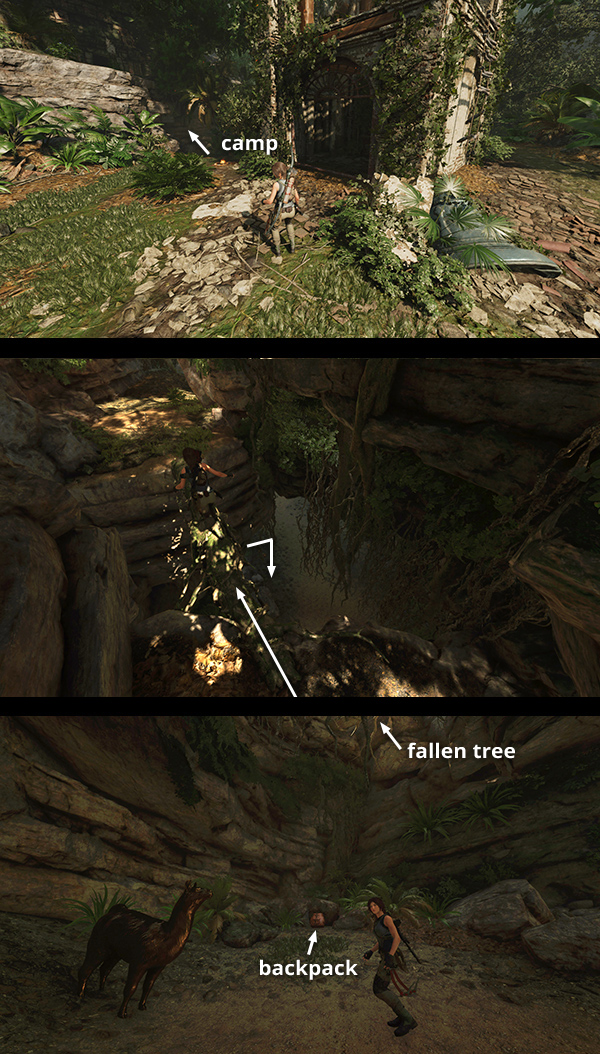
This backpack is in a cave near the large pool southeast of the Mission. If you missed it, fast travel to the Ruined Tower Base Camp. Follow the path into the cave to the northeast. Step out onto the the fallen tree then drop down into the cave below. (Or, if you're coming from the pool, swim to the northwest corner and step out of the water into the cave, as shown here.) The backpack is propped against the back wall of the cave, near a bronze llama. Examining the pack reveals the crypt entrance on your in-game map, as well as survival caches #3 and #5.
To get back to the camp, head for the cave opening near the water. Climb the ledges and climbable wall on the left. Then follow the path to the left (southwest), into the cave and across the fallen tree, and out into the clearing near the ruined bell tower. (Click images for more and larger screenshots.)
ARCHIVIST MAP 1
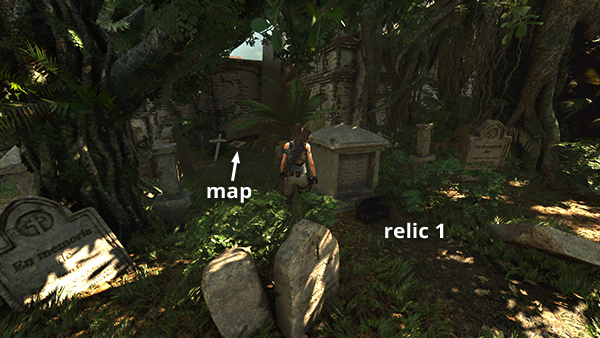
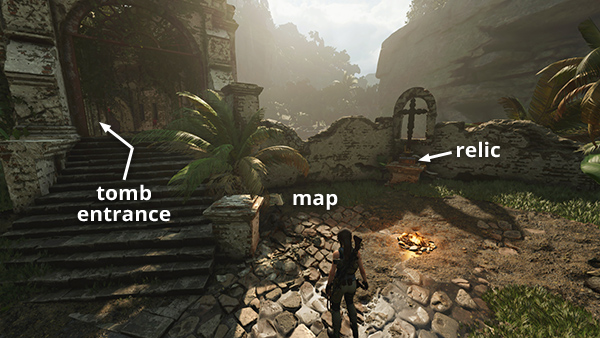
Archivist Maps are also not required for 100% completion, but examining them highlights other collectibles on your in-game map. This archivist map is in the graveyard on the northeast side of the Mission. If you missed it while playing through the story, follow the directions for relic #1. The map is lying on the ground in the corner just beyond the grave with the relic. Examining it reveals the following collectibles on your in-game map: relic #6; documents #1 through #5, #10, #20, and #24; and the monolith. (Click screenshot to enlarge.)
ARCHIVIST MAP 2
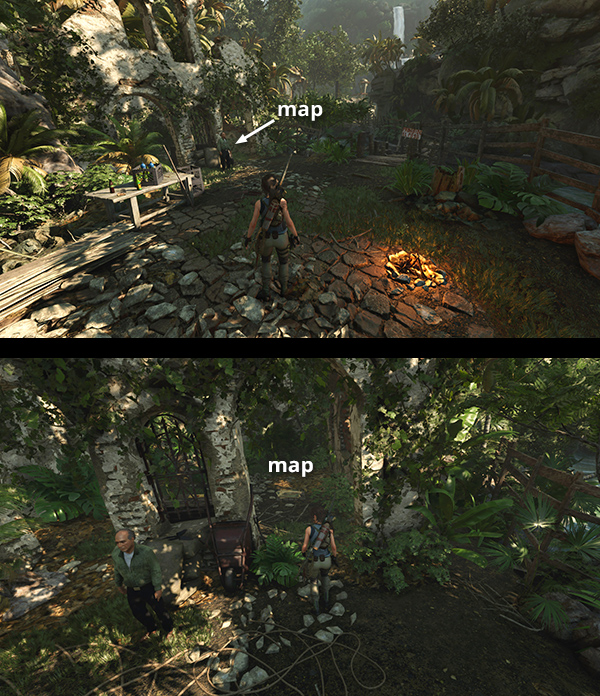
The second map is in the little ruined building near the Riverside Base Camp. If you haven't discovered this camp, start at the Mission Gate Base Camp and go up the steps into the courtyard. Turn right near the dry fountain and follow the steps down to the southeast. Continue past the NPCs Sara and Guillermo (the Star-Crossed Mission giver) and on to the southeast until you reach the Riverside camp. The map is lying on the ground inside the ruined building. Examining it reveals a number of items on your in-game map: relic #9; documents #7, #8, #9, #11, #18, and #19; and murals #1, #3, and #4. (Click image for more and larger screenshots.)
ARCHIVIST MAP 3
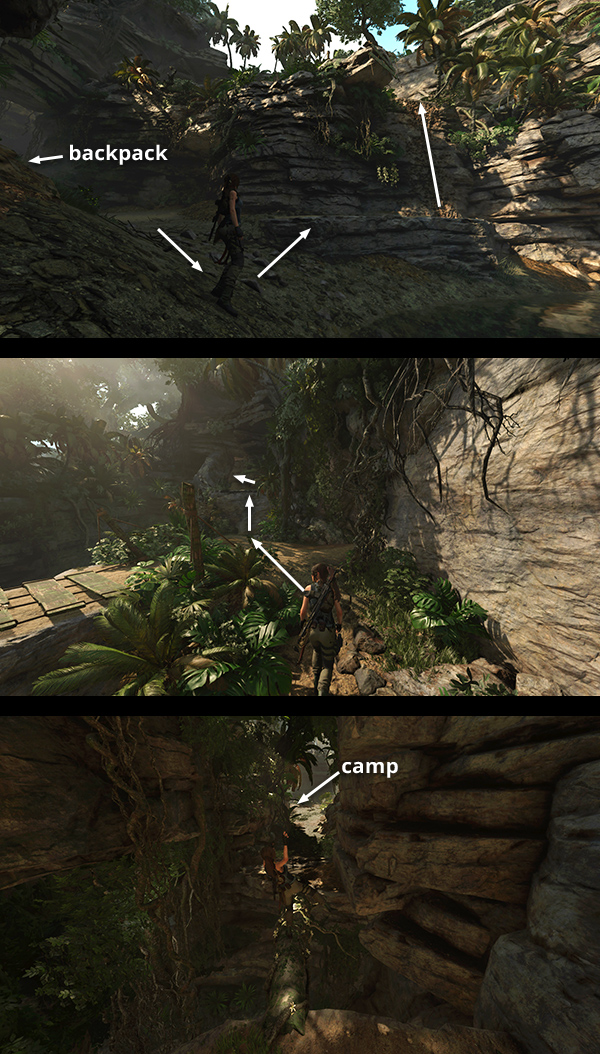
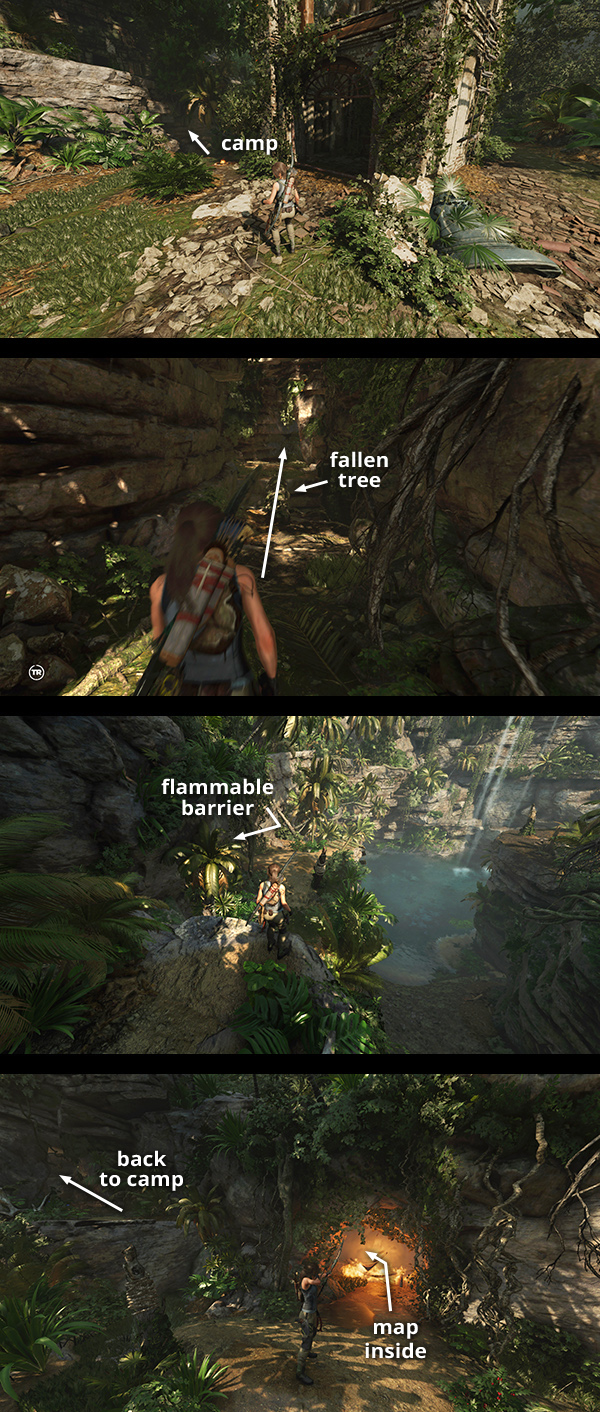
This map is in the same general area as explorer backpack #3, above. Start at the Ruined Tower Base Camp and follow the path to the northeast. Go into the cave and across the fallen log to emerge on a ledge overlooking the large pool. Use a fire arrow to destroy the barrier on the left. The map is in the small cave behind this barrier. Examining it reveals the following collectibles on your in-game map: relics #1 and #3; and documents #6, #12, #13, #16, #17, #21, #25, and #27. (Click image for more and larger screenshots.)
ARCHIVIST MAP 4
This map is lying on the ground next to the Deserted Cloister Base Camp. That's the camp near the entrance to the Tree of Life Challenge Tomb. If you haven't discovered this camp yet, start at the Ruined Tower Base Camp and follow the main walkthrough. Examining the Archivist Map marks the following items on your in-game map: relics #2, #4, #5, #7, and #8; documents #14, #15, #22, #23, and #26; and mural #2. Relic #6 is sitting on a small altar near the map. (Click image for more and larger screenshots.)
†UPDATE HISTORY: 10/31/21 - Page first posted online.
WAS THIS WALKTHROUGH HELPFUL? If not, I apologize and invite you to contact me with any questions. If you need help right away, I recommend the r/TombRaider subreddit. Other fan-run forums are listed at tombraiders.net/stella/community.html. If this site was useful, please consider supporting it financially or in other ways. For details, visit tombraiders.net/stella/support.html. As always, I welcome your corrections/suggestions. Thank you!
Copyright © Stellalune (). All rights reserved. Feel free to copy or print this walkthrough for personal use. By all means, share it with friends, but please include this credit line so people can send me their feedback. No part of this walkthrough may be reproduced on another site without permission. Follow this link for details about this site's advertising and privacy policy.
Stella's Tomb Raider Site: tombraiders.net.