Mission of San Juan – Combat Outside the Church
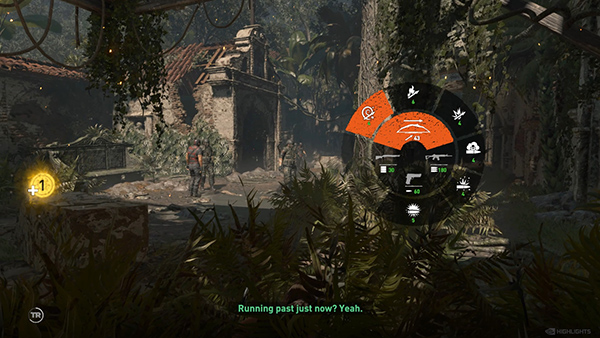
As soon as you regain control after the cutscene, select Fear Arrows (by repeatedly pressing the Bow Select button, 1 on the keyboard or D-pad Up on the controller) and craft some if necessary (by holding Alt Fire without aiming).
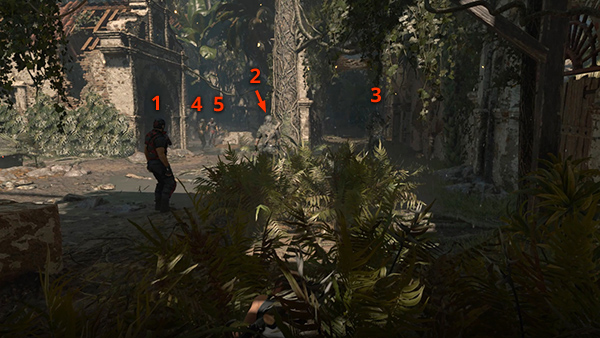
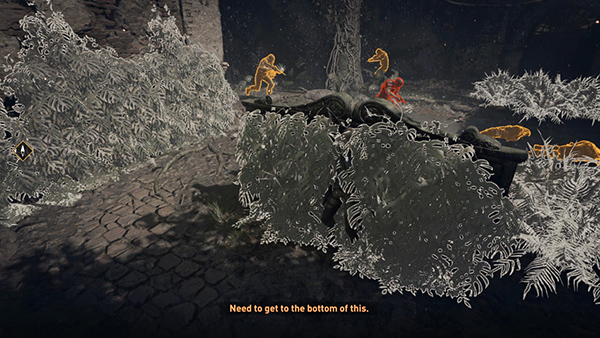
Watch the 5 mercenaries. Target the middle one of the 3 nearest enemies (#2 in the screenshot above), since he has line of sight on more possible targets, and he'll hopefully do more damage with his rifle than the guy on the left, who just has a pistol.
Before he can move off to the left, hit him in the body with a fear arrow (Aim then Alt Fire).
Wait for just a moment until the poison kicks in and he starts shooting at his companions. Then, when everyone's attention is focused on the mayhem, scramble behind the low wall on the left...
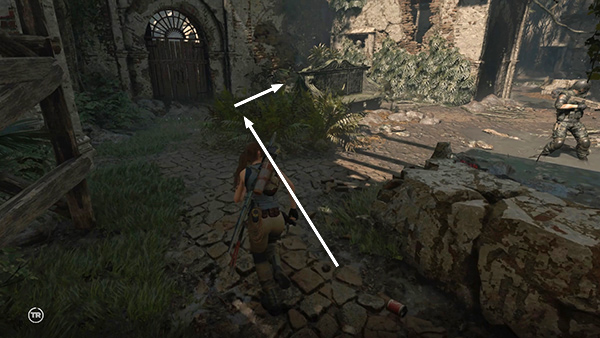
...and from there to the clump of bushes beyond, and finally behind the bench on the far left.
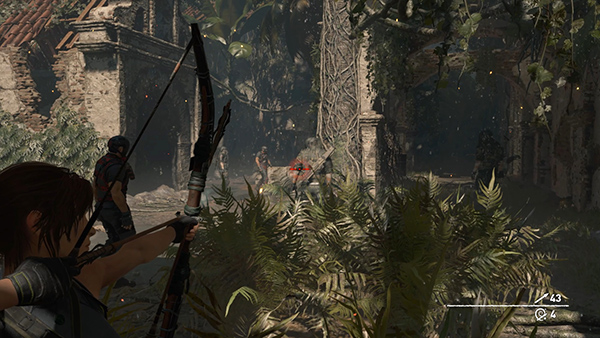
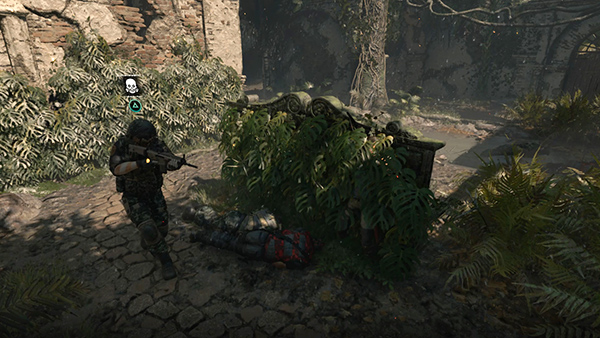
Hide among the vines growing on the back of the bench and wait to see how things shake out. With very good luck the gunner will kill two of his pals before he expires. Generally, though, only 2 of the 5 men will die. It still helps to get the others moving.
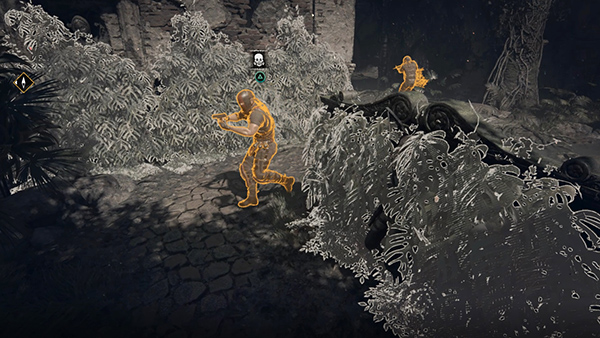
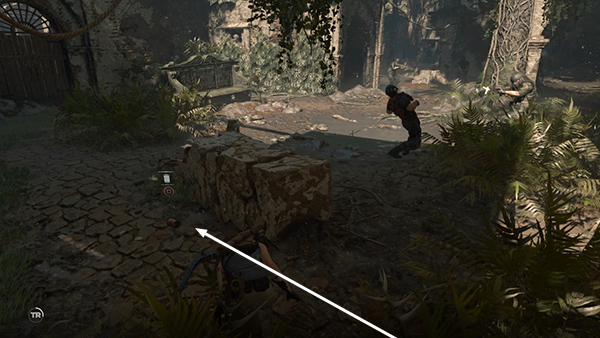
Wait here for the other 3 men to approach, usually one at a time. Then take them down with stealth attacks when you see the Melee prompt.
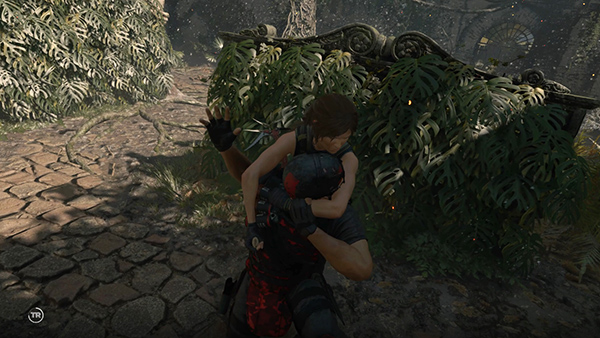
Like so.
Rinse and repeat, just like you did back in the Porvenir Oil Fields.
- OR -
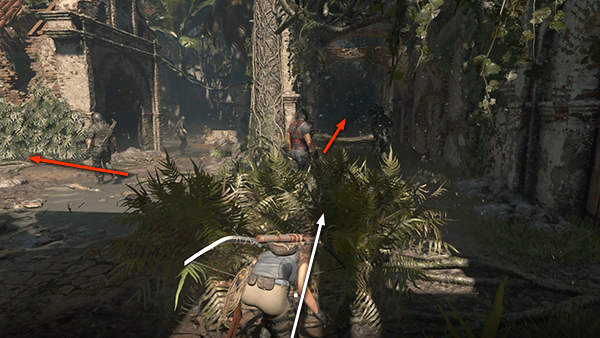
If you don't have the resources to craft Fear Arrows, or the above strategy isn't working for you, wait until the nearest 3 enemies separate, then sneak forward into the next clump of vegetation.
Pretty soon the man on the right will be out of the others' line of sight (i.e., yellow in Survival Instinct). Move out quickly and press Melee for a stealth kill. Then immediately move forward between the outer wall on the right and the vine-covered all near it.
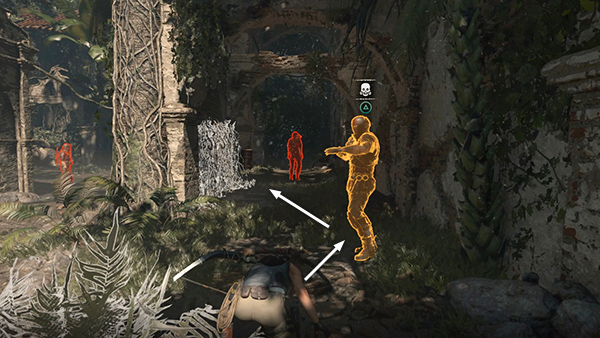
Use the mud puddle to apply camouflage and then disappear into the vines.
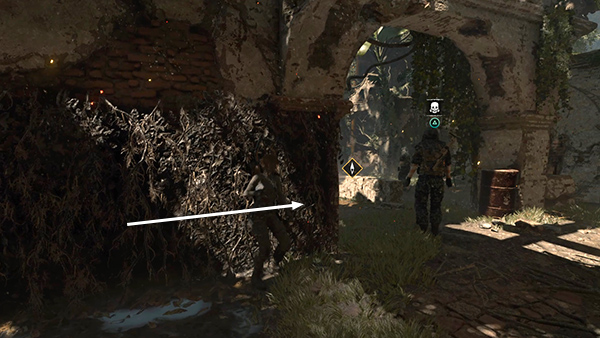
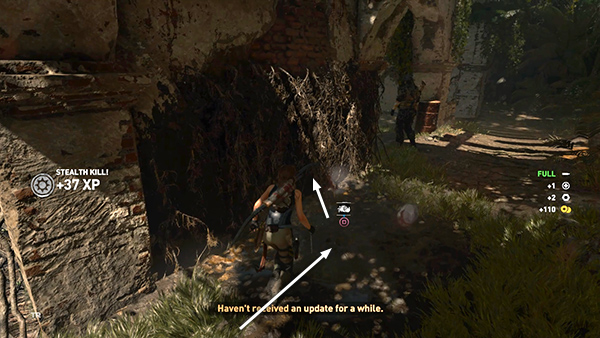
Sidle to the right and stealth attack the man standing there. Then just wait among the vines for the others to come to you.
Of course, if Lara is spotted, things can quickly get out of hand, so either reload the checkpoint, run and try to find cover somewhere else, or switch weapons and start fighting. Whenever you're fighting multiple enemies, the best bet is usually to start out stealthy and pick off as many of them as you can before confronting the others.
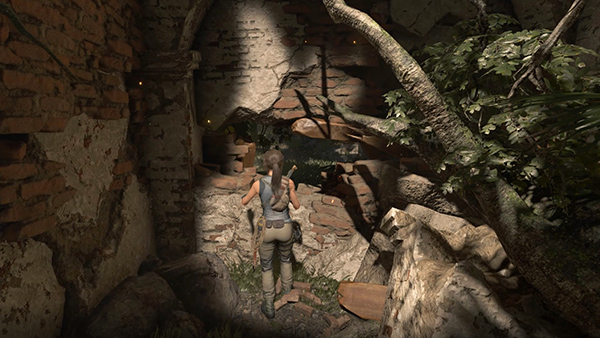
When you've taken care of this first group of enemies, loot the bodies, pick up various resources scattered around the area, and head for the opening in the brick wall in the southwest corner. Climb through into the next area.
[Next | Mission of San Juan Walkthrough]
Copyright © - Stellalune ( ). All rights reserved. Feel free to copy or print this walkthrough for personal use. By all means, share it with friends, but please include this credit line so people can send me their feedback. No part of this walkthrough may be reproduced on another site without permission. Follow this link for details about this site's advertising and privacy policy.