Streets of Rome - Streets and Courtyards - "What a Horrid Idea!" Achievement/Trophy
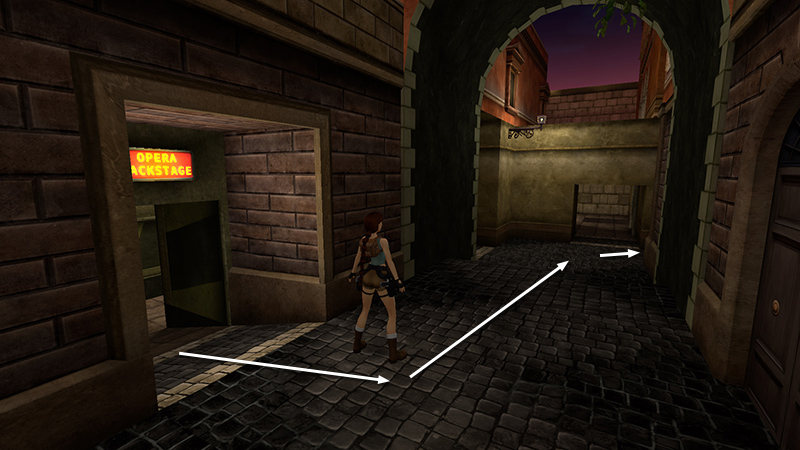
After completing the training area, detailed in the previous sections, exit the backstage area onto the street where you started and turn left. Pass under the high, curved archway then turn right.

Follow the narrow alley to an OPEN COURTYARD WITH A FOUNTAIN.
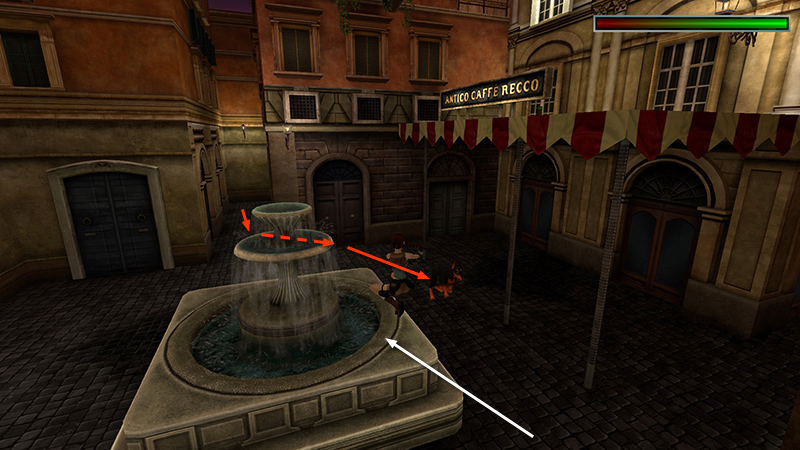
Draw pistols and kill the Doberman (1) that charges out of the alley ahead. If you like, you can jump up onto the fountain and shoot the dog from safety.
NOTE: You'll meet 4 more dogs during this level. If you lure each of them back to this fountain before killing it, you'll unlock the "Bark Square" achievement/trophy. I have to wonder at this point—especially having played TR2 as well—whether someone on the dev team had a bad dog bite experience while vacationing in Italy.
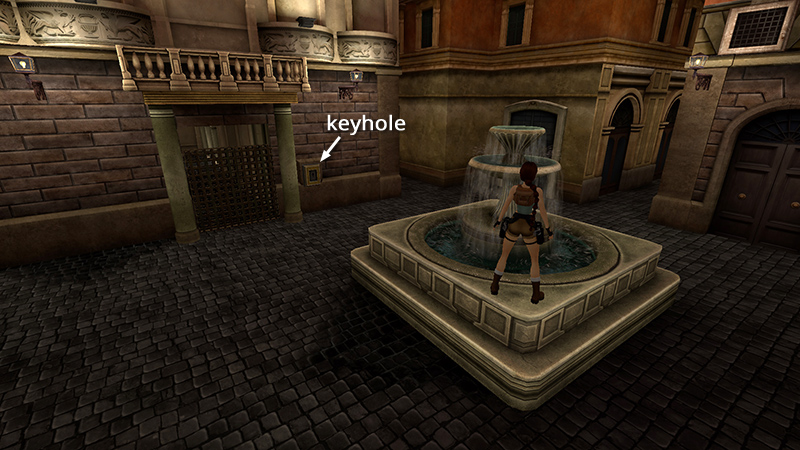
Make a mental note of the locked gate and keyhole near the fountain.
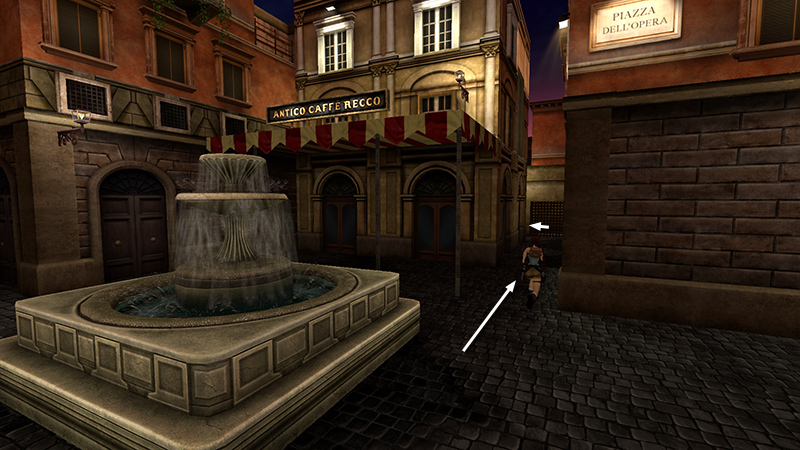
For now, follow the narrow alley opposite the locked gate (i.e., to the right of the building with the red-and-white striped awning). This alley leads past a barred doorway...
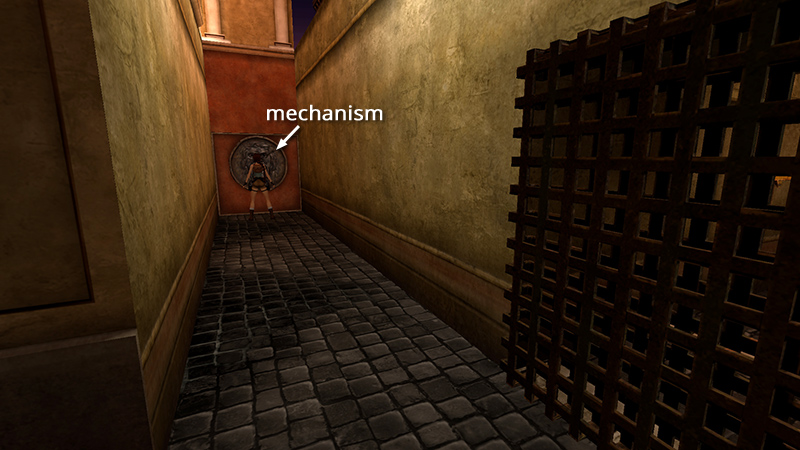
...to a panel with a carved face. Inside its "mouth" is a mechanism...
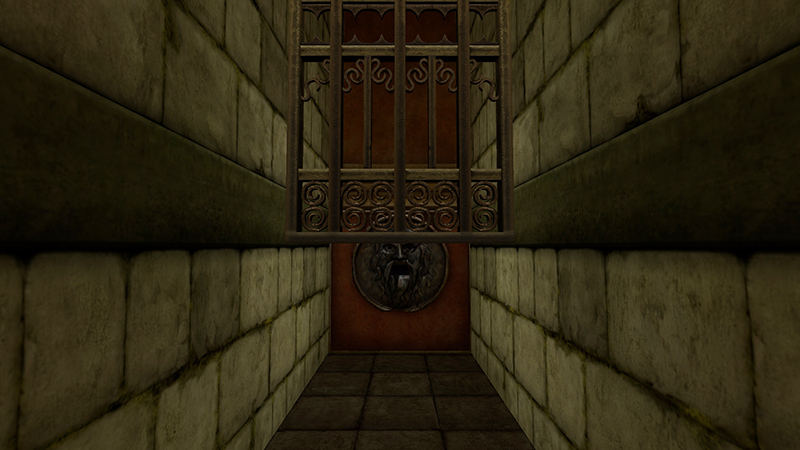
...that opens a gate elsewhere. Behind that gate is another "Mouth of Truth" mechanism. The gate is not actually timed. So if you don't care about achievements, just use the first mechanism and make your leisurely way to the second one, following the route shown below.

To unlock the "What a Horrid Idea!" achievement/trophy, you'll need to use the first mechanism then sprint to the second and use it within 16 seconds. Quick-save before operating the first mechanism. (Use F6/F9 to quick-save/load on keyboard. Check Options > Control > Shortcuts for your system's controls.) You don't have to do this in one try, but if you don't make it, it's easier to reload than to run all the way back. As soon as you use the first mechanism, press Look and Roll simultaneously, to skip the cutscene showing the gate opening and position Lara so she's ready to run.
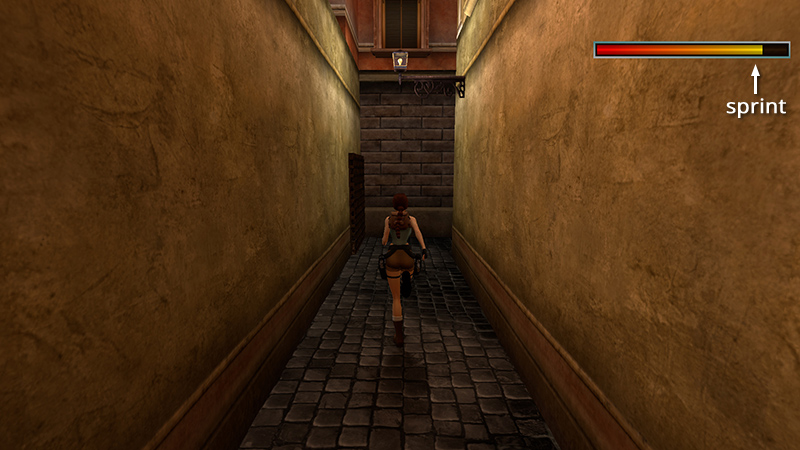
Sprint forward toward the corner.
NOTE: You'll notice the sprint/dash meter appears at the top right when Lara is sprinting. When it runs down, she'll need to recover before sprinting again, but this won't be a factor if you follow this strategy. Check the main walkthrough for more info on sprint/dash settings.

Briefly release the Sprint button for more control as you round the corner to the right.
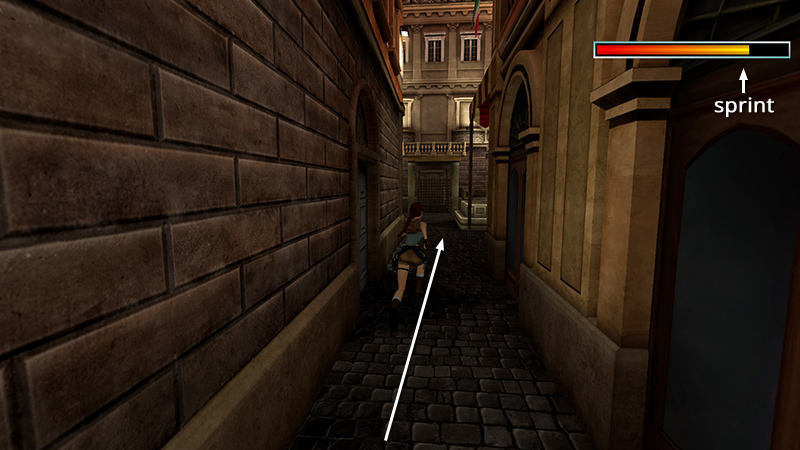
Then continue sprinting toward the fountain courtyard.
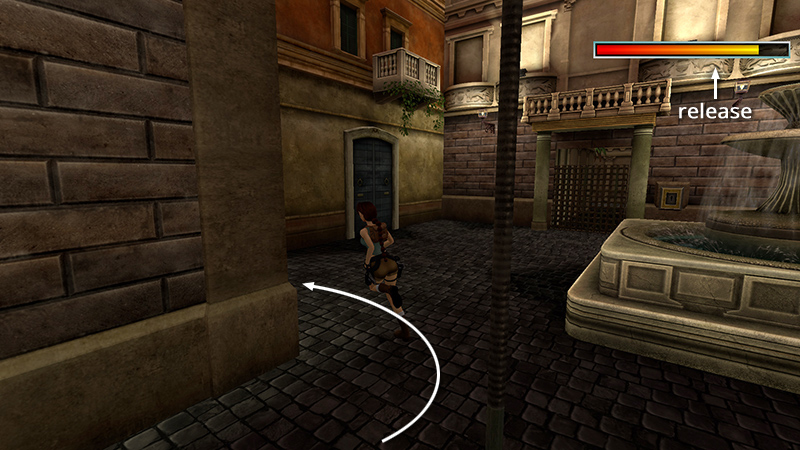
Briefly release Sprint as you turn left just before the fountain.
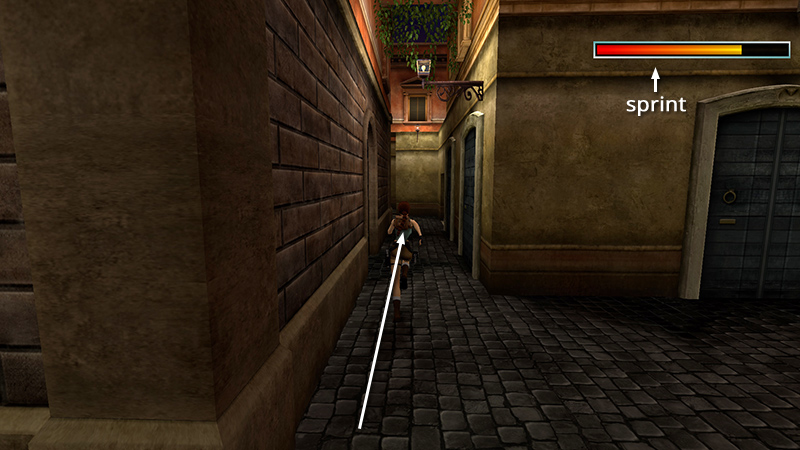
Continue sprinting on the straight-away.

Then, ease off Sprint momentarily as you run through the small, square doorway on the right.

In this next small small courtyard, resume sprinting and veer left...
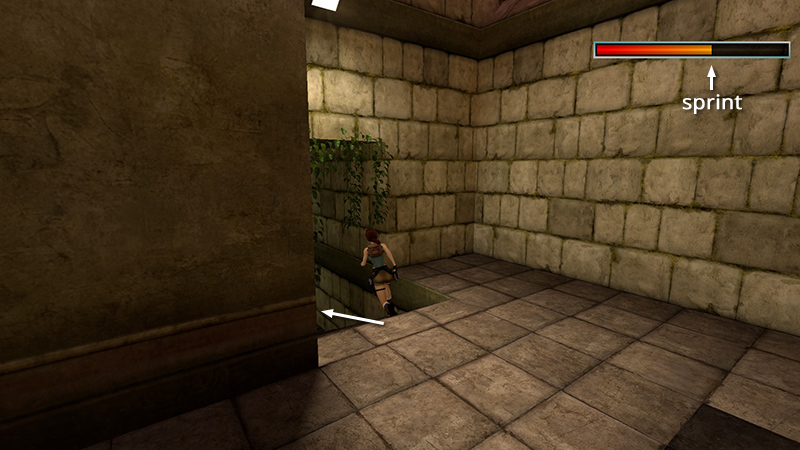
...down the steps and through the gate.

Release Sprint just before you reach the second mechanism, so Lara doesn't crash into the carved disc and lose time straightening herself out. Press Action as soon as you see the hand icon.
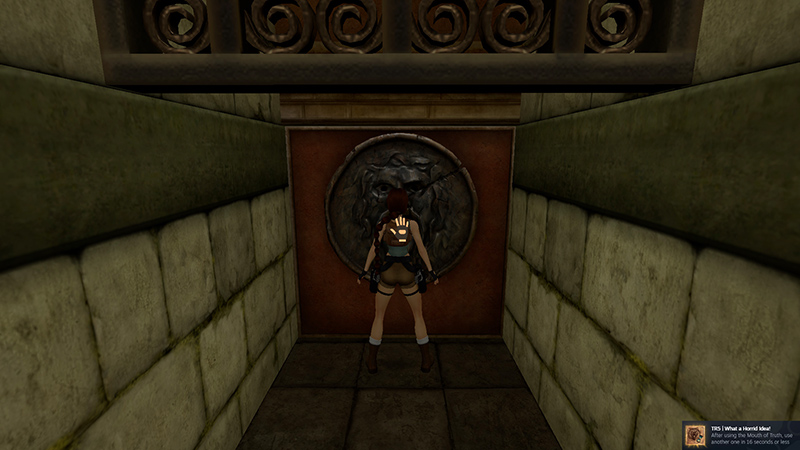
If you've made it in time, the achievement/trophy should pop as you operate the mechanism.
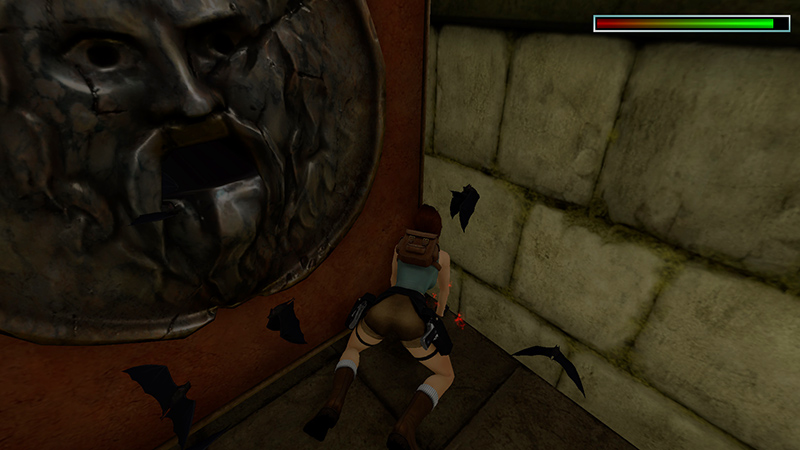
When you do this, a flock of bats flies out and tries to mess up Lara's hairdo. You can't kill them, so either flee or crouch in one of the corners near the mechanism. She'll take little or no damage this way.
DARK MODE: I plan to add optional dark mode for these pages, but my current priority is updating the walkthroughs. Meanwhile, may I suggest a reputable dark mode browser extension, such as Dark Reader? (Download only from trusted sites, like darkreader.org or your browser's web store.)
Walkthrough text and diagrams copyright © Stellalune (email ). Feel free to copy or print this walkthrough for personal use. By all means, share it with friends, but please include this credit line so people can send me their feedback. No part of this walkthrough may be reproduced on another site without permission.