Stella's Tomb Raider Mobile/Cell Phone Game Walkthrough - The Osiris Codex
 LEVEL 7 – PUZZLE OF BASTET (MP1212)
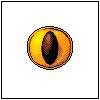
Pick up the Golden Eye (CX3981) on the pedestal to the right. This extends set of blocks above, preventing Lara from reaching the exit. This map includes four areas, one in each corner, which you must explore to re-open the exit and find a necessary artifact. You can explore the four corners in any order.
To the right is a tall room with a moving block and spikes below. When the block descends, jump onto it. Ride it upward. Ignore the switch to the left for now. Jump to the next block on the right, then the next. Shoot to the left. Even though you can no longer see the switch (S1), shooting it causes the block on which Lara is standing to start moving up and down. Ride it downward and jump onto the ledge with the medipack. When the block returns, jump back onto it and ride it upward again. Shoot the switch (S2) to the right to start the middle block moving.
Now carefully jump from the right block to grab the middle block. This can only be done when the right block is at its highest and the middle block is only a little higher. You may need to wait through several cycles to get the right positioning.
Ride the middle block to the top and jump to grab the ledge on the right. Use the switch (S3) to reveal one of the steps leading to the exit.
Hang from the end of the ledge, drop to grab the crevice below. Then, when the block directly below moves upward, drop onto it. Turn left, wait for the right and middle blocks to move together as before and jump to grab the middle block. Pull up. Move to the left side of the block and wait for the left block to move level with the middle block. Then jump onto the left block. Wait for the left block to move level with the ledge and then jump again.
Return past the starting point and beneath the ladder to another ladder leading down. Crouch and shoot the snake across the gap, but don't jump across yet. Instead, climb down the ladder on the right side and drop to the ledge below.
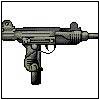
Push the movable block all the way to the right. Climb on top of it and jump to grab the pillar with the ladder and the horizontal gap. Climb down to the floor, watching out for the wizard shooting blue energy blasts from his wand. When he moves off to the left, climb up and shoot him. Pick up the Uzi (GN1372) and use the switch (S4) to retract some of the spikes to the left. Pick up the medikit and return to the right. Climb the ladder and drop down on the other side of the pillar.
Kill the priest and then climb onto the ledge with the movable block. Jump to the ledge on the right, then to the ledge with the switch. Use the switch (S5) to reveal another of the steps near the exit.
Jump back across the ledges to the movable block and push it all the way to the left. Climb onto it and jump to grab the edge of the pillar with the ladder on the back. Pull up and jump to grab the edge of the movable block at the edge of the next ledge. Pull up, go to the right and jump over the spikes to grab the ladder. Climb up.
(NOTE: If you didn't push the block into position earlier, climb down the ladder instead. Go to the left, past the switch and the spot where you got the Uzi. Drop down into the spikes and quickly move to the left before Lara dies. Climb the ladder to get out.)
Crouch and kill the snake on the next ledge. Drop down, shoot the mummy, then climb back up through the opening. Head to the right, climb down the ladder and shoot another mummy. Then go all the way to the right, climb into the alcove and take the Glyphed Parchment (CX1179). Hop down, then work your way back up the ledges to the right.
When you reach the two overhead ladders, jump over to the right. Pull the movable block underneath the ladder on the right and climb to the top.
Turn left. If you didn't kill the snake on the other side of the gap, do that now. Jump across and continue to the left. Drop down into a room with a movable block and 2 pressure pads (P6 and P7). Pull/push the block onto the right pad, beneath the ledge. Stand on the left pad and face left. Depressing both pads opens the doors to the left (D6 and D7). Shoot the switch (S8) behind the doors to lower a large block (B8) in the room above.
Pull/push the movable block back to the left and use it to climb up to the ledge with the medipack. Climb the ladder and drop down on the other side. Push the next movable block all the way to the right. (You're able to do this only after lowering the large block into the hole in the floor.) Climb onto the block and jump up to grab the ledge above. Turn left and jump across the ledges to the switch (S9) in the upper left corner. Use it to reveal the third and final step leading to the exit.
To get down without injury, jump across the ledges to the right and drop down onto the movable block. Head back to the left, climb down to the room with the 2 pressure pads. Then climb back up to the start.
Jump to grab the overhead ladder and climb up. Climb the steps to the exit. (NOTE: You cannot leave without the Golden Eye and Glyphed Parchment.)
 |
|
 |
|
 |
|
NOTE ON ITEM & MAP CODES: Each level and item has a code, which can be found on the map screen or item info screen. Once you have a code, you can enter it on a page at the Tomb Raider Mobile or Eidos Mobile UK web site to access a level map or detailed item information. My walkthroughs include all of the item info, as well as my own maps, which are a bit more detailed than the unlockable ones.
Copyright © 2006- Stellalune ( or contact me via web form). In-game item descriptions copyright © Eidos, Ltd. Feel free to copy or print this walkthrough for personal use. By all means, share it with friends, but please include this credit line so people can send me their feedback. No part of this walkthrough may be reproduced on another site without permission. Follow this link for details about this site's advertising and privacy policy.
WAS THIS WALKTHROUGH HELPFUL? If not, I apologize and invite you to contact me with any questions. If you need help right away, I recommend the r/TombRaider subreddit. Other fan-run forums are listed at tombraiders.net/stella/community.html. If this site was useful, please consider supporting it financially or in other ways. For details, visit tombraiders.net/stella/support.html. I also welcome any and all suggestions to improve things. Thank you!
Stella's Tomb Raider Site: tombraiders.net.