Natla's Mines - Farther Along the Lava River - Secret #2
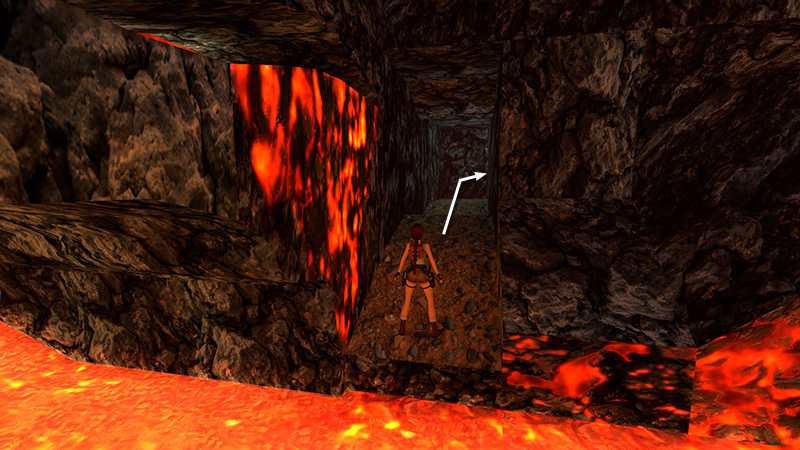
After traversing along the horizontal crevices to the doorway on the south side of the lava river, as shown in the previous section, follow the passage uphill.
Then slide down a steep slope and turn right...
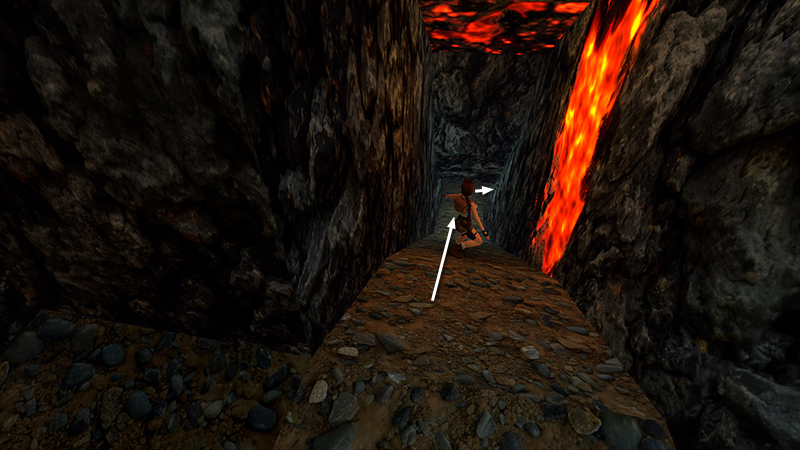
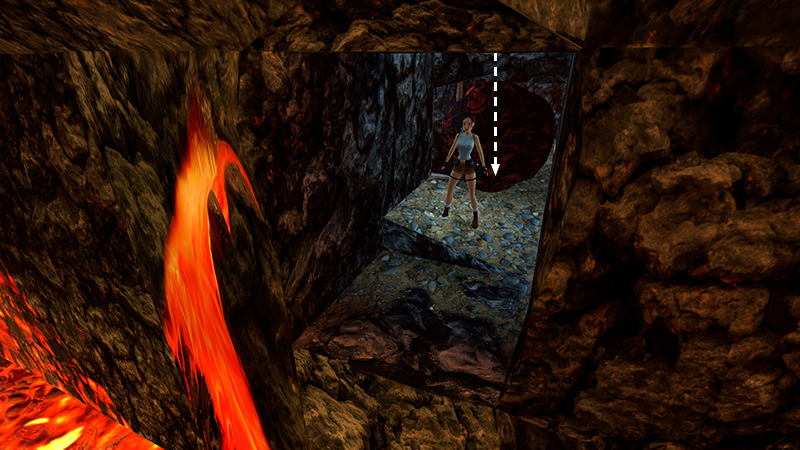
...to emerge near the lava river. The spray of erupting lava will injure Lara if she gets too close. So, rather than jumping directly across the river, move downstream a bit and take a standing jump onto the rectangular block in the middle of the lava falls. Turn left and walk to the end of this block, overlooking the lower pool.
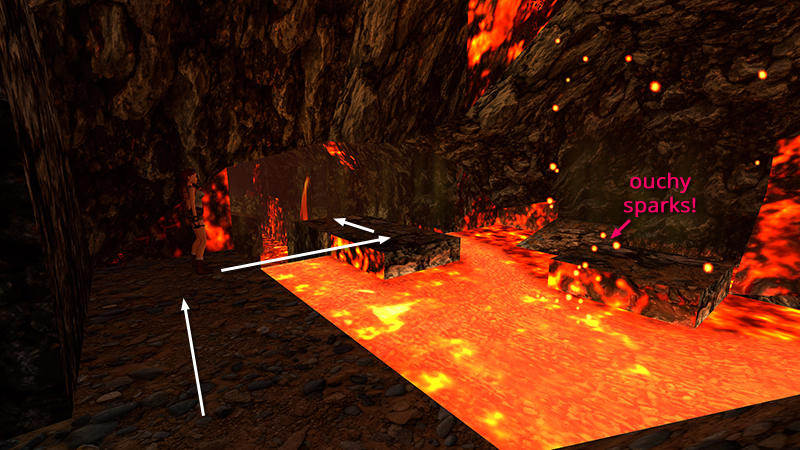
Take a running jump to the square pillar on the right.
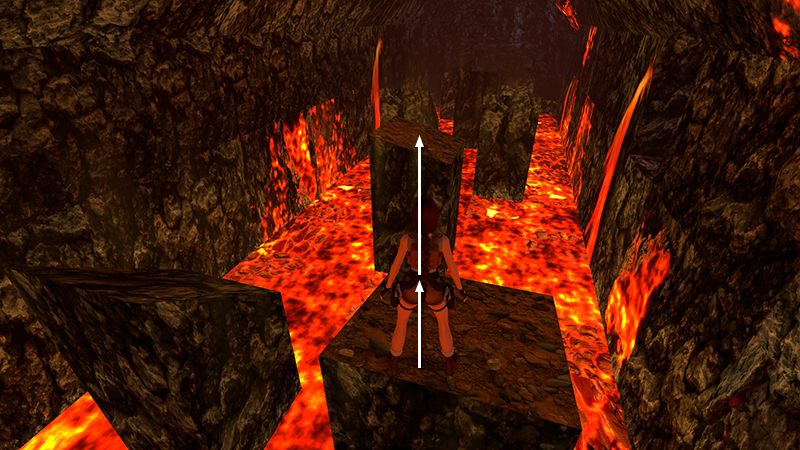
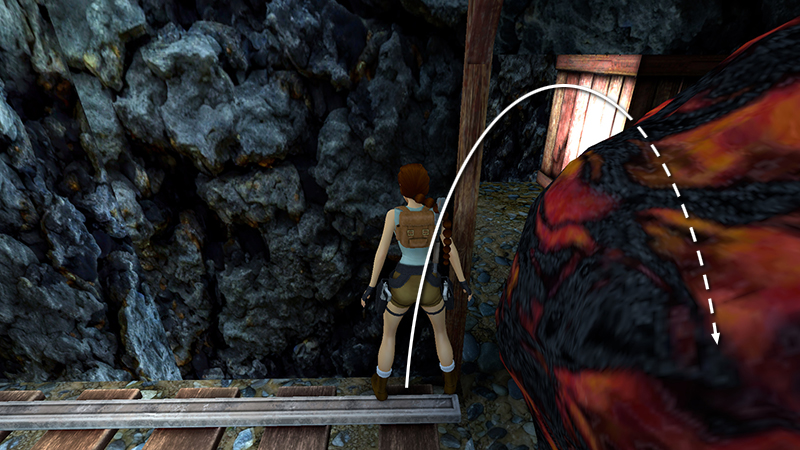
Take another running jump to the next block downstream (not the angled block on the left).
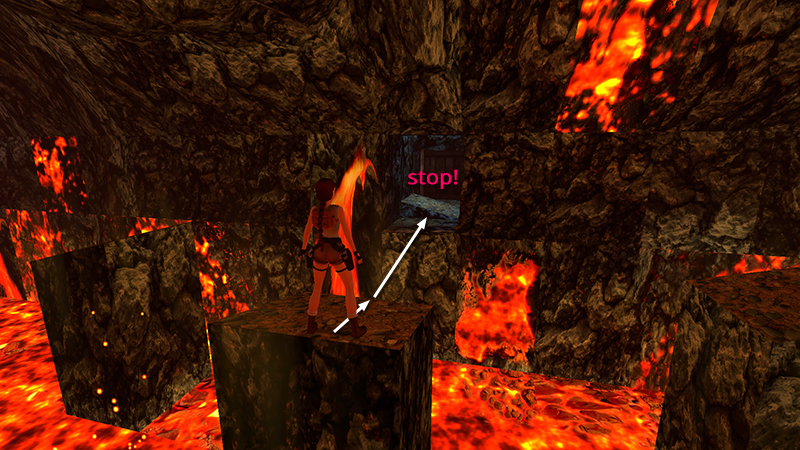
Turn right and take a final running jump into the opening in the cave wall. Do not run on toward the wooden crate. There's a boulder trap ahead. You may want to save the game before proceeding.
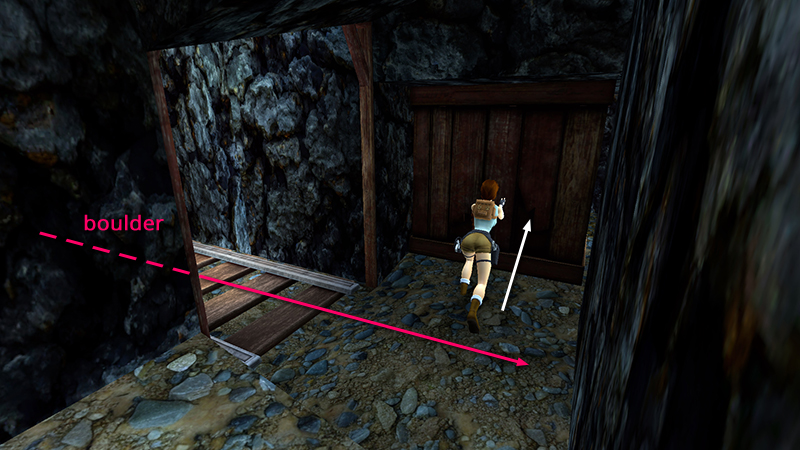
Lara can stand just inside the opening without triggering the boulder, which rolls in from the left. But as soon as she approaches the wooden crate, the boulder starts to roll. So run forward and immediately push the crate into the room beyond. If you move quickly enough, Lara will be in the safe space where the box was by the time the boulder reaches the end of the tunnel.
NOTES: If instead of pushing the crate, you trigger the boulder and then hop back so Lara doesn't get crushed, you can still get into the secret room. See the ALTERNATE METHOD FOR SECRET #2 in a footnote following the main walkthrough. Also, be sure to get all pickups in this area. You'll need the SHOTGUN to unlock an achievement/trophy a bit farther on.
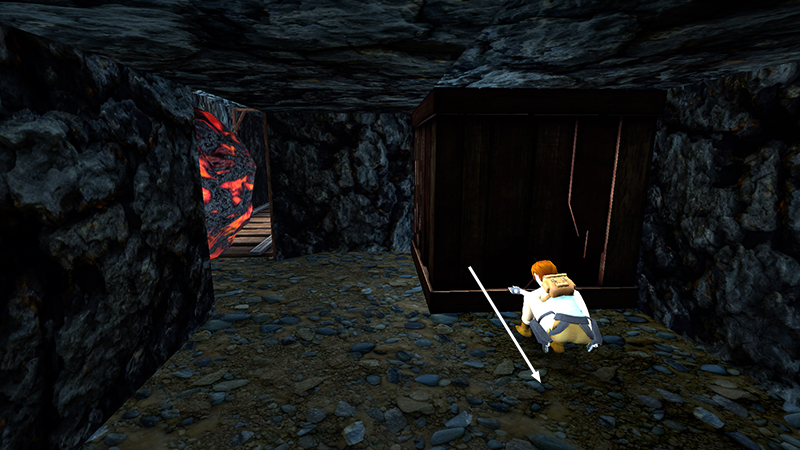
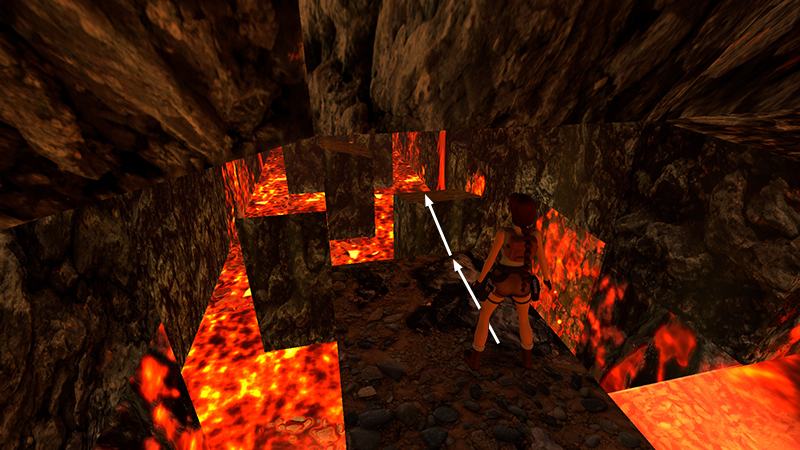
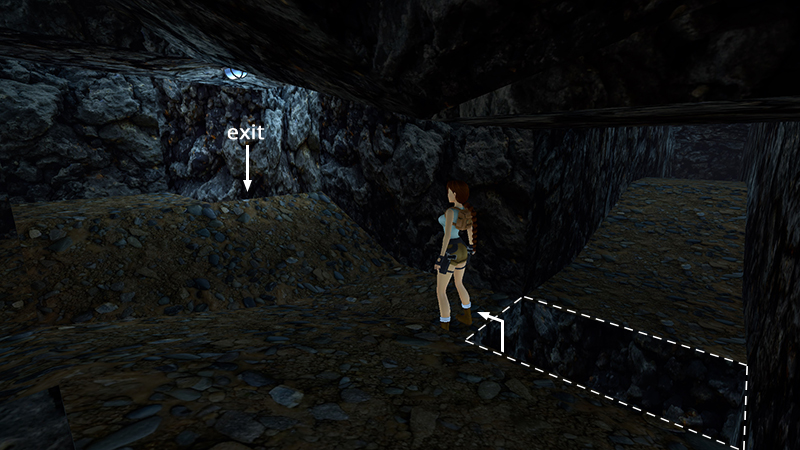
Go around the crate into a small room. This is SECRET #2. Pull the crate once to the side to reveal an opening in the ceiling.
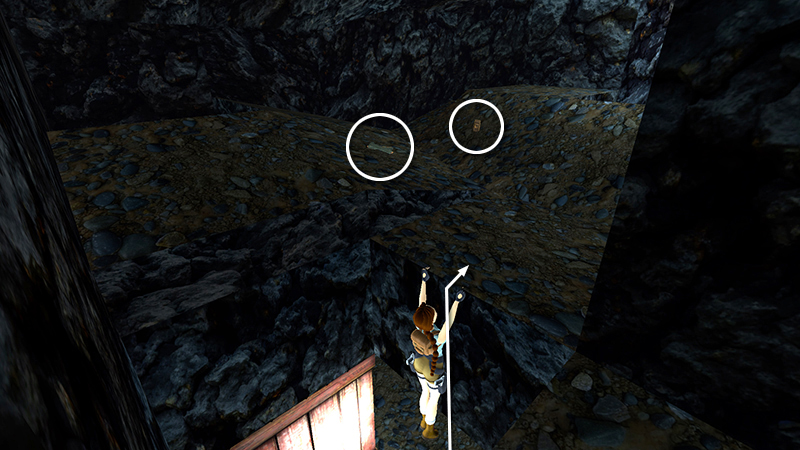
Climb into the room above to find a large medi pack and Uzi clips (14-15).
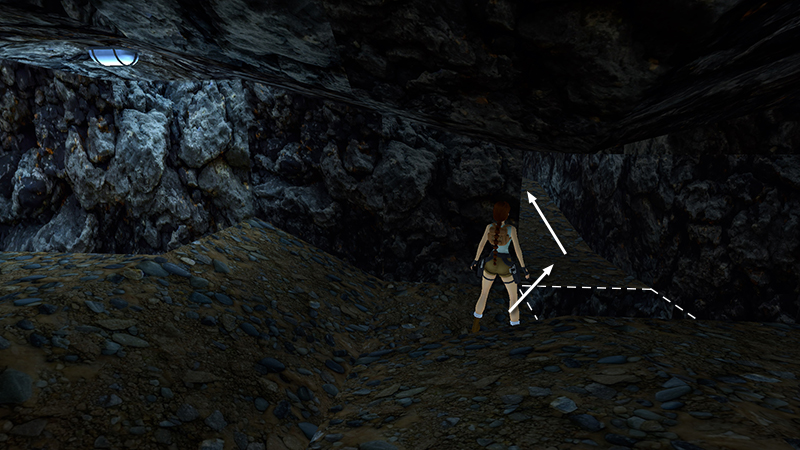
Ignore the opening in the southwest corner, under the electric light. Instead, jump over the opening where you climbed up and follow the passageway to the end.
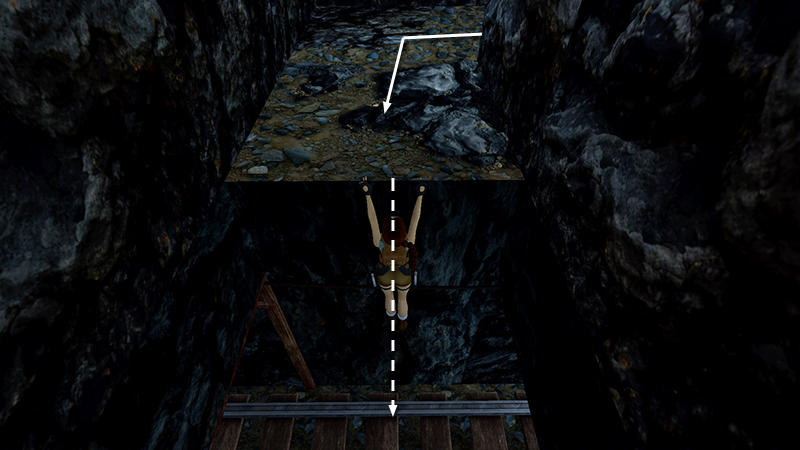
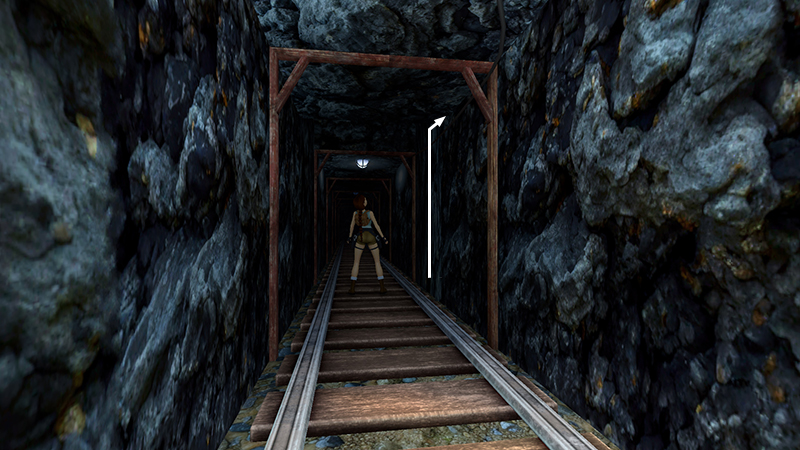
Drop down...
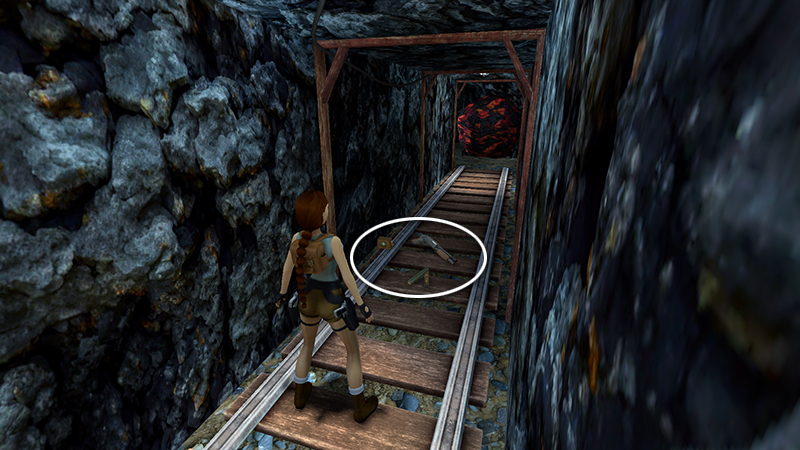
...and follow the tracks toward the boulder. On the way you'll find more Uzi clips, a SHOTGUN, and another large medi pack (16-18).
Follow the tracks to the end and squeeze Lara between the boulder and the left wall. (The low ceiling prevents you from getting past the boulder on the right side.) To do this, stand with Lara's chest against the left wall and the boulder on her right. Then side flip to the right a few times until Lara squeezes through into the room with the movable crate. Then either repeat the process to get past the boulder to the exit (a little tricky)...
...or climb up through the opening near the crate and drop down through the opening beneath the electric light.
- OR -
If you can't get past the boulder this way, just return along the tracks to the raised opening, climb up, and follow the passage back to the room above the crate.
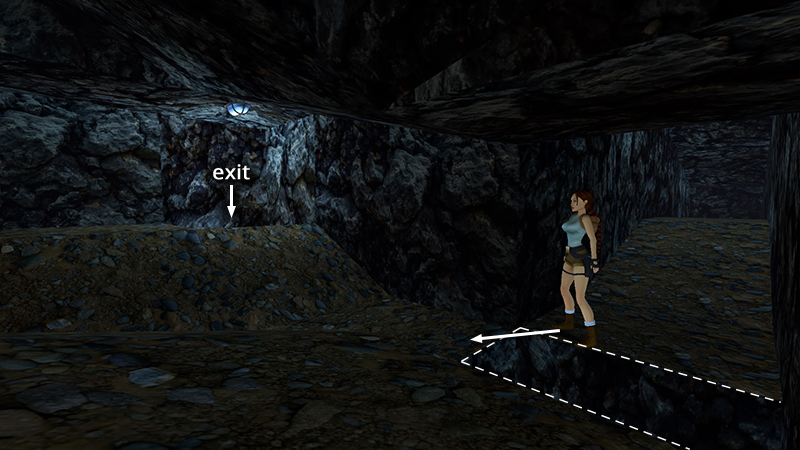
Jump the gap in the floor and drop down through the opening beneath the electric light.
You're now on the other side of the boulder, where you started.
DARK MODE: I plan to add optional dark mode for these pages, but my current priority is updating the walkthroughs. Meanwhile, may I suggest a reputable dark mode browser extension, such as Dark Reader? (Download only from trusted sites, like darkreader.org or your browser's web store.)
Walkthrough text and diagrams copyright © Stellalune (email ). Feel free to copy or print this walkthrough for personal use. By all means, share it with friends, but please include this credit line so people can send me their feedback. No part of this walkthrough may be reproduced on another site without permission.